Meatless Monday: Pumpkin mac and cheese

This autumnal pasta is creamy and rich thanks to the roasted squash, a little unctuous thanks to the cooked onions, and gloriously herby thanks to the fresh sage.

Take me to the recipe!

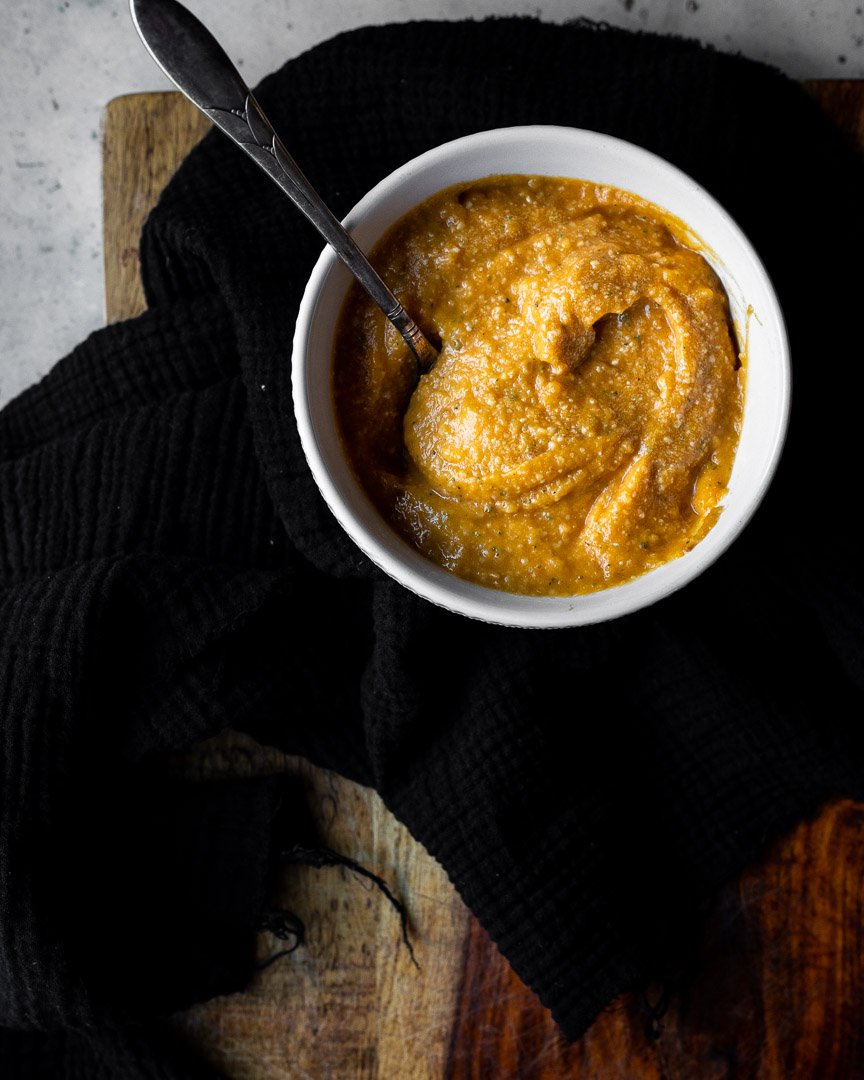
This mac and cheese is warming, cheesy, and chock full of veggies. It also works as dinner or lunch (or both!). I’ve made this with some sausage on the side for an even heartier meal, but it’s very filling on its own.

A couple of notes:
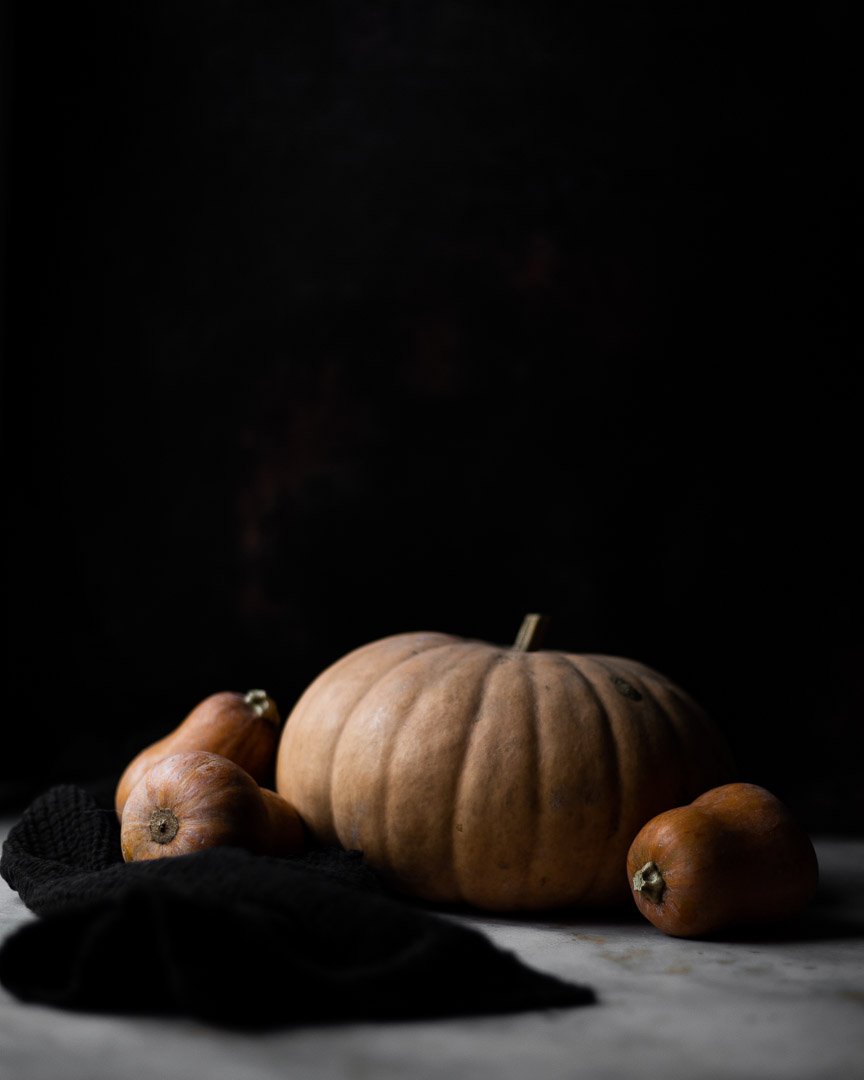
- I use half roasted squash and half pumpkin (butternut or acorn squash is my favorite, but you could use kobocha or delicata) because I don’t always love straight pumpkin pasta sauces. There is something heavy and somehow both flavorless and overwhelming about a sauce made with just pumpkin.
- The most time consuming part of this recipe is cooking the onions. A longer, slower cook yields much better flavor that significantly improves the final dish. I recommend taking the time.
- This recipe makes twice as much sauce as you need for a pound of pasta. You can either freeze half, or make two boxes of pasta for a large family. We’ve found that using 1 box of pasta and freezing half of the sauce yields one dinner for the four of us and some leftovers for lunch the next day.

Pumpkin mac and cheese

Time: 45 minutes, mostly active
Yield:
4 adult-sized dinner servings, 6 kid-sized dinner servings, or more if you’re serving this for lunch

2 Tbsp olive oil, butter, ghee, or your fat of choice
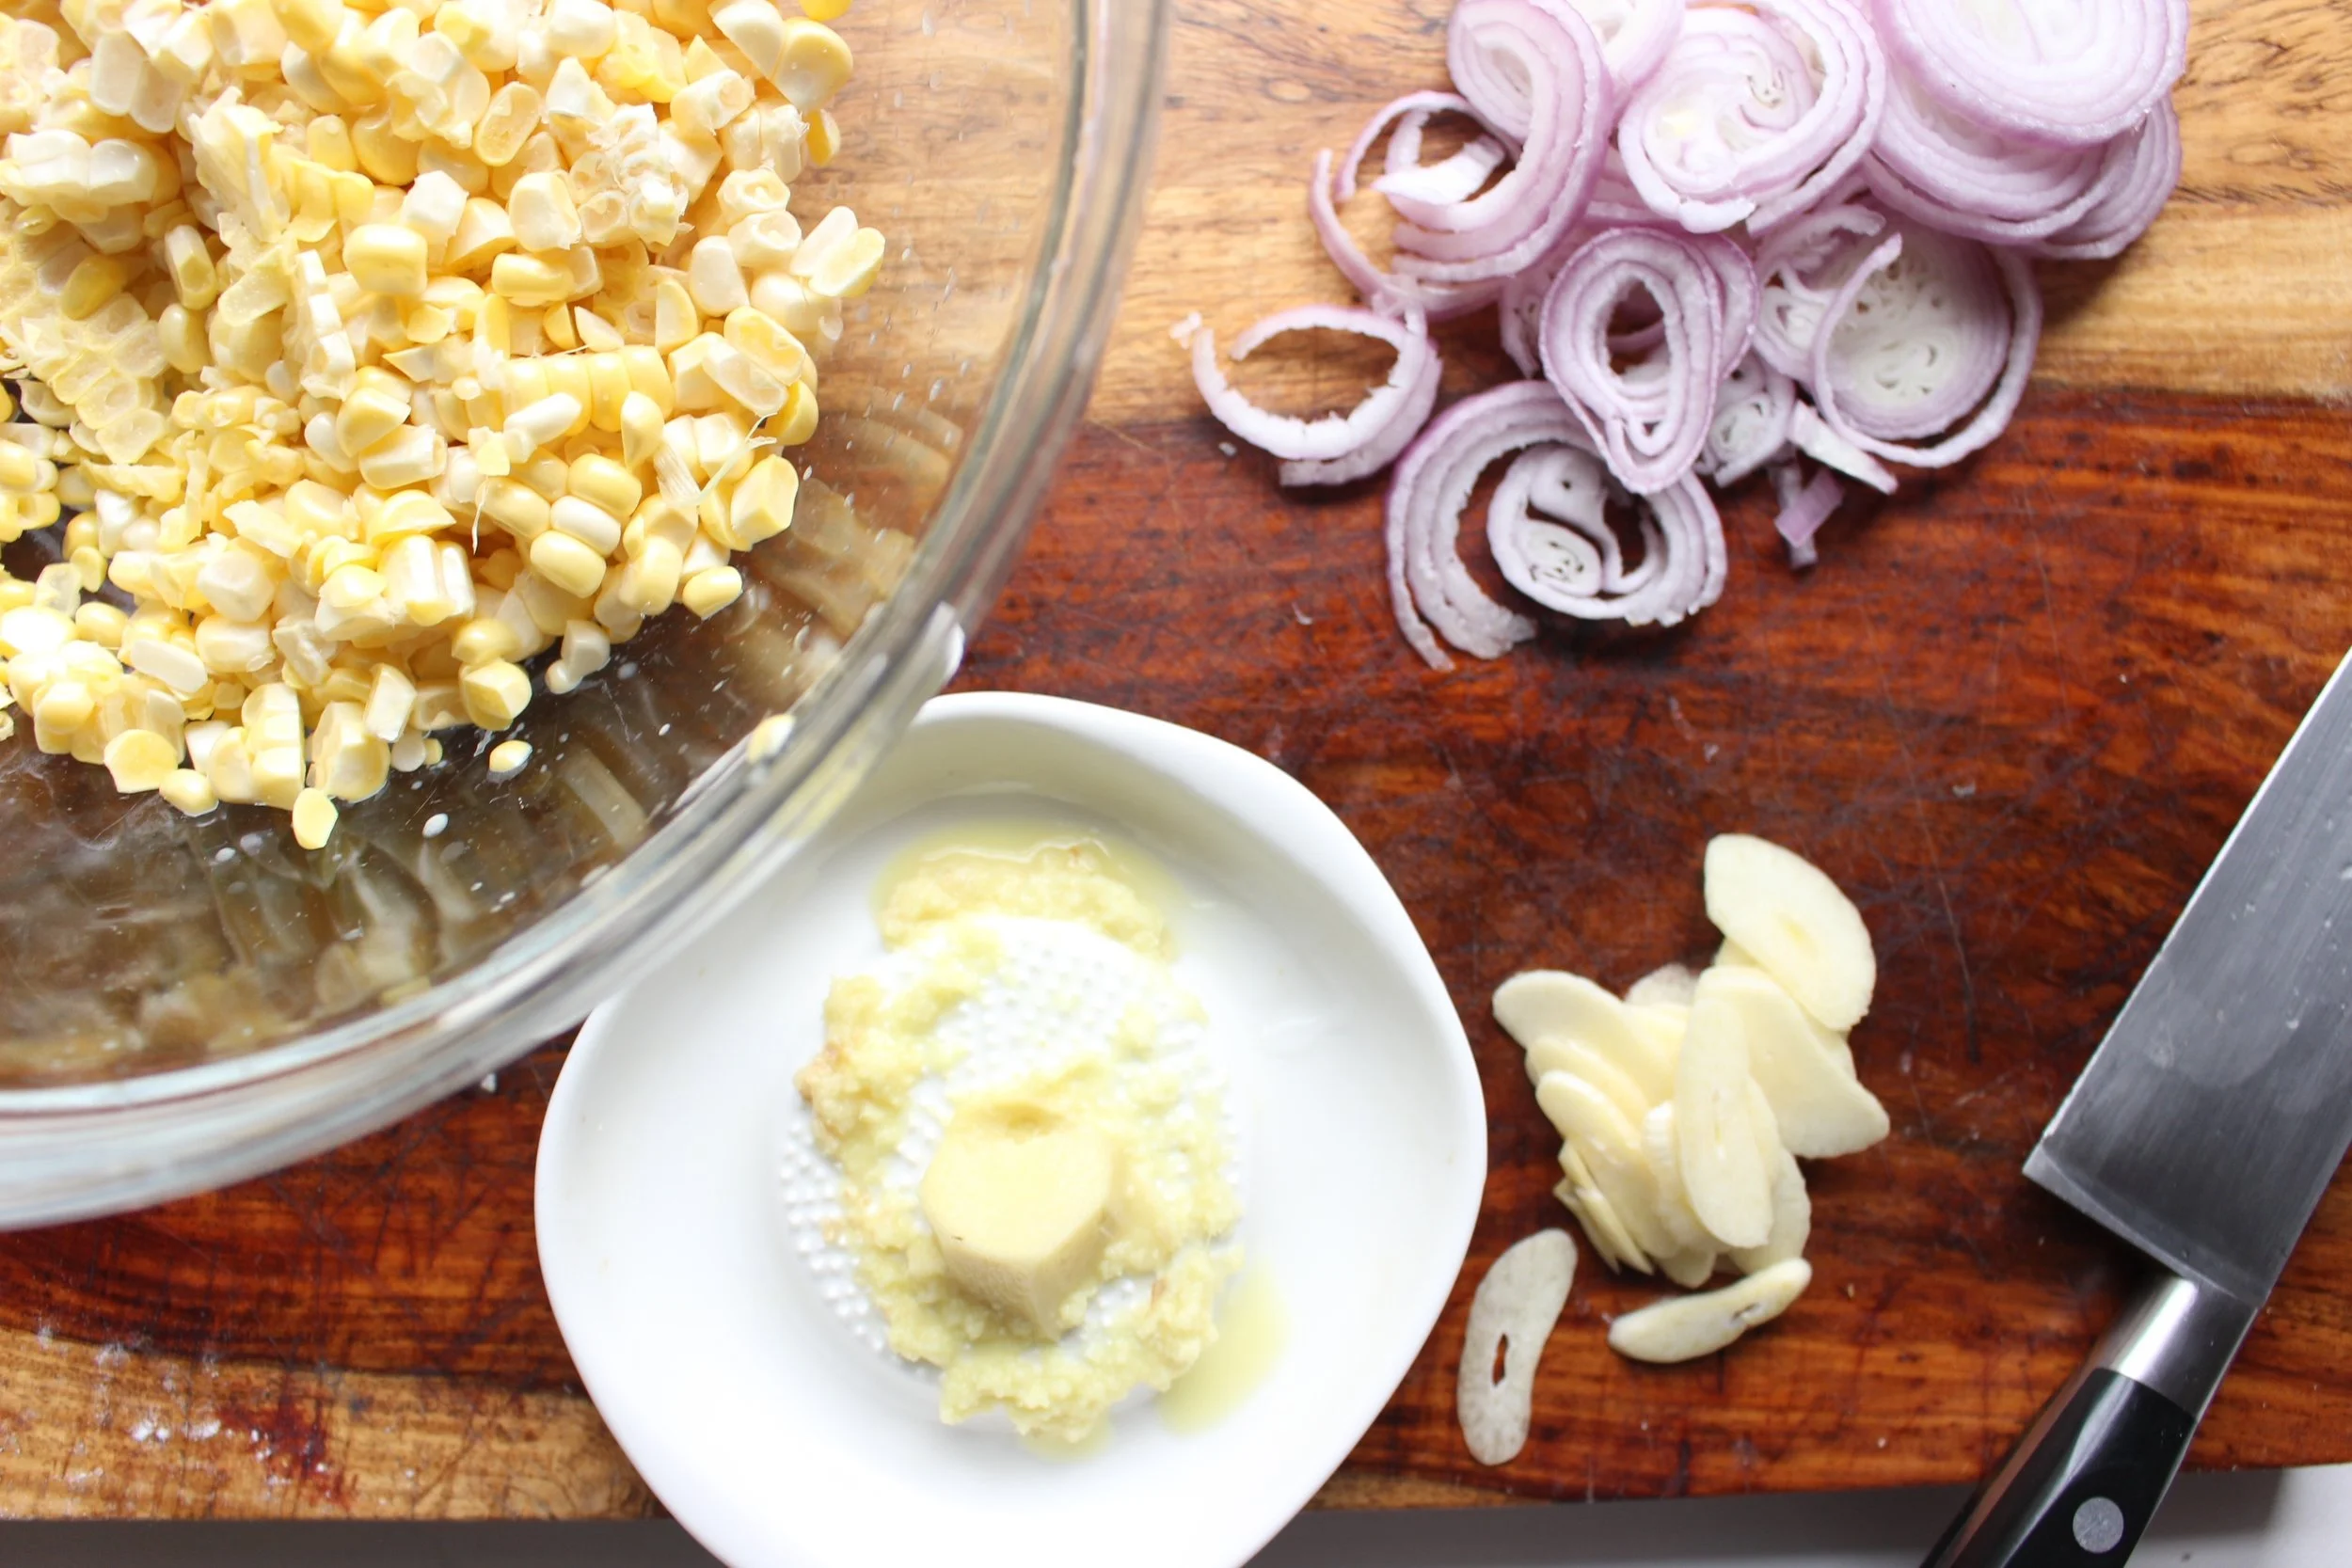
1 large onion, sliced thinly
2 large cloves garlic, diced
10 large sage leaves, minced
2/3 cup pumpkin puree
1 cup squash, roasted
½ tsp kosher salt
1/2 cup milk, or more, to create desired consistency
½ cup gruyere, shredded
½ cup cheddar cheese, shredded
¼ cup grated parmesan
1 lb pasta
1/2 cup reserved pasta water

Preheat the oven to 425. Cut your squash in half lengthwise and place cut side down on a parchment-covered baking sheet. Bake until fork tender, about 20-30 minutes.  

Bring a large stock pot of salted water to a boil. Cook your pasta according to package directions (towards the end of cooking your onions). Reserve 1/2 cup of pasta cooking water.

Heat a large sauté pan with the cooking oil over medium heat. Turn the heat down slightly and add the thinly sliced onions. Cook, stirring often, until caramelized, about 25- 30 minutes.

Add the garlic and sage to the pan with the onions and cook until fragrant, about 2-3 minutes. Remove from the heat.

In a blender or food processor, combine the cooked onions, garlic, sage, squash, pumpkin, salt, and cheese. Blend on high. Slowly add the milk until you’ve reached your desired consistency.* Scrape down the sides as needed.

Pour about 1/2 of the sauce into a large container for another time.

Drain your pasta, but reserve ½ cup of the pasta water. Put the pasta back into the pasta pot, top with ½ of the sauce, and thin out as needed with the reserved pasta water. Taste for seasoning and add salt and pepper as needed.

*The amount of milk you’ll need depends largely on your squash. Some squash have more water in them, so you’ll need less milk. Start with ¼ cup and add more as needed.

Coconut creamed corn

Creamed corn isn’t generally considered a “healthy” side. But swap in coconut milk for regular old dairy or a heavy bechamel sauce and you have a much lighter version of this classic that celebrates the beauty of late summer corn.

IMG_8536.jpg

This dish also comes together in minutes and is full of herbs and aromatics like garlic, shallot, ginger, lime zest, and basil. Add some quick sauteed shrimp, some grilled or roasted white fish, or a rotisserie chicken and you have a very quick dinner filled with healthy fats and real ingredients. You’re also free of gluten, dairy, sugar, nuts, and soy if you have corn leftovers for tomorrow’s lunchbox.

IMG_8533.jpg

Coconut creamed corn

½ tsp coconut oil
2 medium or 3 small garlic cloves, sliced or minced  
1 very large or 2 smaller shallots, sliced or minced
½-inch piece of fresh ginger, minced or shredded
3 large ears corn with kernels removed from the cob (about 2 heaping cups of kernels)
6 Tbsp coconut milk
Heaping ¼ tsp lime zest
15-20 basil leaves, chopped
¼-½ tsp flaky sea salt
Pepper

Heat the coconut oil over a medium flame and when hot, add the sliced or minced shallots. Saute for 1-2 minutes, until the shallots are translucent and starting to brown.

Turn the heat down to medium low and add the sliced or minced garlic. Saute for another 1-2 minutes until fragrant. If the onions or garlic brown too quickly, turn down the heat.

Add the minced or shredded ginger and sauté for one more minute.

Add the corn kernels and sauté for 4-5 minutes. Add the coconut milk and let bubble for one minute until the milk has reduced to more of a sauce than a milk, but don’t let it disappear.

Remove from the heat. Add the lime zest, minced basil, salt, and pepper and stir to combine. Taste for seasoning and adjust according to your taste.

Yield: 3 servings

IMG_8542.jpg

How to fill a lunchbox

Chicken and cheese taco with cherry tomatoes, raspberries, blackberries, Romesco sauce, guacamole, and flax seed tortilla chips.

Chicken and cheese taco with cherry tomatoes, raspberries, blackberries, Romesco sauce, guacamole, and flax seed tortilla chips.

I spend a lot of time thinking about, planning, and executing M's lunches. And there are days when he eats...none of it. But there are days when he eats tons and I feel utterly triumphant. I wanted to share my top lunchbox tips so that you, too, can declare victory when that lunchbox comes home nearly empty (and you haven't worked that hard to make it happen).

Sushi is always a favorite and can be filled with WHATEVER your kid likes. See my Instagram post for my simple sushi rice recipe.

Sushi is always a favorite and can be filled with WHATEVER your kid likes. See my Instagram post for my simple sushi rice recipe.

1) Repurpose leftovers: Obviously, you can plop a portion of last night's dinner into your kids' lunchbox. (See below for some favorite ways to do this.) But another tactic is to make extras of the proteins and veggies that were dinner's components. Those ingredients, plus a tortilla with some cheese (or vegan cheese) and avocado, become a taco, quesadilla, or roll-up. We're also big fans of the "open face" sandwich with cheese melted on top. Or, cube it all up and make a skewer. Or, if your kid is a pasta eater, add those proteins and veggies to noodles and some jarred sauce. Easy peasy.

Leftover fried rice plus smoked salmon, blueberries, cheese, hummus, and pretzels.

Leftover fried rice plus smoked salmon, blueberries, cheese, hummus, and pretzels.

2) Prep: Every weekend I do these 5 things:

  • Hard boil some eggs

  • Make a white, wheat, rice, or bean pasta

  • Bake mini muffins or doughnuts

  • Make no-bake energy balls or granola bars

  • Roast two veggies that I know M will eat

IMG_7730.jpg

3) Send breakfast for lunch: I often make double breakfast and add it to a lunchbox later in the week. For instance, these two-ingredient egg and banana pancakes are a big favorite. Use them as sandwich bread with nut or seed butter and chia jam or rolled them up like little cigars. Savory waffles like veggie or cheese can sub in for sandwich bread. Granola cups are also an easy batch bake that work for breakfast, lunch, and snacks.

4) Take inspiration from their classroom learning: I like to theme M's lunches, but that's mostly because I need inspiration and not because I'm trying to win any mom awards. Dinosaurs, Butterflies, and The Ocean were particularly fertile ground. Even if "theme-ing" lunch just means cutting out a sandwich shape, it feels a little special.

IMG_7832.jpg
IMG_7968.jpg
IMG_7973.jpg
IMG_7974.jpg

5) Deconstruct something they like: Add the fixings for tacos, nachos, sandwiches, pasta, etc and let them put it together themselves. Like a homemade lunchable.

6) Think about appetizers: Have you considered sending your kids to school with a cheese plate or chicken sausage pigs in a blanket? Half of M's lunch most days is a crudite plate.

See? Basically crudite.

See? Basically crudite.

Double Duty Dinner/Lunch Recipes 

Sweets with oomph

No bake add-ins

Happy lunching everyone!

Salted honey and rosemary teiglach

Teiglach! This sweet honeyed dessert reminds me so much of my childhood Rosh Hashanah dinners. It is a mountain of baked or fried dough balls that are combined with nuts, dried fruits, and sprinkles by a honey syrup. And though it looks complex, it is stupidly easy.

Take me to the teiglach!

Teiglach is a traditional Rosh Hashanah dessert that uses honey to help usher in a sweet new year. My version has lemon zest and almond extract in the dough, and some fresh rosemary and flaky sea salt. #meandthemoose #roshhashanahsweets #desserts #t…

Though teiglach, for me, tends to be specific to the Jewish Holidays, it’s a close cousin of the Italian struffoli, which is traditionally served for Christmas or Easter. So, you can feel good about serving this sticky treat for any occasion, really.

I added flaky sea salt and rosemary to my version because traditional teiglach is very sweet (hello, honey) and both of those ingredients tone down the sweetness. I also added almond extract to my dough, which makes for a more complex overall taste. The almond, rosemary, sea salt, and honey also play very well together.

Teiglach is a traditional Rosh Hashanah dessert that uses honey to help usher in a sweet new year. My version has lemon zest and almond extract in the dough, and some fresh rosemary and flaky sea salt. #meandthemoose #roshhashanahsweets #desserts #t…

I baked the dough because a) it’s marginally easier; b) it’s marginally healthier; and c) I hate nothing more than smelling like fried oil. Don’t be afraid to overbake the dough balls slightly as this will help them to stay crunchy when they’re covered in honey.

IMG_8503.jpg
Teiglach is a traditional Rosh Hashanah dessert that uses honey to help usher in a sweet new year. My version has lemon zest and almond extract in the dough, and some fresh rosemary and flaky sea salt. #meandthemoose #roshhashanahsweets #desserts #t…

The only tricky part is making sure the honey syrup doesn't burn. I will admit that during recipe testing, I didn't turn the heat down fast enough and my honey almost boiled over. I used it anyway and it was completely fine.

Two quick notes:

  • This is a relatively small batch of teiglach. So, if you're feeding a crowd for the holidays, I would double it.

  • Use a cheap, grocery store honey for this. I’ve used a darker, local, wildflower honey and the flavor was a bit too strong. The stuff in a bottle shaped like a bear or something equally cheap is perfect.

Teiglach is a traditional Rosh Hashanah dessert that uses honey to help usher in a sweet new year. My version has lemon zest and almond extract in the dough, and some fresh rosemary and flaky sea salt. #meandthemoose #roshhashanahsweets #desserts #t…


Salted honey and rosemary teiglach

2 eggs, whisked
1 Tbsp olive oil
1 tsp lemon zest (zest of 1 large lemon)
½ tsp almond extract
1 cup AP flour
½ Tbsp granulated sugar
¼ tsp baking powder
¼ tsp salt
¾ cup toasted mixed nuts, roughly chopped
½ cup light-colored and lightly flavored honey
2 Tbsp sugar
1 ½-2 tsp fresh rosemary, minced and divided (to taste)
¾ tsp Sea salt, divided

Preheat the oven to 350. Line a sheet pan with parchment paper and set aside.

In a large bowl, combine the eggs and olive oil and whisk until well mixed and lightly bubbly. Add the lemon zest and almond extract and whisk again to combine.

Add the flour, sugar, baking powder, and salt and mix just until all of the flour is incorporated. It will be a thick batter. 

Turn out the dough onto a lightly floured surface and knead 5-6 times, just until it feels a little springy and less sticky. Divide the dough in half and roll out each half into a long, thin snake, about ¾ of an inch thick. Chop the snake into ½-inch pieces. Roll each piece into a small ball. The balls should be between the size of a dime and a nickel. 

Bake at 350 for 20-23 minutes until the balls are lightly golden brown and hollow sounding. If you feel like they’re not browning, check the bottoms. If they're golden brown, the balls are done. Remove from the heat and let cool slightly.

While the balls are baking, roast the nuts in a toaster oven or stick them into the oven with the balls (on a separate sheet) until they start to smell nutty. Remove and let cool. Chop roughly, if desired.

Mince the rosemary and set aside ½ tsp. Combine the mixed nuts, 1 tsp of rosemary, and ½ tsp of flaky sea salt and mix well.

Once the balls are out of the oven, in a small saucepan, bring the honey and sugar to a boil over medium heat, stirring often. Once the sugars starts boiling throughout (not just on the edges), reduce heat to low and simmer, stirring often, for 2-3 minutes. Remove from the heat.

Place the balls in a large bowl with the nuts, rosemary, and salt and stir. Pour the honey mixture over the cookies, nuts, and spices and mix well. This will take some elbow grease as the honey cools.

Pour the entire mixture into your serving bowl making a pyramid shape as your pour. If the honey is too warm and the mixture won’t form into a mound, let it cool for a few minutes and try again. Once you get the mixture into a mound, let cool completely in the fridge.

Bring back to room temperature for serving. Just before serving, top with the remaining ½ tsp of rosemary and ¼ tsp of flaky sea salt.

This dessert is best served the day it's made, but will keep well, covered with plastic wrap at room temperature, for up to two days.

Yield: Enough for 5-6 adults, depending on appetites and tolerance for sweet things

IMG_8524.jpg

Fried green tomatoes

IMG_8384.jpg

If your child loves french fries and tomatoes, then they will love fried green tomatoes. Or, they will reject them out of hand because they're mercurial toddlers like mine. One day, M will love these. I'm sure of it.

I just dropped M off for his first day of a new school year. He was only off for a week between "grades" but I felt so nervous this morning! M had a tough time adjusting to his last classroom and now he has new grownups, a new space, and some new kids to contend with. Ugh. I don't like change. That must be where M gets it.

We also have a nut allergy in the classroom this year, so I'll be more mindful of nut-free recipes for lunches and snacks.

ALSO also, after just a week off from packing lunches, I forgot what a huge drag it is. My sympathies go out to those of you getting back to it after an ENTIRE summer off. Strength to you, fellow lunch-packers.

IMG_8378.jpg

The keys to good fried green tomatoes, to me, are soaking overnight in buttermilk, and cooking with HOT oil. I've gotten equally delicious and crunchy results from using a little bit of oil and a lot of oil, but the heat seemed like the common denominator.

I also experimented a lot with corn flour and different grinds of cornmeal. I initially liked corn flour the best, but it's very easy to get too much flour, which doesn't cook evenly. (Picture #2 was taken BEFORE I knocked off the excess.) Ultimately, my favorite was straight-up, finely ground cornmeal.

IMG_8387.jpg

Fried green tomatoes

3-4 large green tomatoes, sliced in ¼-inch thick slices
1-2 cups buttermilk, full or low-fat (enough to cover the tomato slices)
1 tsp salt, divided
1 cup finely ground cornmeal
½ tsp paprika
Ground pepper
¼ cup avocado oil
Course sea salt

Slice the tomatoes and discard the end pieces. Place the tomatoes in a container and cover them with buttermilk. Add ½ tsp salt, cover, and shake. Refrigerate for at least a few hours and up to 1 day.

Combine the corn meal, salt, paprika, and pepper in a large container. Set aside. Heat one to two tablespoons of avocado oil at a time until very hot.

Working one at a time, shake off excess buttermilk and immediately place the tomato slice in the cornmeal mixture. Cover both sides well, but shake off the excess cornmeal as well.

When the oil is hot (when you add anything to the oil, it immediately starts bubbling), add the tomatoes (as many as will fit in your pan, but don’t crowd them; work in batches), and fry for 3 minutes. Check for brownness and flip when golden. When second side reaches golden brown, remove to a paper towel and sprinkle with coarse sea salt.

Between batches of tomatoes, pour out any leftover oil and carefully wipe off any cornmeal left in the pan. Heat two more tablespoons of avocado oil and repeat the cooking process with remaining tomatoes.

Yield: 12-16 tomato slices

IMG_8389.jpg
IMG_8394.jpg