Almond and coconut baked doughnuts

Almond and coconut doughnuts are a healthier treat packed with equal parts nutrition and deliciousness. #meandthemoose #healthybaking #doughnuts #healthydoughnuts #bakeddoughnuts #wholegrains #wholegrainbaking #breakfastrecipes #snackrecipes

A healthier baked doughnut that features whole grains, lower sugar, and my favorite flavor combination: Almond and coconut. YES, PLEASE.

Take me to the recipe!

Almond and coconut doughnuts are a healthier treat packed with equal parts nutrition and deliciousness. #meandthemoose #healthybaking #doughnuts #healthydoughnuts #bakeddoughnuts #wholegrains #wholegrainbaking #breakfastrecipes #snackrecipes

I have bad news and good news: I was diagnosed last week with gestational diabetes. Luckily, I’m in my third trimester and don’t have much longer to go, so what’s a few weeks of monitoring my blood sugar and trying to eat really healthy foods?

I did eat half of one of these doughnuts and it didn’t send my blood sugar soaring (thanks whole grains, coconut sugar, and healthy fats!), so that was another piece of good news. Obviously, if you have diabetes of any kind, you know what works best for your body or are working with your doctor to figure that out, so not everyone will be able to say the same. But I was glad to know that at lease some treats aren’t off the table.

What has made this so hard isn’t the dietary restrictions or even the blood sugar monitoring.

What’s hardest is the added layer of scrutiny over my body when pregnancy already casts a harsh, glaring spotlight. Every routine thing you eat, drink, use on your skin, or take for a headache feels so consequential. And anyone who’s had disordered eating in the past can tell you that it takes a lot of work to STOP feeling like these minor choices are so meaningful.

Ugh. It just feel like I’ve lost myself a little more with this diagnosis. I resigned myself 8 months ago to making all of the changes you have to make when pregnant for the greater, temporary good and I wish it didn’t feel like ever day meant cutting out one more thing that brings me joy.

And now i’ll stop complaining. There are real problems in the world.

But! Lack of a delicious, healthier doughnut option doesn’t have to be one of them!

Almond and coconut doughnuts are a healthier treat packed with equal parts nutrition and deliciousness. #meandthemoose #healthybaking #doughnuts #healthydoughnuts #bakeddoughnuts #wholegrains #wholegrainbaking #breakfastrecipes #snackrecipes

A couple of notes:

  • We’re aiming for a batter that is thicker than pancake batter, but thinner than cookie dough. Depending on how much liquid you get from your banana and egg, you may want to add more flour. Start with an extra Tbsp and keep adding until you’re happy with the density.

  • These doughnuts are okay without the topping, but the extra sugar, almonds, and  coconut really take them to a new place. I really don’t recommend skipping them.  

  • The brown sugar and coconut oil topping makes a pretty dense mixture and a lot of the topping will fall off. BUT, it’s delicious. If you’d like something a bit smoother and more glaze-like, you can swap in 6 Tbsp powdered sugar, enough water to make a thin glaze (start with ½ tsp and add slowly), and a few drops of almond extract.

Almond and coconut doughnuts are a healthier treat packed with equal parts nutrition and deliciousness. #meandthemoose #healthybaking #doughnuts #healthydoughnuts #bakeddoughnuts #wholegrains #wholegrainbaking #breakfastrecipes #snackrecipes

Almond coconut doughnuts

Yield: 10-12 doughnuts
Time: about 35 minutes, mostly active

 ½ large, very ripe banana, thoroughly smooshed
½ cup milk (any type will do!)
3 Tbsp full-fat yogurt (Greek or otherwise)
1 large egg
¾ cup coconut sugar
½ tsp almond extract
3 Tbsp coconut oil, melted
1¼ + 1/4 (if needed) cups Whole Wheat pastry flour (regular whole wheat flour or white whole wheat flour work too, but the texture is slightly denser)
1¼ tsp baking powder
½ tsp salt
½ cup shredded unsweetened coconut 
½ tsp cinnamon
¼ tsp cardamom

Topping:
3 Tbsp coconut oil
3 Tbsp brown sugar
½ cup toasted coconut slivers
½ cup toasted almond slivers
½ tsp cinnamon

Preheat oven to 375.

Grease your doughnuts pans with coconut or other neural oil and set aside

In a large bowl, smush the banana as much as possible. Add the rest of the wet ingredients except the coconut oil and whisk together.

Add 1¼ cups flour, baking powder, salt, shredded coconut, cinnamon, and cardamom. Mix well.

Add the coconut oil and mix well. If the mixture is too runny (if it looks like pancake batter), add the remaining ¼ cup of flour 1 Tbsp at a time and mix again.

Fill each doughnut tin about 2/3 full. 

Cook both pans (if using 2 doughnut pans) in the same oven for 10-12 minutes, or until the doughnuts just spring back when poked lightly with a finger. Rotate and pans after 5 minutes to ensure even baking.

Let cool.

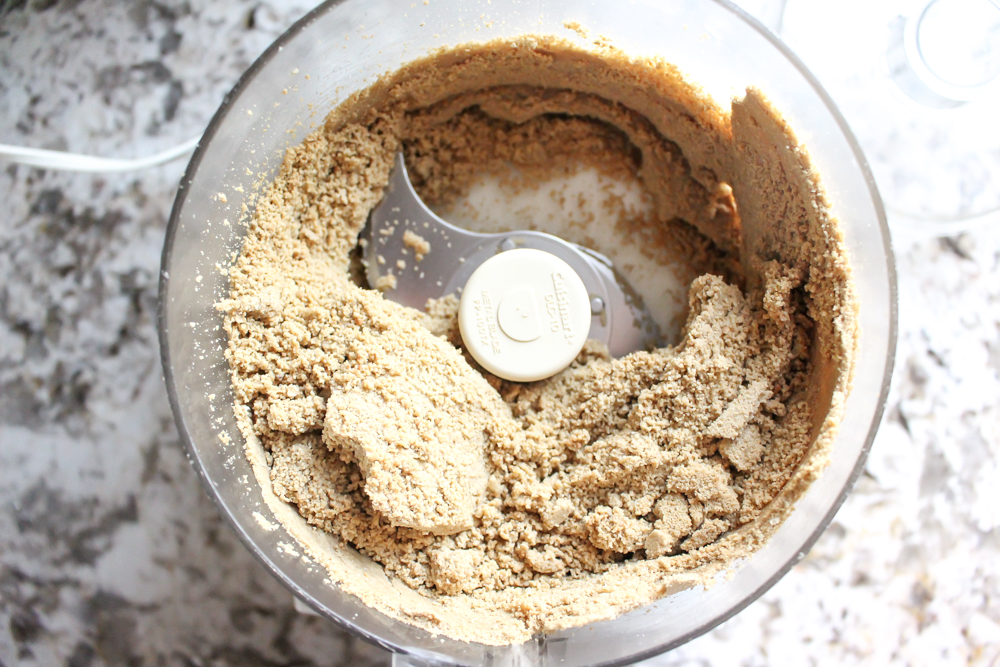
In a separate small bowl, combine the coconut oil (that should still be rather liquid) with the brown sugar and cinnamon and mix. If the mixture seems too liquid and not spreadable, chill it in the refrigerator until slightly more set.

On a baking sheet, combine the coconut flakes and the sliced almonds and let brown in the cooling oven, abut 6 minutes or until you begin to smell the nuts.

Spread a small amount of the sugar and coconut oil mixture on each doughnut and sprinkle the toasted nuts and coconut over the top, pressing lightly to get them to stick.

Kale mac and cheese

Kale mac and cheese | Me & The Moose. This vegged-up pasta sauce looks green and packs a nutritional punch, but tastes like cheese. #meandthemoose #macandcheese #kale #greensauce #kidfood #dinnerrecipes #vegetarianrecipes

Mac and cheese is a perennial favorite for a reason. You can quickly make a huge batch and reheat it as needed. It’s perfect filler for lunchboxes or to whip up for dinner. And you can throw in any old proteins or veggies you have lying around. And it gets eaten. Huzzah!

Take me to the recipe!

Kale mac and cheese | Me & The Moose. This vegged-up pasta sauce looks green and packs a nutritional punch, but tastes like cheese. #meandthemoose #macandcheese #kale #greensauce #kidfood #dinnerrecipes #vegetarianrecipes

So! Easter and Passover just happened/are happening. My kiddo is at the age where he asks a lot of questions about everything, the deeper the subject, the better. The other day he hit me with, “Before I was born, where was I?”

Let me be clear: He was NOT asking where babies come from. He was asking a philosophical question about personhood. He wanted to know where his “self” resided before he had a body. He didn’t put it in those words, but that was the gist.

WHAT? WHY?

As you can imagine, religious holidays are tricky for us because this kid is constantly asking questions and we don’t always have great answers. “Why didn’t the Easter Bunny come to our house” was a little easier to handle than “Am I going to die?” but it was still tough! I stayed away from talking about religion and talked more about traditions, but I know that the questions are going to keep coming and get EVEN MORE complicated as his awareness grows.

Kale mac and cheese | Me & The Moose. This vegged-up pasta sauce looks green and packs a nutritional punch, but tastes like cheese. #meandthemoose #macandcheese #kale #greensauce #kidfood #dinnerrecipes #vegetarianrecipes

Since parenting has required so much mental gymnastics for us lately, I want to keep dinner as simple as possible. So, Mac and Cheese!

As you may or may not know, I prefer a stovetop mac and cheese to the baked kind. I feel like the baking process can dry out the sauce, which is not tasty, IMO.

Kale mac and cheese | Me & The Moose. This vegged-up pasta sauce looks green and packs a nutritional punch, but tastes like cheese. #meandthemoose #macandcheese #kale #greensauce #kidfood #dinnerrecipes #vegetarianrecipes

A couple of notes:

  • Do cook the kale a bit before pureeing. The more you cook the greens, the smoother the sauce will be. I only cook it for a few minutes though because I don’t want to lose too many of the nutrients.

  • Turn down the heat when making the sauce. It takes a bit longer, but will hopefully keep the milk solids from separating, which can make dairy-based sauces look curdled.


Kale mac and cheese

Time: About 25 minutes, mostly active
Yield: About 4 cups or 30 oz

1 lb small, dry pasta
1 bunch Lacinto kale, leaves stripped off of the tough center ribs
2 Tbsp butter
2 Tbsp flour
2 cups milk, divided (I used whole, but you can certainly use a lower fat variety if you like)
½ cup reserved pasta/kale cooking water
6-7 cups shredded cheese (combination of any nutty cheese like cheddar, gruyere, gouda, and Parmesan)
1 tsp garlic powder
½ tsp sea salt
Several cracks of black pepper

Cook pasta according to package directions.

While the pasta cooks, melt the butter over medium-high heat in a large sauce pan. Add the flour, stir well, and let bubble for 1 minute.

Turn the heat down to medium-low, add 1 and 1/2 cups of milk, and whisk to combine.

Add garlic, salt, and pepper to the milk and stir to combine. Let the milk heat up until there are small bubbles forming along the sides of the pan, about 3-4 minutes. Add the cheese and stir until melted, allowing the cheese sauce to bubble slowly, but try not to get the sauce too hot, about 4-5 more minutes.

Remove pasta from boiling water and add kale to that same water. Blanch for 2 minutes and remove greens to a blender. Reserve 1/2 cup of the cooking water.

Add the remaining ½ cup of milk to the green in the blender and puree until smooth, adding the reserved cooking water as necessary to puree the kale.

Add the greens to the cheese sauce and stir well. Allow the mixture to come up to a simmer again.

When both are cooked, combine 2 cups of the sauce with the cooked pasta and stir well. Add any additional toppings you might like.

Kale mac and cheese | Me & The Moose. This vegged-up pasta sauce looks green and packs a nutritional punch, but tastes like cheese. #meandthemoose #macandcheese #kale #greensauce #kidfood #dinnerrecipes #vegetarianrecipes

Sloppy Joe baked potatoes

Sloppy Joe baked potatoes | Me & The Moose. This lightened up version of sloppy Joes uses turkey meat and the bare minimum of sweetener in the filling and forgoes a carby bun for a crispy, salt, malt-vinegary baked potato. #meandthemoose #dinner…

These baked potatoes are dressed up with healthier turkey sloppy Joe filling for a tasty, healthy, and easy version of this kid-friendly sandwich.

Take me to the recipe!

Sloppy Joe baked potatoes | Me & The Moose. This lightened up version of sloppy Joes uses turkey meat and the bare minimum of sweetener in the filling and forgoes a carby bun for a crispy, salt, malt-vinegary baked potato. #meandthemoose #dinner…

M used to love sloppy Joes. LOVE THEM. However, when offered these, he declined saying, “I didn’t order that.” SOMEONE GAVE HIM THE GIFT OF SASS FOR HIS FOURTH BIRTHDAY AND I AM NOT HERE FOR IT.

After calmly explaining that I am, in fact, not his waitress, he proceeded to eat a dinner of pickles, cheese, and guacamole, all of which were the toppings and “safe” options I’d put out with the sloppy Joes. You win some, you lose some.

I’ve explained before how we started serving one family meal and adding lots of “safe” options as alternatives for M so that he can self-direct at dinner. Sometimes that means an apple and almond butter on the table or lots of condiments like pickles, olives, and cheese. Guacamole is usually reliable. But sometimes that means he doesn’t eat a ton for dinner and I’m slowly learning to be okay with that.

So, sloppy Joes, while traditionally a very kid-friendly option, were for the grownups in our house. But I have hope for the future.

Sloppy Joe baked potatoes | Me & The Moose. This lightened up version of sloppy Joes uses turkey meat and the bare minimum of sweetener in the filling and forgoes a carby bun for a crispy, salt, malt-vinegary baked potato. #meandthemoose #dinner…

What tends to appeal about Sloppy Joes is their sweetness, but I find that when the filling gets too sweet (like, when a recipe calls for a cup of ketchup), it can become cloyingly sweet. Also, who needs to eat all of that sugar for dinner?

However, the signature sloppy Joe flavor gets lost when you omit sweetener entirely, so I’ve included the bare minimum of brown sugar (2 tsp!) in this recipe. You can also wait to add it until the very end to decide for yourself if you really need it!

Sloppy Joe baked potatoes

Yield: 3 cups or 23 oz
Time: between 60-75 minutes (35 minutes active time)

4 large Russet potatoes
2 Tbsp olive oil
Flaky sea salt


1 Tbsp olive oil
1 lb ground turkey
½ medium white onion, minced (about ¾ cup)
1 medium stalk celery, minced (about ¼ cup)
1 small carrot, peeled and minced (a scant ½ cup)
2 large cloves garlic, minced 
½ cup water, divided
6 oz tomato paste (one small can, about 10 Tbsp)
2 Tbsp yellow mustard
1 tsp Worcestershire sauce
1 Tbsp malt vinegar (or whatever vinegar you have on hand), plus more for the potatoes
2 tsp brown sugar (optional)
2 tsp flaky sea salt, divided

Optional garnishes: cheese, pickles, pickles jalapenos, guacamole, sour cream, yogurt, coleslaw


  1. Preheat the oven to 400.

  2. Scrub 4 potatoes thoroughly and prick all over with a fork or small paring knife. I usually do 10-12 stabs per potato.

  3. Brush the outside skin with a very thin coating of olive oil. You should have some of the 2 Tbsp left over. Sprinkle with flaky sea salt.

  4. Place the potatoes on a sheet pan and bake for 45 minutes to an hour, or until the skin is crisp and the potato is fork tender.

  5. While the potatoes cook, heat the olive oil in a large sauté pan over medium heat for 1-2 minutes. Add the ground turkey and chop the meat into small pieces with the end of your spatula or spoon. Stir a few times and reduce the heat to medium low.

  6. Chop the onions and add to the pan, stirring a few times.

  7. Repeat with the celery, carrots, and garlic, letting each vegetable cook while you prep the next one.

  8. Cook and stir until the turkey is fully cooked and no pink remains. The whole process of cooking the turkey and veggies should take about 13-15 minutes.

  9. Turn the flame back up to medium and let the turkey and veggies brown slightly. When they begin sticking to the pan a bit (about 3-4 minutes), pour in ¼ cup of water and scrape the browned bits from the bottom of the pan.

  10. Add the tomato paste, mustard, vinegar, Worcestershire sauce, 1 tsp salt, and brown sugar (if using), and mix well. If the mixture seems too dry, add the other ¼ cup of water. If you’ve added all of the water and it seems too wet, let the mixture bubble for a few minutes until your sauce has thickened.

  11. When the potatoes are done, carefully remove the pan from the oven and, using an oven mitt on one hand to steady the potato, cut it open with a sharp knife, being careful of the steam that escapes.

  12. Pour a few drops of malt vinegar and a large pinch of sea salt into each opened potato. Top with 1/2 -3/4 cup of the turkey mixture.

Sloppy Joe baked potatoes | Me & The Moose. This lightened up version of sloppy Joes uses turkey meat and the bare minimum of sweetener in the filling and forgoes a carby bun for a crispy, salt, malt-vinegary baked potato. #meandthemoose #dinner…

Sunflower seed butter with flax and chia

Sunflower seed butter | Me & The Moose. This homemade sunflower seed butter tastes so much better than store-bought and is fortified with flax and chia seeds. #meandthemoose #sunflowerseedbutter #lunchboxideas #lunch #lunchbox #sunflowerseedreci…

Once again, I’m copying Trader Joe’s. They have a peanut butter with flax and chia and it’s a fantastic way to get some extra nutrition into a picky eater. Here’s my school-safe version!

Jump to the recipe!

I have a confession to make: I go back and forth between caring A WHOLE LOT about M’s nutrition and then feeling like there are a million little struggles every day and I don’t want to add food to that list.

And he’s always been a contrarian with FOMO, which means he doesn’t love limits. The “perfect parent” voice in my head constantly beats me up about not being stricter. Don’t get me wrong, I say “no” to things 100 times a day and we obviously set lots of boundaries. But we’ve figured out that M does better when he has choice within those limits and that we have to say “yes” to some things or there will be a meltdown.

Anyway, part of M’s way of gaining control these days is that he has VERY strong opinions about food. What he loves one day, he hates the next. Peanut butter mixed into applesauce has been a constant and lately he’s been really into PB&J’s after watching this silly video.

BUT we can’t send any nuts to school, so sunflower seed butter it is. Unfortunately, a lot of the store-bought ones don’t taste great. I’ve made my own sunflower seed butter before and I do love this recipe. But if M’s eating this for at least one meal per day, I wanted to beef up the nutrition. And it tastes so good, he doesn’t complain!

Sunflower seed butter | Me & The Moose. This homemade sunflower seed butter tastes so much better than store-bought and is fortified with flax and chia seeds. #meandthemoose #sunflowerseedbutter #lunchboxideas #lunch #lunchbox #sunflowerseedreci…

A couple of notes about this nut butter:

  • When roasting the nuts, you want them to be mostly brown and golden rather than gray. But watch to make sure that they don’t burn! (See the photos above for a before and after.) Well-roasted seeds are much easier to process than ones that are still partly raw.

  • The grinding process takes a bit of patience. If you let the machine run, the seeds will come together into a paste. There are more detailed instructions for the individual grinding steps in the recipe below. Be sure to read the recipe before starting this butter.

  • Storage: I store this seed butter in the fridge because I’ve read that flax and chia (and seeds in general) tend to get rancid quickly when left vulnerable to moisture and heat in the cabinet). The cold tightens the butter considerably, but 20 seconds in the microwave makes the butter easily spreadable again.

Sunflower seed butter | Me & The Moose. This homemade sunflower seed butter tastes so much better than store-bought and is fortified with flax and chia seeds. #meandthemoose #sunflowerseedbutter #lunchboxideas #lunch #lunchbox #sunflowerseedreci…

Sunflower seed butter with flax and chia

Yield: 2-2¼ cups 
Time: 30-35 minutes

3 cups raw sunflower seeds
4-6 Tbsp coconut oil, melted
2 Tbsp maple syrup
2 tsp vanilla extract
1 tsp cinnamon
1 tsp flaky sea salt
3 Tbsp each chia seeds
3 Tbsp whole flax seeds

  1. Preheat the oven to 350. Spread the raw sunflower seeds out on a large sheet pan. Roast for 5 minutes and shake the tray. Roast for 2-3 minutes more, checking to make sure that the seeds don’t burn. When the seeds are uniformly more golden brown than gray, they’re ready for processing.

  2. Add the roasted seeds to a large food processor and grind for 2 minutes. The seeds will break up and look very dry and like breadcrumbs.

  3. Add 2 Tbsp of coconut oil and the maple syrup and process for 2 more minutes. At this stage, the seeds start coming together in a large slow-moving glacier of seed butter. Scrape down the sides and break up the glacier as necessary. It will still feel dry and crumbly when you break up the glacier.

  4. Add the vanilla and cinnamon and process again, this time letting the machine run. Let it go for at least 3-4 minutes before adding more coconut oil as the heat of the processor and the continued grinding will start to make the butter smoother and wetter. The glacier of seed butter will still be forming, but will be spinning around the food processor much faster.

  5. After that 3-4 minutes, and while the food processor is running, add the other 2-4 Tbsp of coconut oil to achieve a silky consistency. Don’t add more maple syrup or water because it will make the seed butter stick together and clump more instead of smoothing it out.

  6. The whole process of grinding the seeds into a smooth butter usually takes between 15 and 20 minutes (including stopping add ingredients), so patience is key.

  7. Transfer to a large bowl and stir in the sea salt, chia seeds and flax seeds and stir well.

Sunflower seed butter | Me & The Moose. This homemade sunflower seed butter tastes so much better than store-bought and is fortified with flax and chia seeds. #meandthemoose #sunflowerseedbutter #lunchboxideas #lunch #lunchbox #sunflowerseedreci…

Sheet pan dinner: White fish with potatoes and fennel

Sheet pan dinner: White Fish with Potatoes and Fennel | Me & The Moose. This one pan wonder dinner is ready in 40 minutes and features fish and veggies dressed up with all the sweet, salty, creamy, briny, and crunchy toppings you could want. #me…

This sheet pan dinner is ready in about 40 minutes (start to finish) and combines mild base flavors with all kinds of dynamic toppings so you can please even the pickiest palate.

Jump to the recipe!

Sheet pan dinner: White Fish with Potatoes and Fennel | Me & The Moose. This one pan wonder dinner is ready in 40 minutes and features fish and veggies dressed up with all the sweet, salty, creamy, briny, and crunchy toppings you could want. #me…

Well hello anxiety, my old friend!

Question for the caregivers out there: Are you able to separate your own happiness from that of your kids? It’s a tough question because if your child is having a hard time in any area of his/her/their life, it can feel weird to say that you’re happy anyway. It’s also hard to actually be happy anyway. But at the same time, it’s a lot of pressure for a kid to have that much impact on their caregiver’s well-being.

We’ve had a couple of good weeks recently. You know the ones: You suddenly realize that the littles are more agreeable, they actually eat the food that you cook, and they can entertain themselves with toys that they already own!

We were on one of those streaks when M suddenly had a really tough week last week. I felt myself getting more and more anxious about it. Then I tried talking to him about a specific situation at school and he wouldn’t tell me because, he said, “I don’t want to make you mad and sad.” CRY FACE EMOJI.

I realized that my sensitive butterfly could tell that I was getting upset about his tough times and that it was stressing him out.

On the one hand, it’s good for kids, especially in these self-centered toddler and preschool years, to know that their actions and words impact others. I mean, it’s our job to teach them about consequences. But it’s also not a kid’s job to make sure that their parents are happy. So how do you balance your kids’ stuff with your own? Do you feel happy even when your kids are having a rough time?

I have no answers. Just putting this out into the universe in the hopes that someone smarter than me has some guidance.

Sheet pan dinner: White Fish with Potatoes and Fennel | Me & The Moose. This one pan wonder dinner is ready in 40 minutes and features fish and veggies dressed up with all the sweet, salty, creamy, briny, and crunchy toppings you could want. #me…

When I feel anxious, as I have this week, I gravitate towards unhealthy food, which always makes me feel worse. So instead, I made this sheet pan dinner and it has done the trick! Every flavor is represented here: Creamy, tangy feta; briny, salty olives; sweet, piquant roasted red peppers; and crunchy, sour pickled onions. Throw on some aromatic fresh oregano and garlic butter and this simple fish, potatoes and fennel dinner is all dressed up in a more interesting package.

The various components cook at different rates, which is the only slightly tricky part of this meal. But good news: You can prep the next step while the earlier one is cooking.

Sheet pan dinner: White Fish with Potatoes and Fennel | Me & The Moose. This one pan wonder dinner is ready in 40 minutes and features fish and veggies dressed up with all the sweet, salty, creamy, briny, and crunchy toppings you could want. #me…

Sheet pan dinner: White fish with potatoes and fennel

½ lb small potatoes, halved or quartered
2 large bulbs of fennel, white part only, trimmed and thinly sliced
2 Tbsp olive oil
½-1 tsp salt, divided  
Black pepper, to taste
4 white fish fillets, about 6 oz each, fresh or frozen
2 Tbsp butter
2 cloves garlic, minced  

Toppings (all are optional!):
½ cup green or black olives, pitted and chopped
2-3 oz feta, crumbled
Fresh oregano
Quick pickled red onions (See recipe below)
Roasted red peppers, sliced
Lemon wedges
Flatbreads, Naan, or Pita

  1. Preheat the oven to 425.

  2. Prep the potatoes and place on a parchment-lined baking sheet. Toss with 1 Tbsp of olive oil and sprinkle with salt. Bake for 5 minutes.

  3. While the potatoes roast, slice the fennel into 1/8th inch slices. Add the fennel to the roasting pan and toss with the other 1 Tbsp of oil and another large pinch of salt. Bake for 12-15 minutes or until the fennel starts to brown and the potatoes are fork tender.

  4. While the fennel roasts, wrap your fish in parchment packets. Cut a piece of parchment 2-3x as large as your fish filet. Place the filet in the middle and bring the two longer ends together and fold down. Fold up the remaining sides.

  5. Add the fish on top of the veggies and cook until it flakes easily. This will take slightly longer if you’re cooking the fish from frozen. (I check the fish after 10 minutes if thawed, or after 15-18 minutes if frozen. Open up one parchment packet and try to flake the fish with a fork. If it comes apart easily, it’s done.)

  6. While the veggies and fish are roasting, prep your toppings. Set aside.

  7. Mince the garlic. Combine with 2 Tbsp of butter and heat in the microwave for 30 seconds to a minute until the butter is liquid. Add a pinch of salt and stir. Set aside.

  8. Remove the sheet pan from the oven and carefully open the parchment packets. Discard the paper and the water that’s collected in the packets while the fish cooked.

  9. Top the fish fillets with the garlic butter.

  10. Top the sheet pan with any of the toppings you choose.

Yield: 4 servings

Quick pickled red onions
1 large red onion, sliced into 1/8 inch slices
1/2 cup white vinegar
1 Tbsp granulated sugar
1/2 tsp kosher salt

  1. Combine the onions with the pickling ingredients in a large container and shake a few times. Let sit in the refrigerator for at least an hour, or up to 1 week.

Sheet pan dinner: White Fish with Potatoes and Fennel | Me & The Moose. This one pan wonder dinner is ready in 40 minutes and features fish and veggies dressed up with all the sweet, salty, creamy, briny, and crunchy toppings you could want. #me…