Candy pretzel no-churn ice cream

No-churn vanilla ice cream with Easter candy and pretzel mix-ins is the easy, fun cooking project that you can do with your kids to use up that holiday haul! #Easter #icecream #icecreamrecipe #nochurn #dessert #sweetandsavory

No-churn vanilla ice cream with Easter candy and pretzel mix-ins is the easy, fun cooking project that you can do with your kids to use up that holiday haul! #Easter #icecream #icecreamrecipe #nochurn #dessert #sweetandsavory

If the Easter Bunny left you a LOT of candy this year (or you stocked up on post-holiday sales), this Candy Pretzel No-Churn Ice Cream is a fun way to use it up. AND, it’s so easy that my (newly) 6-year-old can make it mostly by himself!

Take me to the ice cream!

No-churn vanilla ice cream with Easter candy and pretzel mix-ins is the easy, fun cooking project that you can do with your kids to use up that holiday haul! #Easter #icecream #icecreamrecipe #nochurn #dessert #sweetandsavory

No-churn vanilla ice cream with Easter candy and pretzel mix-ins is the easy, fun cooking project that you can do with your kids to use up that holiday haul! #Easter #icecream #icecreamrecipe #nochurn #dessert #sweetandsavory

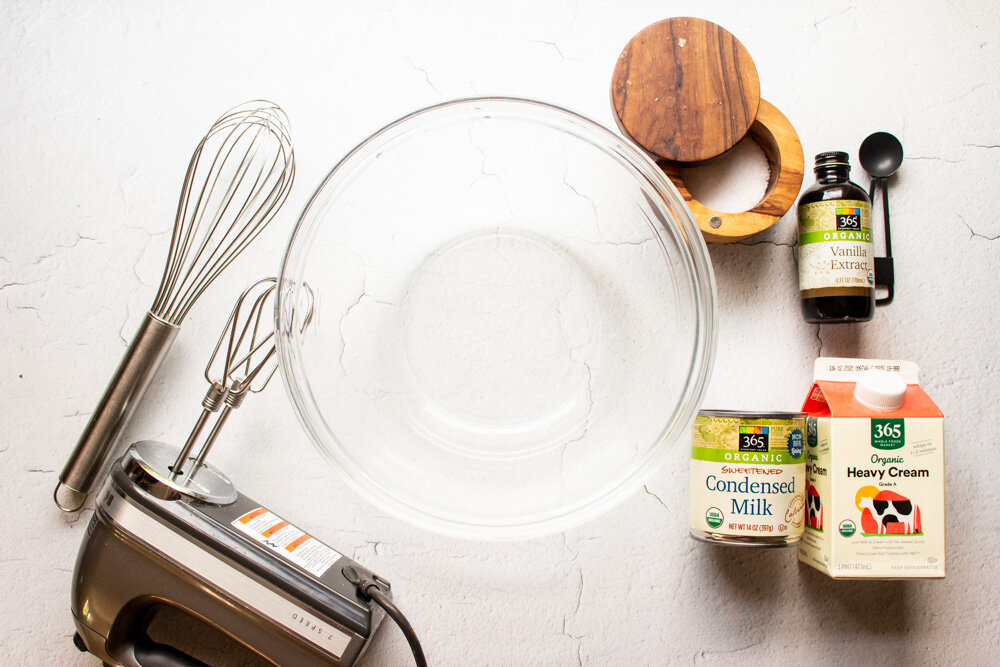
I’m obsessed with no-churn ice cream. Most recipes you’ll find are basically the same— a carton of heavy cream, a can of sweetened condensed milk, a pinch of salt (but not in this recipe because we’re using pretzels), some vanilla extract, and whatever mix-ins you like. Some recipes use a bit of cream cheese, but I prefer it without.

*There are two ways to make the ice cream base: You can whip the cream first and then fold in the condensed milk, OR you can combine them and whip the whole mess together. Obviously, it’s faster to do the milks together, but you risk over-mixing. Whipping the base too much can lead to a buttery texture in the final product, which is a little gross.

Whipping the cream on its own lets you see how thick it’s gotten, so you’re less likely to overdo it. If you’re a newbie or just worried, use this method.

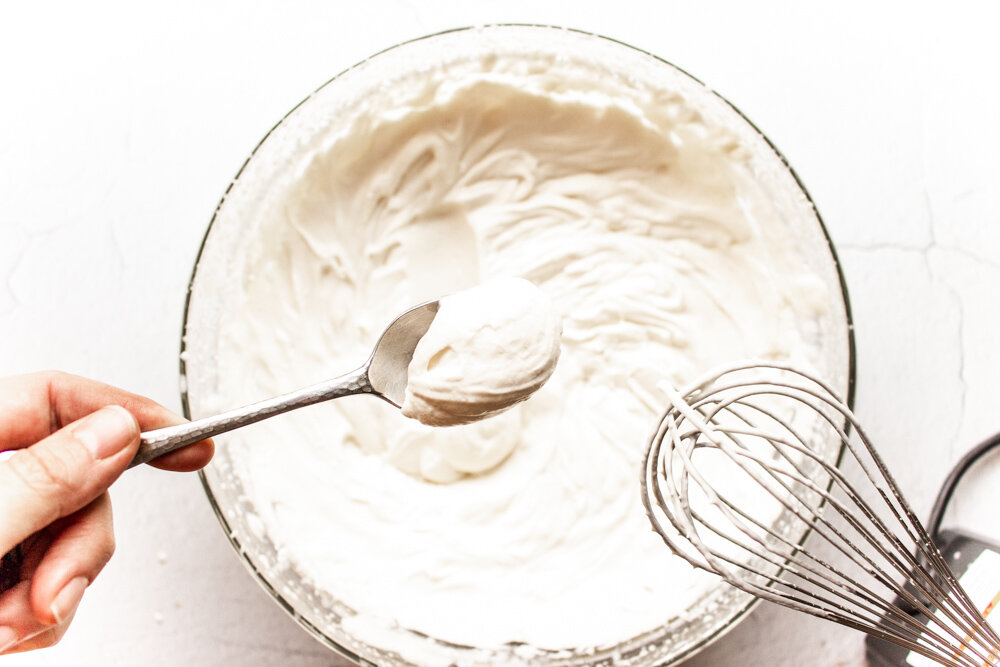
I usually dump them both together and whip until I see tracks in the mixture that stay put for a few seconds before melting back into the gloop. Just note: When you mix the two liquids together, you WON’T achieve a stiff peak like you would with cream alone.

No-churn vanilla ice cream with Easter candy and pretzel mix-ins is the easy, fun cooking project that you can do with your kids to use up that holiday haul! #Easter #icecream #icecreamrecipe #nochurn #dessert #sweetandsavory

No-churn vanilla ice cream with Easter candy and pretzel mix-ins is the easy, fun cooking project that you can do with your kids to use up that holiday haul! #Easter #icecream #icecreamrecipe #nochurn #dessert #sweetandsavory

No-churn vanilla ice cream with Easter candy and pretzel mix-ins is the easy, fun cooking project that you can do with your kids to use up that holiday haul! #Easter #icecream #icecreamrecipe #nochurn #dessert #sweetandsavory

No-churn vanilla ice cream with Easter candy and pretzel mix-ins is the easy, fun cooking project that you can do with your kids to use up that holiday haul! #Easter #icecream #icecreamrecipe #nochurn #dessert #sweetandsavory

No-churn vanilla ice cream with Easter candy and pretzel mix-ins is the easy, fun cooking project that you can do with your kids to use up that holiday haul! #Easter #icecream #icecreamrecipe #nochurn #dessert #sweetandsavory

No-churn vanilla ice cream with Easter candy and pretzel mix-ins is the easy, fun cooking project that you can do with your kids to use up that holiday haul! #Easter #icecream #icecreamrecipe #nochurn #dessert #sweetandsavory

My favorite part of this particular recipe is the pretzel-Rolo concoction. You basically melt a Rolo (or any other chocolate and caramel candy) in the oven for 3 minutes and then smoosh another pretzel and some sprinkles on top. They’re like a chocolate-covered pretzel with a caramel sprinkle bonus! And much less messy to make!

Also, if you’re like us, you always have some stale pretzels in the back of the cabinet that no one really wants to eat. This is a great way to resurrect them.

No-churn vanilla ice cream with Easter candy and pretzel mix-ins is the easy, fun cooking project that you can do with your kids to use up that holiday haul! #Easter #icecream #icecreamrecipe #nochurn #dessert #sweetandsavory

No-churn vanilla ice cream with Easter candy and pretzel mix-ins is the easy, fun cooking project that you can do with your kids to use up that holiday haul! #Easter #icecream #icecreamrecipe #nochurn #dessert #sweetandsavory

Candy pretzel No-Churn Ice Cream

Time: 20 minutes + 8 hours of freezing
Yield: About 5 cups of ice cream

10-15 Rolo candies (or other chocolate and caramel candy)
20-30 mini pretzels
2-3 Tbsp sprinkles
2 cups heavy cream (1 pint)
14 oz sweetened condensed milk (1 small can)
1 tsp vanilla extract
1-2 cups chocolate candy, roughly chopped (I used milk chocolate bunnies and Cadbury eggs, but use whatever you like!)

Heat the oven to 350.

Spread half of the pretzels on a parchment-covered sheet pan. Top with one Rolo or other chocolate and caramel candy. Melt in the oven for 2-3 minutes.

Remove from the oven and top each melted chocolate piece with another pretzel and glitz them up with some sprinkles. Put in the fridge to chill while you make the ice cream base.

*Combine the heavy cream, condensed milk, and vanilla extract in a large bowl or in the bowl of a stand mixer. (See notes above for different methods for making the base.) Mix with the whisk attachment until you see visible tracks in the cream that stick around for a few seconds before melting back into the gloop.

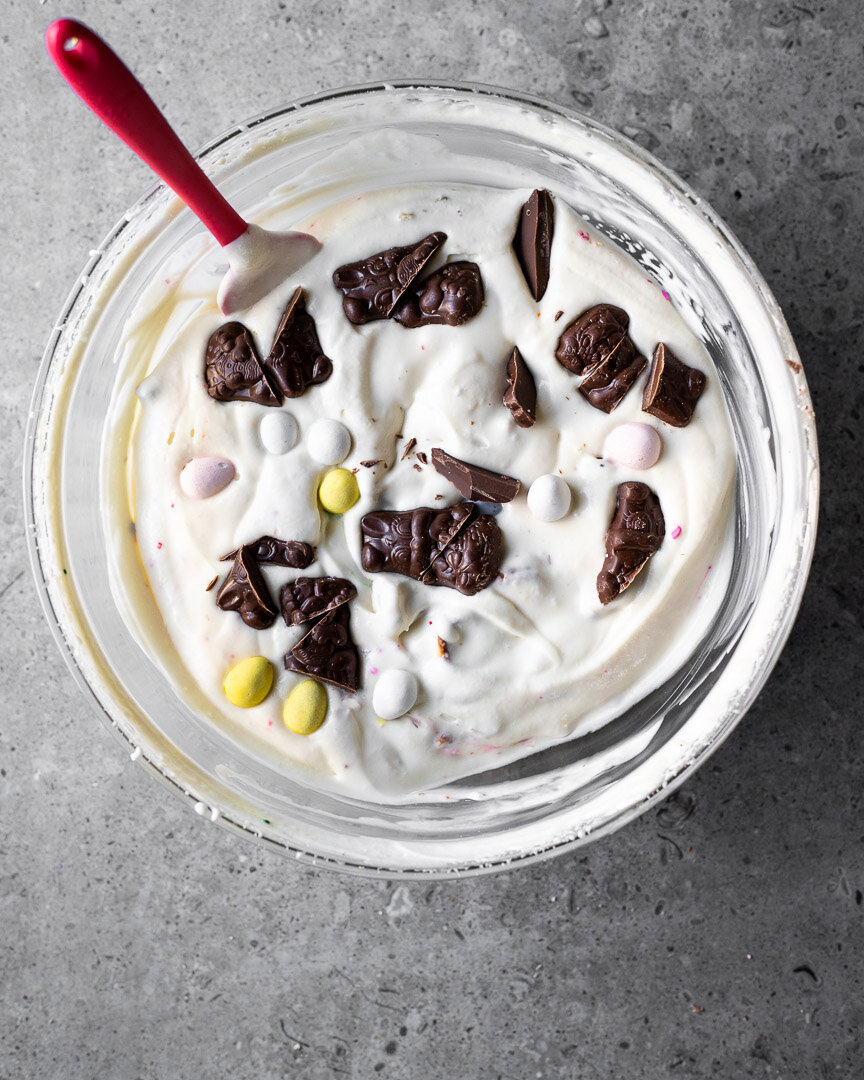
Roughly chop whatever candy you’re using. Remove the pretzels from the fridge and roughly chop those too. Gently fold the chopped candies into the ice cream base. Pour the mixture into a metal or other freezer-safe container and freeze for at least 8 hours.

Almond and coconut energy balls

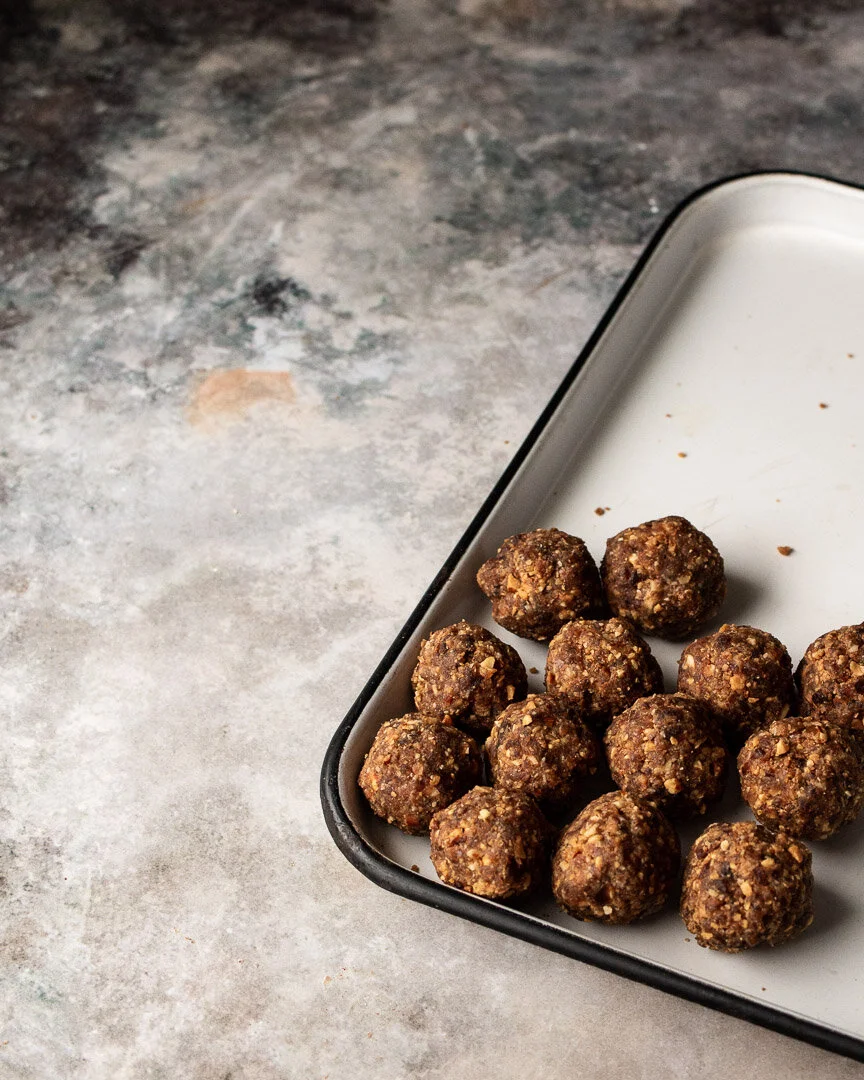
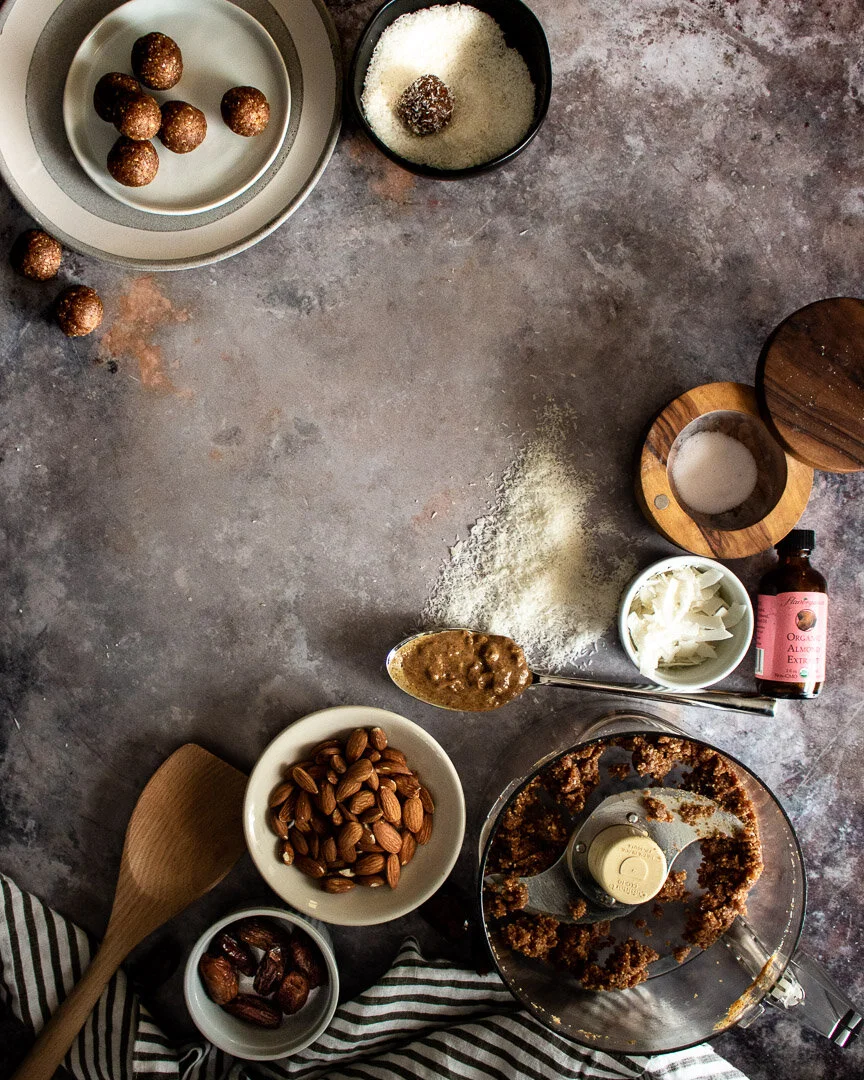
These coconut and almond energy bites are a quick snack to throw together, easy to eat, and last for weeks in the fridge. #meandthemoose #energyballs #energybites #snacks #almonds #dates #easysnacks

These throw-together snacks are easy to make and store for a filling, quick bite on the go.

Take me to the recipe!

These coconut and almond energy bites are a quick snack to throw together, easy to eat, and last for weeks in the fridge. #meandthemoose #energyballs #energybites #snacks #almonds #dates #easysnacks

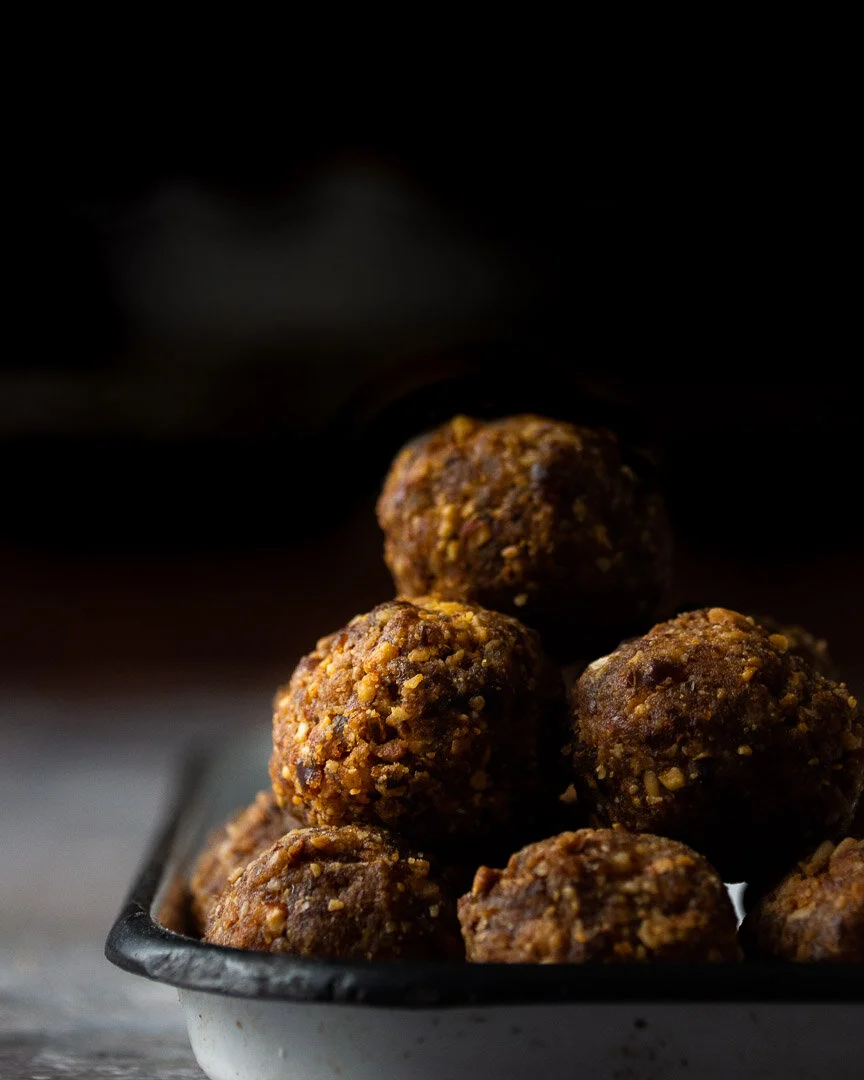
Let’s talk energy balls, shall we? Sometimes called “energy bites,” these sticky, two-bite goodies are naturally sweetened with dates and come together in a food processor in minutes. They require minimal ingredients, can be modified to suit your tastes, and are surprisingly filling for such a tiny treat. Best of all, when stored in the fridge, they last for weeks.

These coconut and almond energy bites are a quick snack to throw together, easy to eat, and last for weeks in the fridge. #meandthemoose #energyballs #energybites #snacks #almonds #dates #easysnacks

This is the thing I grab when I absentmindedly open the fridge, looking for something (in both food and existential senses).

These coconut and almond energy bites are a quick snack to throw together, easy to eat, and last for weeks in the fridge. #meandthemoose #energyballs #energybites #snacks #almonds #dates #easysnacks

A couple of notes:

  • Make the balls small! The mixture is pretty caloric, so I make them no more than about 1 Tbsp each.

  • Do toast the almonds and coconut. That little bit of browning really enhances the flavor and makes the balls less sweet.

  • Test your dates before using. If they don’t squish almost effortlessly, they may be a bit too tough or dry. If that’s the case, cover them with boiling (or just really really hot) water and let sit for 5 minutes.

These coconut and almond energy bites are a quick snack to throw together, easy to eat, and last for weeks in the fridge. #meandthemoose #energyballs #energybites #snacks #almonds #dates #easysnacks

Almond and coconut energy balls


Time: 15 minutes
Yield: 16 balls

1/2 cup raw almonds
1/2 cup unsweetened shredded or flaked coconut
16 pitted dates, rehydrated if too tough or dry
2-3 Tbsp almond butter
1/8 tsp almond extract
Pinch of salt
Water, as needed

Preheat the oven or toaster oven to 350. Spread the almonds and coconut out onto a baking sheet and toast until the coconut is just beginning to brown on the edges and the mixture smells nutty, about 3 minutes. Keep a close eye on the mixture to ensure that it doesn’t burn.

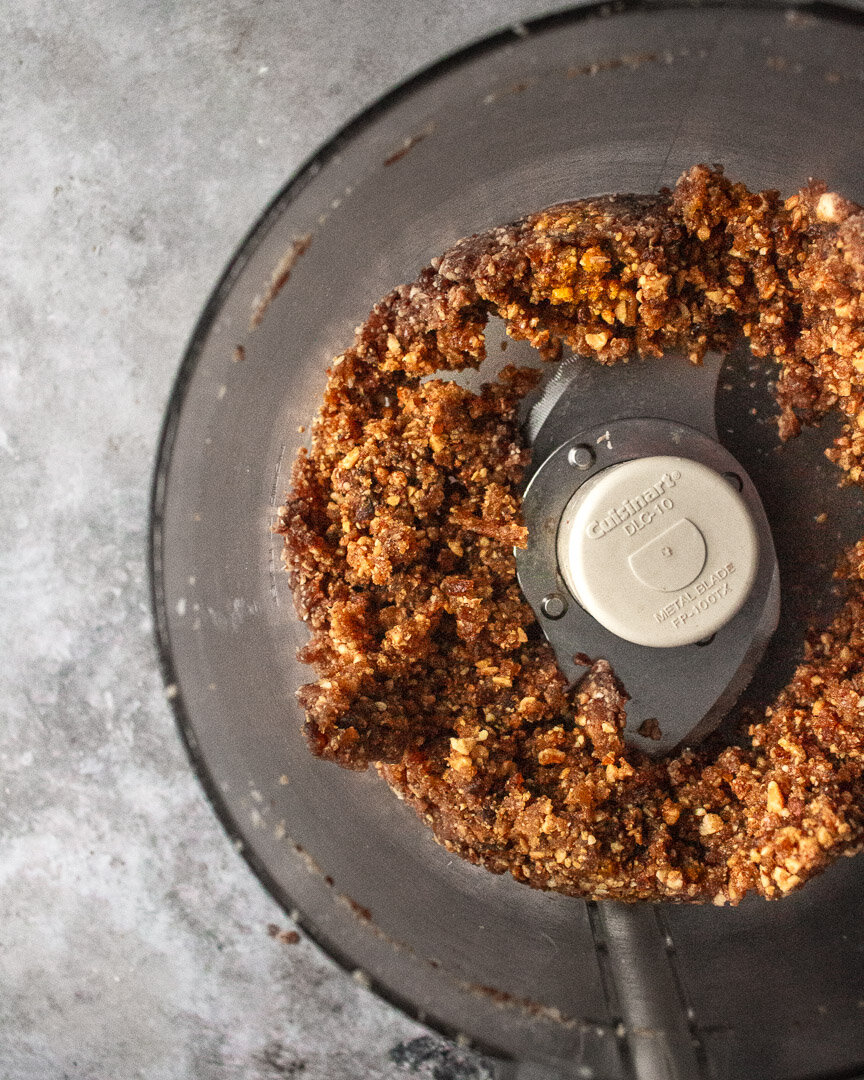
Put the toasted almonds and coconut in a food processor along with the dates, almond butter, almond extract, and salt. Whizz in the processor until the mixture comes together in one large mass, about 4-5 minutes. If the mixture doesn’t come together, sprinkle in about 1/2 tsp of water and try again, repeating about every 30 seconds until you have a large mass.

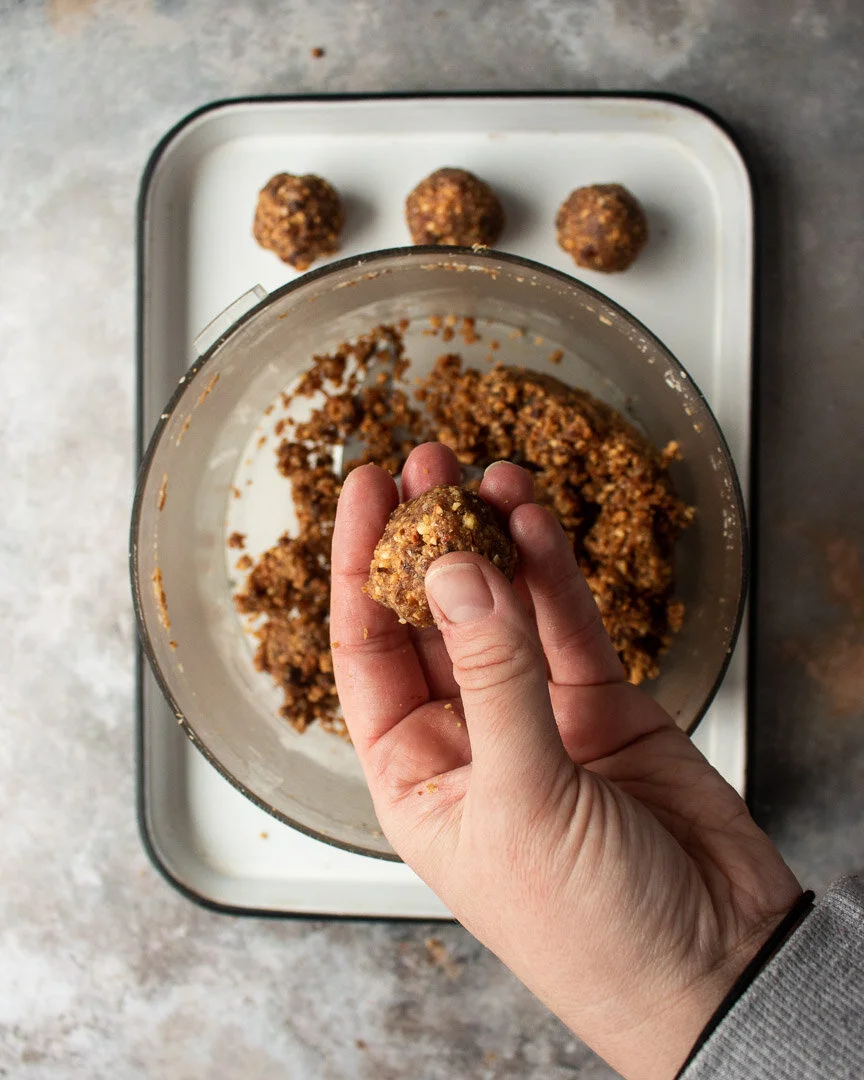
Scoop about 1 Tbsp of the mixture into wet hands and roll into a ball.

Chill the balls in the refrigerator to help them set.

Macadamia nut brittle no-churn ice cream

This no-churn Macadamia Nut Brittle Ice Cream is easier than it looks and so much better than the sum of its parts: A perfect quarantine project and summer dessert rolled into one. #meandthemoose #icecream #nochurnicecream #macadamianuts #macadamian…

Since we’re all still social distancing this summer, cut down on your trips out for ice cream by making this simple, but fancy-seeming caramel-y, nutty, and creamy no-churn ice cream at home.

Take me to the recipe!

This no-churn Macadamia Nut Brittle Ice Cream is easier than it looks and so much better than the sum of its parts: A perfect quarantine project and summer dessert rolled into one. #meandthemoose #icecream #nochurnicecream #macadamianuts #macadamian…

This dish is the epitome of “looks harder than it is” cooking. There are some tricky parts, but all told, the ice cream base only takes 10 minutes to put together and the brittle is about 10 minutes of prep and then 10 minutes of watching like a hawk and then you’re done!

So why should you bother with this recipe if it’s tricky? Well, it’s the best combination of a '‘project” because we all need things to fill the day, especially when those things result in delicious ice cream, and something simple. You won’t end up with hundreds of dishes and the ingredients are pretty easy to come by. (I mean, so far, there’s no run on sweetened condensed milk, but who knows. I got everything through a curb-side order from Target.)

This no-churn Macadamia Nut Brittle Ice Cream is easier than it looks and so much better than the sum of its parts: A perfect quarantine project and summer dessert rolled into one. #meandthemoose #icecream #nochurnicecream #macadamianuts #macadamian…

I also love no-churn ice cream because, even if you have one, who really wants to haul out an ice cream maker? The texture falls somewhere between soft serve (the love of my life) and hard ice cream,

This is also a great kids’ cooking project. Maybe do the scalding-hot-sugar portion yourself, but the rest (smashing brittle to pieces! whipping cream! Gently folding the two together!) is 5-year-old approved.

And best of all, the final ice cream is so much better than the sum of its parts. I literally couldn’t stop eating it. It’s caramely and crunchy, but also super creamy. It’s sweet, but not overly sugary. And for my husband, it brings him right back to childhood when he used to eat this now discontinued Haagen Dazs flavor with his dad.

This no-churn Macadamia Nut Brittle Ice Cream is easier than it looks and so much better than the sum of its parts: A perfect quarantine project and summer dessert rolled into one. #meandthemoose #icecream #nochurnicecream #macadamianuts #macadamian…

A couple of notes:

  • I barely adapted this recipe for the brittle from Bon Appetite, and added copious notes to demystify this process (don’t be put off by the length of the recipe below! it’s actually really simple!). Caramel is basically just-burned-enough sugar, but it goes from perfectly browned to acrid in a matter of seconds. So, to save you from redoing the brittle a few times and wasting ingredients, I’ve added a lot of notes within the recipe itself.

  • Read the directions through one or two times before making this. It’ll really streamline the process and help you anticipate what’s happening with the super hot sugar.

  • I’ve used salted nuts and salted butter, but both are optional: Use what you can find. If opting for unsalted nuts and butter, add some salt to the dry brittle ingredients (see note in the recipe).

This no-churn Macadamia Nut Brittle Ice Cream is easier than it looks and so much better than the sum of its parts: A perfect quarantine project and summer dessert rolled into one. #meandthemoose #icecream #nochurnicecream #macadamianuts #macadamian…

Macadamia nut brittle no-churn ice cream


Yield: 2½ cups brittle; about 5 cups ice cream  
Time: About 20-25 active minutes for the brittle; 10 minutes for the ice cream; 8 hours freezing time

For the brittle
(Adapted from Bon Appetite)

1 cup roasted, salted macadamia nuts, roughly chopped into peanut-sized pieces (you can also use unsalted, raw nuts, but you’ll need to roast them yourself in a 400 degree oven until they start to smell nutty and are slightly golden; and add ½ tsp of sea salt to the dry mixture)
1 Tbsp butter (salted or unsalted), straight from the fridge and chopped into 9 pieces
1 tsp baking soda
1 cup sugar
½ cup water (plus an extra ½ cup for wiping the sides of the saucepan while cooking)
2 Tbsp light corn syrup

Line a baking sheet with parchment paper and set aside.

Grease a spatula with butter and set aside.

Place a trivet or oven mitt on an area of your counter.

Fill a cup with some water and unearth your pastry brush. Set aside.

In a medium bowl, combine the chopped nuts, butter, and baking soda. Set aside.

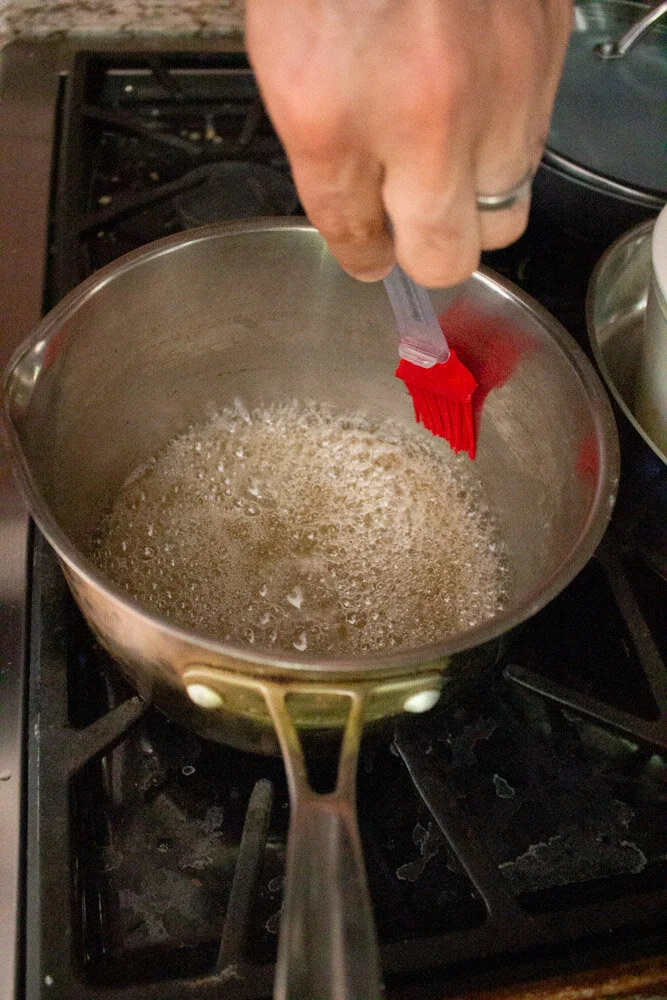
In a medium-sized, but deep (not wide) saucepan, combine the sugar, water, and corn syrup. Stir to combine with a second spatula (other than your greased one). Place over a medium-high flame and stir until the sugar dissolves and you can’t feel any grit, about 2-3 minutes.

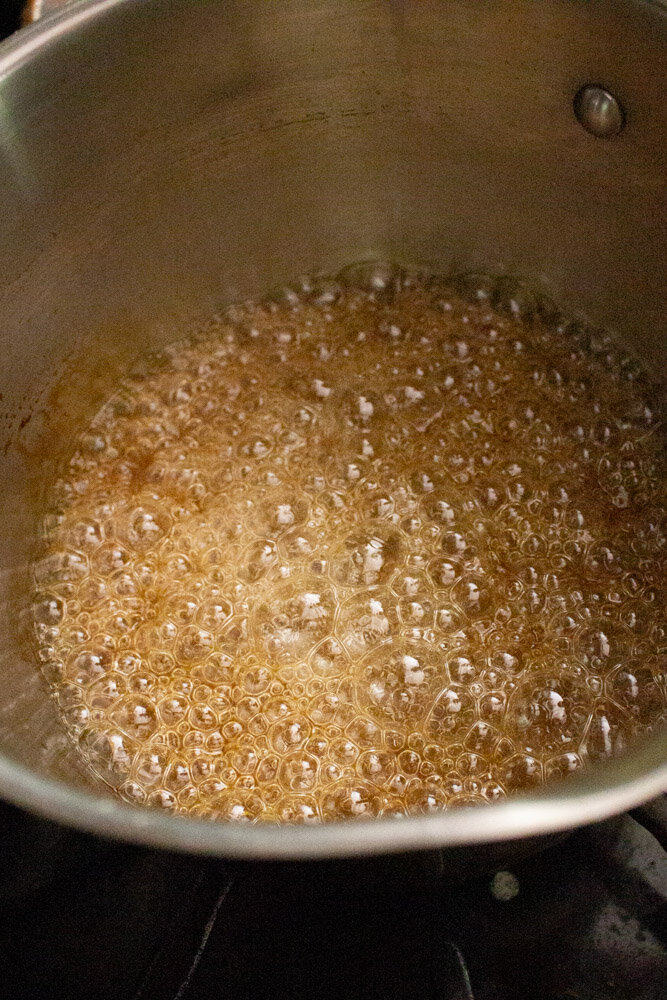
Leave the flame at medium-high and let the mixture come to a big, rolling boil for anywhere from 7-9 minutes. Do not stir.

  • The sugar usually turns from a clear, light-ish yellow to a golden camel color in about 8 minutes, but if your flame is slightly cooler or hotter than mine, it may take an extra minute or one minute less.

Every minute or so, wipe the insides of the pan with a wet pastry brush to remove thin layers of sugar water that may have splashed up the sides of the pan. Start with your brush about an inch away from surface of the hot sugar and then work your way down the sides of the pan with the wet brush, shimmying it from side to side, dissolving that thin layer as you go. Re-wet the brush often.   

  • It’s hot in there, so be careful. If the water bubbles or crackles so much that it spits onto your skin when you touch the sides with the wet brush, the pan is too hot. Turn down the flame slightly and try again in 30 seconds.

  • However, if you brush the insides of the pot with the water and it doesn’t make any hissing sound, your pan isn’t hot enough. Turn up the flame slightly and try again in 30 seconds.

  • Another temperature gauge is the steam or smoke coming off of your pan. You DO want some steam, you DO NOT want smoke. It can be hard to tell the difference. For me, the volume of that vapor is the easiest way to tell: Really visible, obvious steam that looks at all smoky means that your pan is too hot.

  • Once you’ve found a comfortable angle for wiping the sides, rotate the pan to ensure that you get everywhere, but aren’t sticking your hand awkwardly over burning hot sugar.

  • This cleaning method isn’t perfect and you’ll likely smell some burning sugar. Don’t let it fool you into thinking that your sugar is cooked too early. Just try to find the burning spot and give it an extra brush with water.

Let the pan bubble until the sugar turns that medium camel color. Every 30 seconds to 1 minute, give the pan a few swirls to make sure the sugar browns evenly. The edges of the sugar will cook faster than the center.

  •  These swirls should be vigorous enough to really mix the sugar, but not so vigorous that you splash more sugar onto the pan’s sides than necessary. Rotate the pan occasionally too.

  • If the bubbles make it hard to judge the color, use a rubber spatula to gently move the bubbles to one side and try to spot the color underneath.

Once you reach your desired camel color, remove the pan from the heat. (Don’t just turn the flame off, actually move the pan to the trivet we placed earlier. The caramel can burn quickly.)

Using the buttered spatula. stir in the nuts, butter, and baking soda and combine vigorously. It may take a minute for the butter to melt completely. The mixture should bubble up a bit thanks to the baking soda.

Immediately dump the mixture onto the parchment and spread into a thin layer with the buttered spatula. Let harden and cool completely while you make the ice cream base.

When it has completely cooled, smash the brittle into lots of small, pea-sized pieces. I use a kids’ hammer for this part.


For the ice cream
(Adapted from literally hundreds of recipes for no-churn vanilla ice cream)

2 cups heavy cream (1 pint)
14 oz sweetened condensed milk (1 small can)
1 tsp vanilla extract
1 generous pinch salt

In a large bowl or the bowl of stand mixer, combine all of the ingredients. Whisk slowly to combine.

Gradually increase speed until you’ve reached the highest setting or second highest setting on your hand mixer or high speed on your stand mixer. It will splatter either in the bowl of the mixer or all over your kitchen if using a hand mixer. Keep mixing..

Slowly, you’ll begin to see tracks in the cream from the whipping of the whisk attachment. When those tracks deepen and remain after the whish has gone through the cream, keep whisking for one more minute.  

This entire process should take about 5 minutes.

When the cream is whipped to “stiff peaks” stage (when you run a spoon through it, the indentation from the spoon should stay firmly in place), Gently fold in 1¾ cups of the brittle.

Move to the container you’ll use for freezing the ice cream. Top with another ¼ cup of brittle.

Freeze for at least 8 hours or overnight.   

Almond and coconut baked doughnuts

Almond and coconut doughnuts are a healthier treat packed with equal parts nutrition and deliciousness. #meandthemoose #healthybaking #doughnuts #healthydoughnuts #bakeddoughnuts #wholegrains #wholegrainbaking #breakfastrecipes #snackrecipes

A healthier baked doughnut that features whole grains, lower sugar, and my favorite flavor combination: Almond and coconut. YES, PLEASE.

Take me to the recipe!

Almond and coconut doughnuts are a healthier treat packed with equal parts nutrition and deliciousness. #meandthemoose #healthybaking #doughnuts #healthydoughnuts #bakeddoughnuts #wholegrains #wholegrainbaking #breakfastrecipes #snackrecipes

I have bad news and good news: I was diagnosed last week with gestational diabetes. Luckily, I’m in my third trimester and don’t have much longer to go, so what’s a few weeks of monitoring my blood sugar and trying to eat really healthy foods?

I did eat half of one of these doughnuts and it didn’t send my blood sugar soaring (thanks whole grains, coconut sugar, and healthy fats!), so that was another piece of good news. Obviously, if you have diabetes of any kind, you know what works best for your body or are working with your doctor to figure that out, so not everyone will be able to say the same. But I was glad to know that at lease some treats aren’t off the table.

What has made this so hard isn’t the dietary restrictions or even the blood sugar monitoring.

What’s hardest is the added layer of scrutiny over my body when pregnancy already casts a harsh, glaring spotlight. Every routine thing you eat, drink, use on your skin, or take for a headache feels so consequential. And anyone who’s had disordered eating in the past can tell you that it takes a lot of work to STOP feeling like these minor choices are so meaningful.

Ugh. It just feel like I’ve lost myself a little more with this diagnosis. I resigned myself 8 months ago to making all of the changes you have to make when pregnant for the greater, temporary good and I wish it didn’t feel like ever day meant cutting out one more thing that brings me joy.

And now i’ll stop complaining. There are real problems in the world.

But! Lack of a delicious, healthier doughnut option doesn’t have to be one of them!

Almond and coconut doughnuts are a healthier treat packed with equal parts nutrition and deliciousness. #meandthemoose #healthybaking #doughnuts #healthydoughnuts #bakeddoughnuts #wholegrains #wholegrainbaking #breakfastrecipes #snackrecipes

A couple of notes:

  • We’re aiming for a batter that is thicker than pancake batter, but thinner than cookie dough. Depending on how much liquid you get from your banana and egg, you may want to add more flour. Start with an extra Tbsp and keep adding until you’re happy with the density.

  • These doughnuts are okay without the topping, but the extra sugar, almonds, and  coconut really take them to a new place. I really don’t recommend skipping them.  

  • The brown sugar and coconut oil topping makes a pretty dense mixture and a lot of the topping will fall off. BUT, it’s delicious. If you’d like something a bit smoother and more glaze-like, you can swap in 6 Tbsp powdered sugar, enough water to make a thin glaze (start with ½ tsp and add slowly), and a few drops of almond extract.

Almond and coconut doughnuts are a healthier treat packed with equal parts nutrition and deliciousness. #meandthemoose #healthybaking #doughnuts #healthydoughnuts #bakeddoughnuts #wholegrains #wholegrainbaking #breakfastrecipes #snackrecipes

Almond coconut doughnuts

Yield: 10-12 doughnuts
Time: about 35 minutes, mostly active

 ½ large, very ripe banana, thoroughly smooshed
½ cup milk (any type will do!)
3 Tbsp full-fat yogurt (Greek or otherwise)
1 large egg
¾ cup coconut sugar
½ tsp almond extract
3 Tbsp coconut oil, melted
1¼ + 1/4 (if needed) cups Whole Wheat pastry flour (regular whole wheat flour or white whole wheat flour work too, but the texture is slightly denser)
1¼ tsp baking powder
½ tsp salt
½ cup shredded unsweetened coconut 
½ tsp cinnamon
¼ tsp cardamom

Topping:
3 Tbsp coconut oil
3 Tbsp brown sugar
½ cup toasted coconut slivers
½ cup toasted almond slivers
½ tsp cinnamon

Preheat oven to 375.

Grease your doughnuts pans with coconut or other neural oil and set aside

In a large bowl, smush the banana as much as possible. Add the rest of the wet ingredients except the coconut oil and whisk together.

Add 1¼ cups flour, baking powder, salt, shredded coconut, cinnamon, and cardamom. Mix well.

Add the coconut oil and mix well. If the mixture is too runny (if it looks like pancake batter), add the remaining ¼ cup of flour 1 Tbsp at a time and mix again.

Fill each doughnut tin about 2/3 full. 

Cook both pans (if using 2 doughnut pans) in the same oven for 10-12 minutes, or until the doughnuts just spring back when poked lightly with a finger. Rotate and pans after 5 minutes to ensure even baking.

Let cool.

In a separate small bowl, combine the coconut oil (that should still be rather liquid) with the brown sugar and cinnamon and mix. If the mixture seems too liquid and not spreadable, chill it in the refrigerator until slightly more set.

On a baking sheet, combine the coconut flakes and the sliced almonds and let brown in the cooling oven, abut 6 minutes or until you begin to smell the nuts.

Spread a small amount of the sugar and coconut oil mixture on each doughnut and sprinkle the toasted nuts and coconut over the top, pressing lightly to get them to stick.

Coconut and cardamom alfajores

Alfajores made easier with store-bought dulce de leche and a streamlined recipe and method. Save time AND make delicious cookies this year! #meandthemoose #holidaybaking #Christmascookies #alfajores #shortbreadcookies #dulcedeleche #cookierecipes #b…

You may think you don’t need another holiday cookie recipe, but these are subtly spiced, barely sweet, and super easy. Win, win, win!

Take me to the cookies!

Alfajores made easier with store-bought dulce de leche and a streamlined recipe and method. Save time AND make delicious cookies this year! #meandthemoose #holidaybaking #Christmascookies #alfajores #shortbreadcookies #dulcedeleche #cookierecipes #b…

First of all, who’s had Alfajores before? If not, get thee to an Argentinian bakery because they. are. delicious. This South American staple uses dulce de leche in between two soft, cakey, vanilla cookies and is then rolled in shredded coconut.

In the US version, we often swap the softer cookie for a crispier vanilla shortbread, which I prefer. Also, I decided to skip the shredded coconut on the outside and opt for a coconut-flavored shortbread because, while I love the taste of coconut, I don’t always love its texture.

Alfajores made easier with store-bought dulce de leche and a streamlined recipe and method. Save time AND make delicious cookies this year! #meandthemoose #holidaybaking #Christmascookies #alfajores #shortbreadcookies #dulcedeleche #cookierecipes #b…

I started with this Coconut Shortbread recipe from Food52, but simplified the method, dialed down the sugar, swapped two egg yolks for one whole egg, and added a tiny bit of cardamom for a warmer, spicier flavor that felt right for the holidays.

You know what else feels right for the holidays? Shortcuts. In this version of the recipe, we use only one bowl and mix up cold fats with the rest of the ingredients in a food processor instead of a mixer.

AND, this part might seem like sacrilege to some, but I used jarred dulce de leche. I know, I know. Bad food blogger, bad! I like this one the most and found it at World Market, but you can also find it online. If you feel like making your own, here are some options:

Smitten Kitchen’s stovetop dulce de leche
Displaced Housewife’s olive oil dulce de leche
Live Well Bake Often’s oven-baked dulce de leche
The Spruce Eats boiled condensed milk dulce de leche

Here we go!

Alfajores made easier with store-bought dulce de leche and a streamlined recipe and method. Save time AND make delicious cookies this year! #meandthemoose #holidaybaking #Christmascookies #alfajores #shortbreadcookies #dulcedeleche #cookierecipes #b…

Coconut and cardamom alfajores

Yield: 24 cutout cookies; 12 sandwiches
Time: 90 minutes (about 30 active)

½ cup (1 stick) butter, cut into ½ inch cubes
6 Tbsp coconut oil (solid)
½ cup cane sugar (can substitute granulated sugar if necessary)
1 tsp vanilla extract
1 egg
2 cups all-purpose flour
¼ cup coconut flour
1/4 tsp cardamom
¼ tsp sea salt
1 15-oz jar of dulce de leche

Cube the butter and add it to a food processor. Add the coconut oil (making sure it’s solid). Run the food processor until the butter and coconut oil have combined and are smooth, about 30 seconds. You may have to scrape down the sides.

Add the sugar, vanilla extract, and egg. Run the machine until the ingredients are well combined. Again, you may have to scrape down the sides.

Add the dry ingredients and pulse just until the dough comes together. I often need to scrape the sides once. The end result of the dough should be a crumbly wet dough that’s in large and small sandy chunks that come together easily when pressed.  The dough should be wetter than a pie dough, but slightly more crumbly than your typical sugar cookie dough.

Divide the dough roughly in half and place one dough chunk on a sheet of parchment paper. Using the paper or your hands to form a ball. Place another piece of parchment on top of the dough ball and roll out to a ¼-inch thick disk. Repeat with the other half of the dough. Chill both dough disks in the refrigerator for 30 minutes.

When the dough has chilled for about 25 minutes, preheat the oven to 325.

Working one disk at a time, remove the top parchment sheet from each half and use it to line a cookie sheet. Cut out as many shapes as possible and gently transfer them. Re-roll the dough to cut out more shapes. For the cookies that will be the base of each sandwich, score gently with a fork. For the top cookie, cut out any shape you like from the middle.

Bake the cutout cookies for 14-17 minutes, turning once during baking to ensure even cooking. The cookies are done when they just begin to brown. Let cool.  

When the cookies are cool, top each bottom portion with 2-3 Tbsp of dulce de leche and top with a cutout cookie.