Turkey and spinach meatloaf

Turkey and spinach meatloaf is loaded with nourishing ingredients, is a snap to put together, and pleases almost everyone in my family. Turkey and spinach meatloaf | Me & the moose #meandthemoose #meatloaf #glutenfree #dinnerrecipes #turkeymeatloaf

This turkey meatloaf is quick, nutritious, gluten free, and delicious!

Take me to the recipe!

Turkey and spinach meatloaf is loaded with nourishing ingredients, is a snap to put together, and pleases almost everyone in my family. Turkey and spinach meatloaf | Me & the moose #meandthemoose #meatloaf #glutenfree #dinnerrecipes #turkeymeatloaf

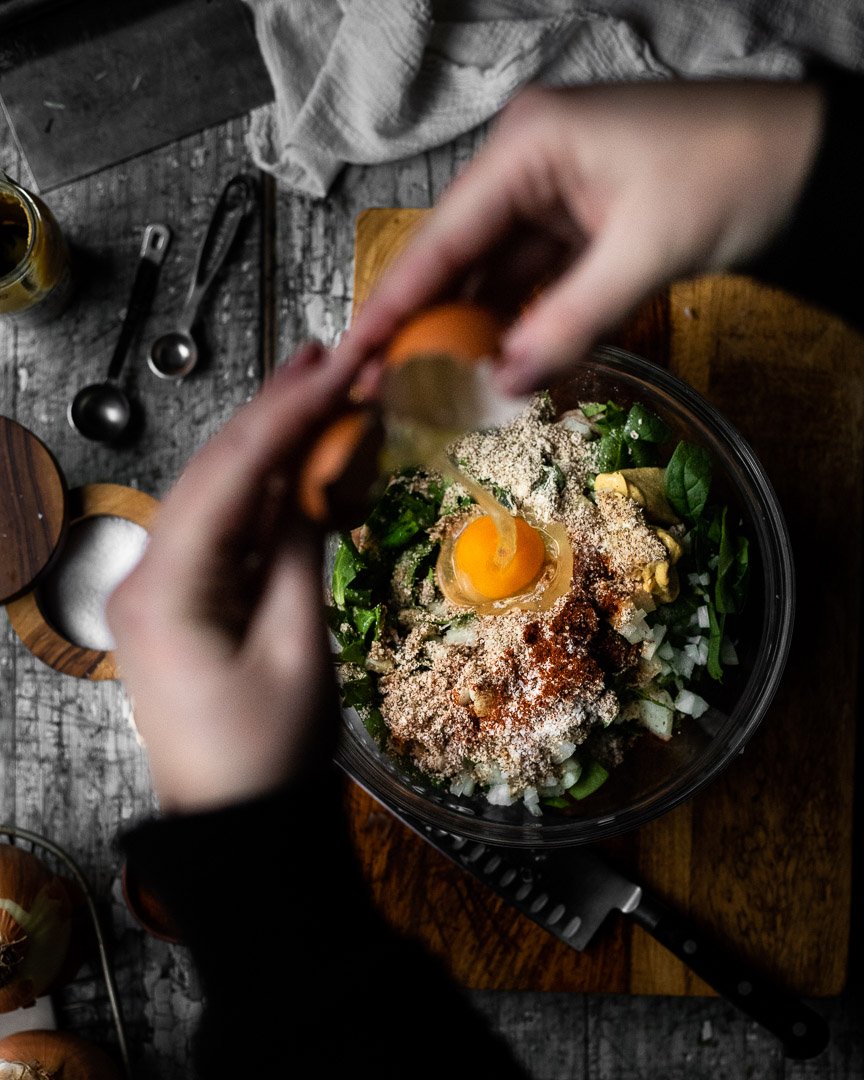
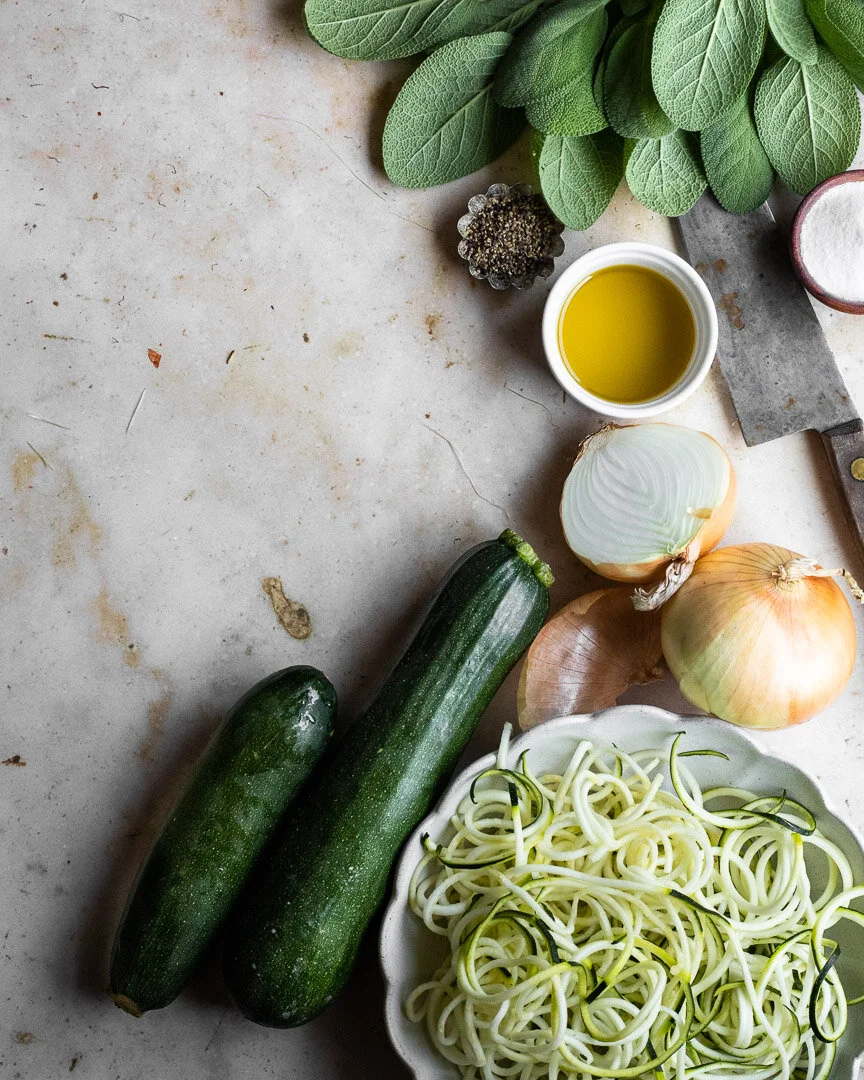
So, meatloaf. A bad one is dense, bland, kind of pasty, and just all around gross. This version is different! One of my secrets is adding in other stuff like onions and spinach to increase the water content, which adds steam while it cooks, which makes for a lighter and fluffier loaf.

The almond meal makes this gluten free, but I also find that it makes the loaf a little lighter because the traditional breadcrumbs and milk can add to the pastiness.

Basically, this meatloaf is a lighter meat and lots of veggies and aromatics held together with just enough egg and almond meal to make it a “loaf.”

I top mine with ketchup, but if you’re watching your sugar, tomato paste or sugar-free ketchup also work really well. My kids love BBQ sauce, so I’ll top one or two of the mini loaves with that instead of ketchup to suit their tastes.

Turkey and spinach meatloaf is loaded with nourishing ingredients, is a snap to put together, and pleases almost everyone in my family. Turkey and spinach meatloaf | Me & the moose #meandthemoose #meatloaf #glutenfree #dinnerrecipes #turkeymeatloaf

Turkey and spinach meatloaf is loaded with nourishing ingredients, is a snap to put together, and pleases almost everyone in my family. Turkey and spinach meatloaf | Me & the moose #meandthemoose #meatloaf #glutenfree #dinnerrecipes #turkeymeatloaf

Turkey and spinach meatloaf is loaded with nourishing ingredients, is a snap to put together, and pleases almost everyone in my family. Turkey and spinach meatloaf | Me & the moose #meandthemoose #meatloaf #glutenfree #dinnerrecipes #turkeymeatloaf

One note about how I make these loaves: I make them as mini loaves because they cook so much faster individually. If you like a traditional meatloaf made in an actual loaf pan, this recipe also cooks well in a pan, but it takes quite a bit longer. Still delicious either way!

Turkey and spinach meatloaf is loaded with nourishing ingredients, is a snap to put together, and pleases almost everyone in my family. Turkey and spinach meatloaf | Me & the moose #meandthemoose #meatloaf #glutenfree #dinnerrecipes #turkeymeatloaf

Turkey and spinach meatloaf

Time: 25 minutes
Yield: 4 mini loaves

1 lb ground turkey
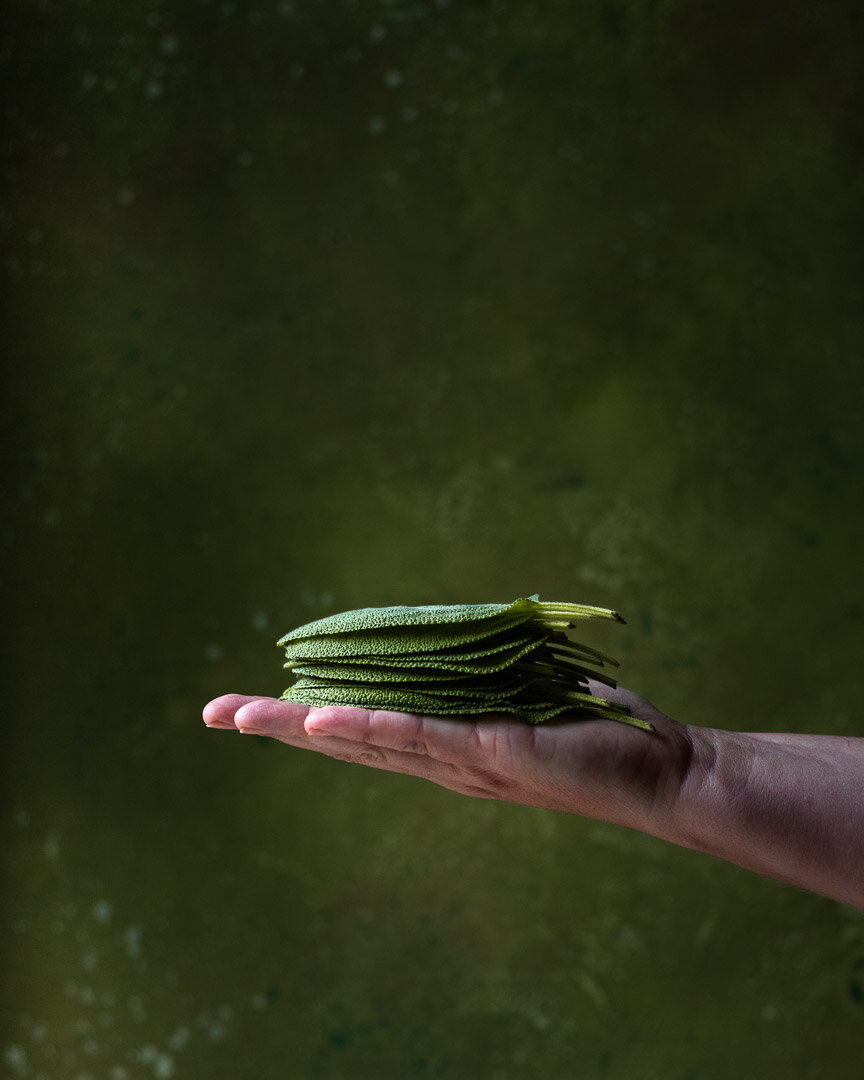
1.5-2 cups spinach or greens, roughly chopped
1/2 large onion, minced
1 egg
1/2 cup almond meal or almond flour
1/2 tsp garlic powder
1/2 tsp paprika
1 tsp kosher salt
pepper, to taste
Ketchup, tomato paste, or BBQ sauce, for topping

Preheat the oven to 400.

Roughly chop the greens. Mince the onion. Add these chopped veggies to a large bowl and add the rest of the ingredients, except for the ketchup, tomato paste, or BBQ sauce.

Using your hands or a spatula, mix the ingredients until just combined and distributed.

With a large spoon, plop four equal portions onto a sheet pan and smooth each into a rough loaf shape.

Top with ketchup or sauce of choice.

Bake for 15 minutes or until a meat thermometer reads 165.
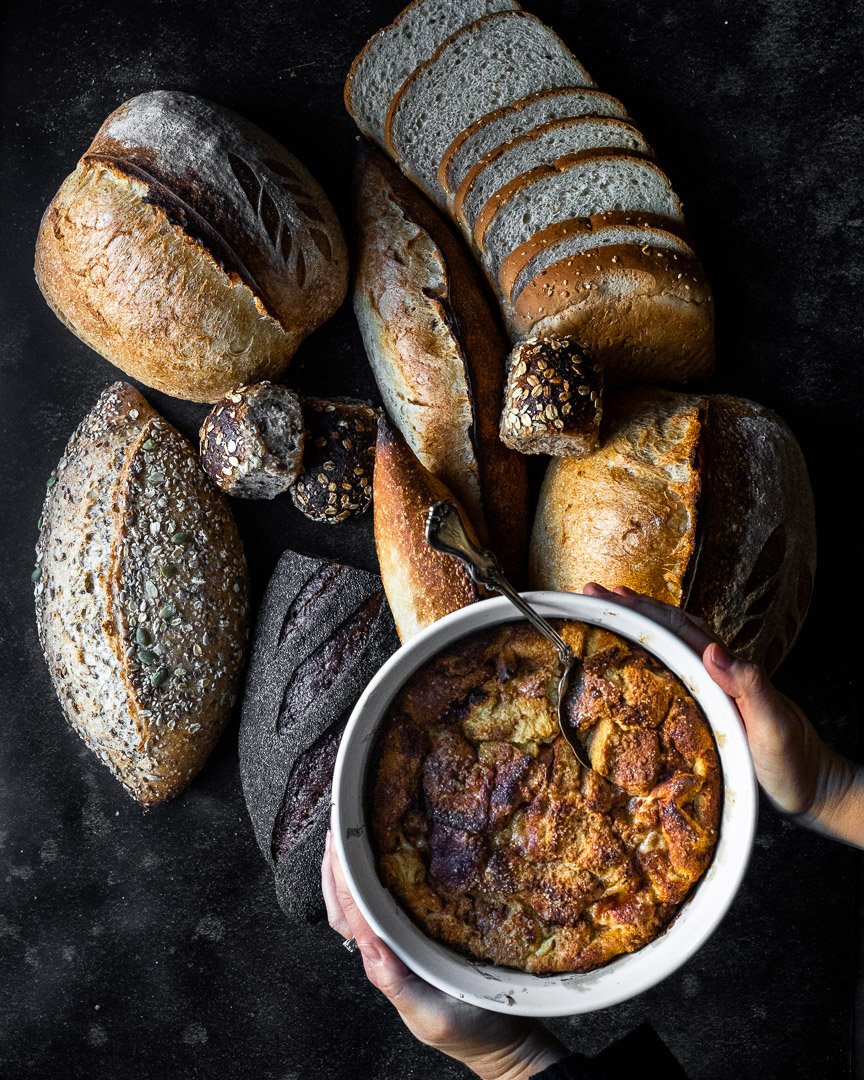
Everything potato gratin

Everything Potato Gratin | This easy side dish is the perfect way to make something that seems fancy (gratin!) while using all the shortcuts (barely any chopping!). #meandthemoose #potatoes #gratin #everythingbagelspice #easysidedishes

This easy side dish is the perfect way to make something that seems fancy (gratin!) while using all the shortcuts (barely any chopping!).

Take me to the recipe!

Everything Potato Gratin | This easy side dish is the perfect way to make something that seems fancy (gratin!) while using all the shortcuts (barely any chopping!). #meandthemoose #potatoes #gratin #everythingbagelspice #easysidedishes

Everything Potato Gratin | This easy side dish is the perfect way to make something that seems fancy (gratin!) while using all the shortcuts (barely any chopping!). #meandthemoose #potatoes #gratin #everythingbagelspice #easysidedishes

Everything Potato Gratin | This easy side dish is the perfect way to make something that seems fancy (gratin!) while using all the shortcuts (barely any chopping!). #meandthemoose #potatoes #gratin #everythingbagelspice #easysidedishes

So, I used Jamie Oliver’s method for a quicker potato gratin. Gratin’s usually need up to an hour in the oven, but by combining cooking methods, you can get a creamy, crunchy, crispy dish in less than 30 minutes. Also, using everything bagel spice means that you don’t have to chop any onions or garlic or really measure much of anything.

Everything Potato Gratin | This easy side dish is the perfect way to make something that seems fancy (gratin!) while using all the shortcuts (barely any chopping!). #meandthemoose #potatoes #gratin #everythingbagelspice #easysidedishes

Just a quick word of warning: Use oven mitts to secure the tin foil over your skillet or tin on the stove. You want a tight seal so that the potatoes steam a bit before going into the oven. ALSO, use caution when removing the foil as the steam is plentiful and HOT.

A note about SALT: I don’t add any in this recipe because most of the pre-made Everything Bagel spice mixes are pretty salty. Check your labels and then decide if you want to add more salt. I would recommend a sprinkle of sea salt over the top of the finished gratin if you feel like it needs more.

Everything Potato Gratin | This easy side dish is the perfect way to make something that seems fancy (gratin!) while using all the shortcuts (barely any chopping!). #meandthemoose #potatoes #gratin #everythingbagelspice #easysidedishes

Everything Potato Gratin

1½ lbs russet potatoes (about 2 very large), peeled and sliced thinly 
½ cup heavy cream 
½ cup water 
2½ Tbsp everything bagel spice, divided
5-6 sprigs of fresh thyme
1½ cups grated cheese (mixture of gruyere, asiago, gouda)  

Time: about 30 minutes, mostly active
Yield: 5 side servings

Preheat the oven to 425. 

In a large oven-proof skillet or tin, spread the thinly sliced potatoes. 

In a large measuring cup, combine the milk, water, and 1 1/2 Tbsp of everything bagel spice. Pour over the potatoes in the skillet. Add the fresh thyme and stir well to combine and to spread out the dried and fresh herbs.

Over a medium-high flame, bring the liquid to a boil. The liquid around the edges of the pan will boil quickly. Look for the first few bubbles in the middle of the pan and turn down the flame to medium-low. 

Carefully wrap a piece of tin foil over the top of the skillet or tin. I wear oven mitts to do this because I want a tight seal, but I don’t want to burn myself. Let cook over a medium-low flame for 6 minutes.

Turn off the flame and CAREFULLY remove the foil being sure to wear oven mitts and to remove the foil away from you to avoid the hot steam.

Top evenly with the grated cheese.

Cook, uncovered, in the oven for 15 minutes. Top with the remaining 1/2 Tbsp of everything bagel spice.

 Let cool slightly and serve.

French toast casserole

French toast casserole | Me & The Moose. Use up your sandwich bread crusts and heels with this no-soak, fast, simple French toast casserole. #meandthemoose #frenchtoast #breakfastrecipes #nosoakfrenchtoast #fastfancyrecipes

Don’t throw out the sandwich bread crusts and heels that your kids won’t eat! Turn them into a simple, fast French toast casserole that’s crunchy, eggy, cinnamon-y, and caramel-y.

Take me to the recipe!

French toast casserole | Me & The Moose. Use up your sandwich bread crusts and heels with this no-soak, fast, simple French toast casserole. #meandthemoose #frenchtoast #breakfastrecipes #nosoakfrenchtoast #fastfancyrecipes

Why don’t kids like bread crusts? Is that universal? I thought it was bullshit until I had kids of my own and one day, the older one disavowed bread crusts FOR NO REASON.

Funnily, my husband was horrified when M started insisting that the crusts be cut off because he was like, “that’s where all the fiber is!” To which I laughed in his face because what?! Bread isn’t an apple.

Anyhoo, this recipe is the perfect way to use up bread scraps. However, this isn’t a good recipe for that rock hard baguette or formerly crusty loaf that you forgot about. This is for the ever-so-slightly tougher outer layer of sandwich bread that you’ve been saving in a bag in the fridge so it didn’t get too stale.

Why do I advocate for using softer, fresher bread? I’ll tell you! Because most French toast casserole recipes require an overnight soak. But I, for one, am way too tired at the end of the day to plan for tomorrow’s breakfast. This recipe requires no waiting, something I am not very good at anyway.

A couple of notes:

  • Amounts: As always, the amounts listed here can be considered guidelines or ratios more than hard and fast rules. If you want the caramel on the bottom to be more like what you’d find in a sticky bun, feel free to increase the butter and sugar! Or if you have more or less than 6 cups of bread, adjust accordingly. This one is very forgiving.

  • Eggs: You want the egg/milk/vanilla/cinnamon mixture to come up about 3/4 of the way to the top of the bread. But pour in the amount listed and squish the bread down gently with your hands. If you can easily see the liquid underneath, you have enough. If you have to push down more firmly to see any liquid or if it just doesn’t feel like enough to you, add more. It’s better to have a little too much liquid than not enough. But DO NOT cover the bread with the egg mixture.

French toast casserole | Me & The Moose. Use up your sandwich bread crusts and heels with this no-soak, fast, simple French toast casserole. #meandthemoose #frenchtoast #breakfastrecipes #nosoakfrenchtoast #fastfancyrecipes

French toast casserole | Me & The Moose. Use up your sandwich bread crusts and heels with this no-soak, fast, simple French toast casserole. #meandthemoose #frenchtoast #breakfastrecipes #nosoakfrenchtoast #fastfancyrecipes

French toast casserole | Me & The Moose. Use up your sandwich bread crusts and heels with this no-soak, fast, simple French toast casserole. #meandthemoose #frenchtoast #breakfastrecipes #nosoakfrenchtoast #fastfancyrecipes

French toast casserole | Me & The Moose. Use up your sandwich bread crusts and heels with this no-soak, fast, simple French toast casserole. #meandthemoose #frenchtoast #breakfastrecipes #nosoakfrenchtoast #fastfancyrecipes

French toast casserole 

 Time: 35 minutes
Yield: 6 large servings

Adapted from https://belleofthekitchen.com/french-toast-casserole/

4 Tbsp butter 
½ cup brown sugar + 1 Tbsp (reserved for later)
6 cups roughly torn bread hunks
2 cup milk 
4 large eggs
2 tsp vanilla extract 
1 tsp cinnamon (or any combination of cinnamon, nutmeg, cardamom, ginger, and cloves)
3 Tbsp coarse sugar (or substitute with granulated)  

Preheat the oven to 425.

In a large ceramic baking dish (though if metal is your only option, melt the butter and sugar in a separate bowl and then add to the baking dish), combine the butter and ½ cup of brown sugar. Microwave on high for 30 seconds or until the butter has just melted. Stir for 1 minute or until the butter and the sugar are mostly combined. Spread the mixture evenly on the bottom of your baking dish.

Top the melted butter and brown sugar with the roughly torn bread cubes. 

In a large measuring cup, combine the milk, eggs, vanilla extract and cinnamon. Whisk until all of the ingredients are incorporated. 

Pour over the bread cubes. Push down gently on the bread to assess how much liquid is in your baking dish. If the liquid doesn’t come up about ¾ of the way to the top of the bread cubes, whisk together another ½ cup of milk and 1 egg and add as much of the mixture as needed to achieve that depth of liquid.  

Combine the remaining 1 Tbsp of brown sugar and the coarse sugar and sprinkle over the top of the casserole. 

Bake for 25-30 minutes or until the middle puffs up and doesn’t jiggle when you gently shake the baking dish.

Cucumber, seaweed, and soba noodle salad

This easy, light salad combines a few ingredients into a subtle, delicious vegan dish that’s ready fast and is a great lunch or dinner option. #meandthemoose #lunch #dinner #recipes #easyrecipes #vegan #vegetarian

This easy, light salad combines a few ingredients into a subtle, delicious vegan dish that’s ready fast and is a great lunch or dinner option. #meandthemoose #lunch #dinner #recipes #easyrecipes #vegan #vegetarian

Before the well of summer cucumbers runs dry, make this easy, light salad that’s ready in a snap and is, at least in this house, very kid-approved!

Take me to the recipe!

This easy, light salad combines a few ingredients into a subtle, delicious vegan dish that’s ready fast and is a great lunch or dinner option. #meandthemoose #lunch #dinner #recipes #easyrecipes #vegan #vegetarian

This easy, light salad combines a few ingredients into a subtle, delicious vegan dish that’s ready fast and is a great lunch or dinner option. #meandthemoose #lunch #dinner #recipes #easyrecipes #vegan #vegetarian

We eat a lot of Japanese food in our house, so my love for these ingredients runs deep. I absolutely can’t turn down a seaweed salad. Ditto nutty buckwheat soba noodles. Unlike whole wheat or other whole grain noodles, soba doesn’t have that gummy (unless you WAAAAAY overcook it!) or gritty texture that can plague say, whole what spaghetti, so the flavor of the noodles really shines.

Everything about this salad is subtle. There aren’t any overwhelming flavors and all of the elements are in harmony with each other: A little salty, a little sweet, a little nutty, a little tangy, a little briny, and a little cool. The seaweed adds a salty, funky flavor and a little crunch. The cucumber adds even more crunch and and is a cooler counterpoint to the sauce that’s made of soy, rice vinegar, brown sugar, and sesame oil.

While this is a light salad that we usually eat as a side (though I’ve had it alone for lunch and it’s V satisfying), the soba offer some heft that leaves you feeling pretty full. My 6-year-old loves it because he loves anything with soy sauce and my almost 18-month-old loves it because he would eat noodles all day, every day.

But the real key to this salad is getting rid of the excess water from the cucumbers, noodles, and rehydrated seaweed. It’s a funny recipe because you have to add water to each element before you get rid of it. But the more you squeeze out, the more potent the sauce tastes. It’s worth a little elbow grease!

This easy, light salad combines a few ingredients into a subtle, delicious vegan dish that’s ready fast and is a great lunch or dinner option. #meandthemoose #lunch #dinner #recipes #easyrecipes #vegan #vegetarian

This easy, light salad combines a few ingredients into a subtle, delicious vegan dish that’s ready fast and is a great lunch or dinner option. #meandthemoose #lunch #dinner #recipes #easyrecipes #vegan #vegetarian

This easy, light salad combines a few ingredients into a subtle, delicious vegan dish that’s ready fast and is a great lunch or dinner option. #meandthemoose #lunch #dinner #recipes #easyrecipes #vegan #vegetarian

This easy, light salad combines a few ingredients into a subtle, delicious vegan dish that’s ready fast and is a great lunch or dinner option. #meandthemoose #lunch #dinner #recipes #easyrecipes #vegan #vegetarian

A couple of notes:

  • I used hijiki seaweed in developing this recipe because I love it, but have JUST NOW learned that it naturally contains a really high level of inorganic arsenic, which can be carcinogenic to humans. Whoopsie daisy. Instead, sub in wakame, which doesn’t contain the same levels of arsenic and is prepared roughly the same way—just rehydrate in water while you prep the rest of the salad.

  • In the US, you can find dried wakame seaweed in Japanese grocery stores, health food stores, or in the all-purpose grocery store (our Whole Foods has it).

  • Before you add the rice vinegar, check your bottle’s label and see if you have plain rice vinegar or “seasoned” rice vinegar. The “seasoned” variety has some added sugar already, so I decrease the brown sugar a little bit to avoid over-sweetening the sauce. See recipe note for exact changes.

This easy, light salad combines a few ingredients into a subtle, delicious vegan dish that’s ready fast and is a great lunch or dinner option. #meandthemoose #lunch #dinner #recipes #easyrecipes #vegan #vegetarian

This easy, light salad combines a few ingredients into a subtle, delicious vegan dish that’s ready fast and is a great lunch or dinner option. #meandthemoose #lunch #dinner #recipes #easyrecipes #vegan #vegetarian

Cucumber, seaweed, and soba noodle salad

Time: About 35 minutes
Yield: About 6 cups of salad

6 Tbsp dried seaweed (wakame or hijiki, but see note above!)
2 cups hot water
1 large cucumber, thinly sliced
1 tsp salt 
9 oz buckwheat soba noodles (2 bundles)
3-4 Tbsp unseasoned rice vinegar*
1.5 tsp brown sugar*
4 tsp soy sauce
4 tsp sesame oil
2 tsp white or black sesame seeds 


*if using “seasoned” rice vinegar, decrease the sugar to 1 tsp

Combine the dried seaweed with 2 cups of your hottest water from the tap (you can use boiling water, but hot water works just fine, in my experience). Set aside.

Slice the cucumber into very thin slices. Using a mandolin is great here, but if you don’t have one, a vegetable peeler also does the trick. Or just practice your knife skills- whatever works!

Place the cucumber slices in a strainer and top with 1 tsp salt. Massage a little with your hands and let sit in the sink to drain while you make the rest of the salad.

Boil the water. When the water boils, add the soba noodles and cook according to the package directions (usually about 5 minutes).

While the noodles cook, make the sauce. Combine the rice vinegar, sugar, soy sauce, and sesame oil in a small container and shake to combine.

When the noodles are cooked, drain very well. I even use a few paper towels to dab up some of the excess water.

Add the noodles to a large bowl and set aside.

Drain the seaweed really well. Again, I use a few paper towels to soak up some of the excess water, but I DO NOT squeeze out the seaweed.

Add the seaweed to the noodles in a large bowl and set aside again.

Rinse the salt off of the cucumbers and drain well. Add the cucumbers to a paper towel, cheesecloth, or dish towel and squeeze to remove as much excess water as possible. Add to the bowl of noodles and seaweed.

Stir the cucumbers, seaweed, and noodles to combine. Top with the sauce and stir well to coat.

Just before serving, top with sesame seeds.

Zucchini with sage and caramelized onions

This simple dish celebrates summer produce and herbs like zucchini and sage. #caramelizedonions #sage #simplerecipes #dinner #lunch #vegetarian

This simple dish celebrates summer produce and herbs like zucchini and sage. #caramelizedonions #sage #simplerecipes #dinner #lunch #vegetarian

This 5-ingredient dish (I’m not counting water, salt, and pepper) is super simple, but tastes surprisingly complex and can be customized in endless ways to suit your family’s tastes.

Take me to the recipe!

This simple dish celebrates summer produce and herbs like zucchini and sage. #caramelizedonions #sage #simplerecipes #dinner #lunch #vegetarian

This simple dish celebrates summer produce and herbs like zucchini and sage. #caramelizedonions #sage #simplerecipes #dinner #lunch #vegetarian

So, I love zucchini. I actually kind of grieved when my glorious early zucchini plant withered and died thanks to a hungry squash vine borer this summer. But, truth be told, zucchini is kind of a zero in the flavor department. One of its best qualities is that it takes on the personality of whatever it’s paired with, right?

Take zoodles, for example. You would think the titular veg would be the star of the show, but those fake noodles are nothing without a great sauce!

Anyway, THIS zucchini dish has caramelized onions and plenty of salt for flavor, sage for herbiness, and goat cheese to give everything a creamy, saucy vibe. The zucchini is really there for body and to provide a base for the other flavors and it totally does the job!

This simple dish celebrates summer produce and herbs like zucchini and sage. #caramelizedonions #sage #simplerecipes #dinner #lunch #vegetarian

This simple dish celebrates summer produce and herbs like zucchini and sage. #caramelizedonions #sage #simplerecipes #dinner #lunch #vegetarian

This simple dish celebrates summer produce and herbs like zucchini and sage. #caramelizedonions #sage #simplerecipes #dinner #lunch #vegetarian

This simple dish celebrates summer produce and herbs like zucchini and sage. #caramelizedonions #sage #simplerecipes #dinner #lunch #vegetarian

But can we talk about sage for a second? Where our zucchini flopped, our sage flourished and we ended up with the most gigantic and brilliant green leaves. But sage feels so autumnal that I struggle to use it in the summer time. And in all fairness, the combo of caramelized onions, goat cheese, and sage does have an autumn vibe. But when paired with the summery zucchini, you can totally eat this in July without feeling like you’re trying to speed up time.

A couple of notes:

  • I spiralized the zucchini, but when cooking the zoodles, they produce a lot of water. If you want something a little dryer or just don’t have/don’t want a spiralizer, just chop the zucchini into 1/2 inch cubes. They’ll be less wet, but no less delicious.

  • We added white fish to this dish the first time we made it and it was my favorite iteration by far. You can absolutely add a can of beans, shredded chicken, or any other protein as well. But anything that requires more than a few minutes of cooking time (the white fish was thin and cooked in about 6 minutes) should be pre-cooked and added along with the zucchini to heat up during the veg’s short cooking time.

This simple dish celebrates summer produce and herbs like zucchini and sage. #caramelizedonions #sage #simplerecipes #dinner #lunch #vegetarian

This simple dish celebrates summer produce and herbs like zucchini and sage. #caramelizedonions #sage #simplerecipes #dinner #lunch #vegetarian

Zucchini with caramelized onions and sage

Time: 30 minutes, all active
Yield: 2 large adult servings, 2 kid servings or more if you add protein

2 large onions, thinly sliced
2 Tbsp olive oil
2 -3 cups water
1 tsp salt, divided, or to taste
5-10 x-large sage leaves (about 1½ to 3 Tbsp chopped fresh sage), to taste
2 large zucchini, chopped or spiralized
Pepper, to taste
½ cup soft goat cheese, or to taste

Heat the olive oil in a large pan with a tight fitting lid until a drop of water sizzles. 

Turn the flame to medium* and add the onions. Stir frequently until some browning begins on the onions or in the pan. Once this happens, add 2-3 Tbsp of water (or, enough to loosen those browned bits from the bottom of the pan), stir and scrape to loosen the browned bits, cover with the lid, and let cook for 2 minutes.**

Repeat this process until the onions are soft and have turned a dark brown color.

*If the onions or the pan are browning too fast, turn down the flame. 

**If there is too much water in the pan when you take off the lid after letting the onions cook for 2 minutes, turn up the flame and let the onions cook with the cover off until there’s more browning on the pan that can be deglazed.

Once the onions are browned to your liking (I usually stop after about 20 minutes), add ½ tsp salt and pepper to taste. 

Add the sage and stir well. 

(If adding protein to the pan, add it now and cook to your preferred doneness.)

Add the zucchini and stir into the onions and sage. Cook for 2-3 minutes, or until the zucchini is slightly wilted. I like the zucchini to have a bit of crunch, so if you like it cooked a bit more, add a few more minutes here.

Add the rest of the salt and pepper to taste. 

Top with the goat cheese and serve.