Boneyard bark
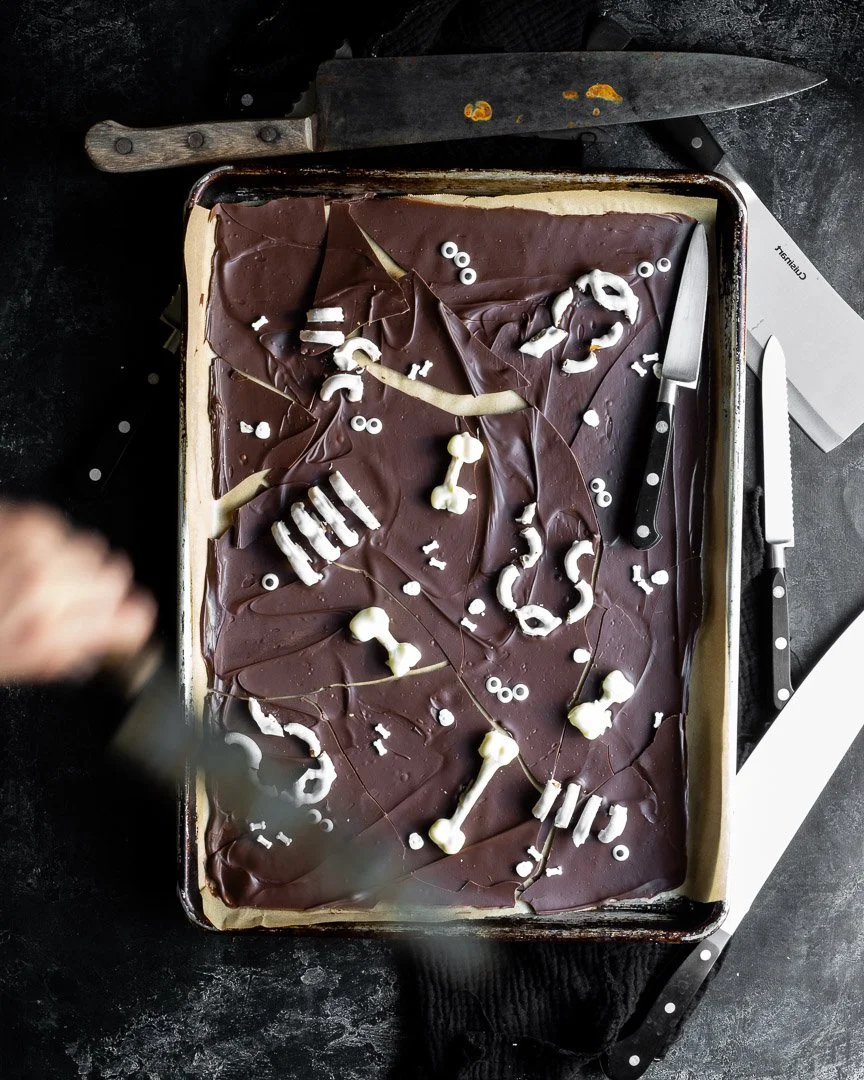
Boneyard bark | Me & the Moose. This boneyard bark is easy and cute for classroom parties, playdates, or just a Halloween treat. #meandthemoose #halloween #bark #boneyardbark #chocolate #marshmallows #pretzels
This last minute, easy, Halloween treat is sure to delight even the smallest ghouls and goblins.

Boneyard bark | Me & the Moose. This boneyard bark is easy and cute for classroom parties, playdates, or just a Halloween treat. #meandthemoose #halloween #bark #boneyardbark #chocolate #marshmallows #pretzels
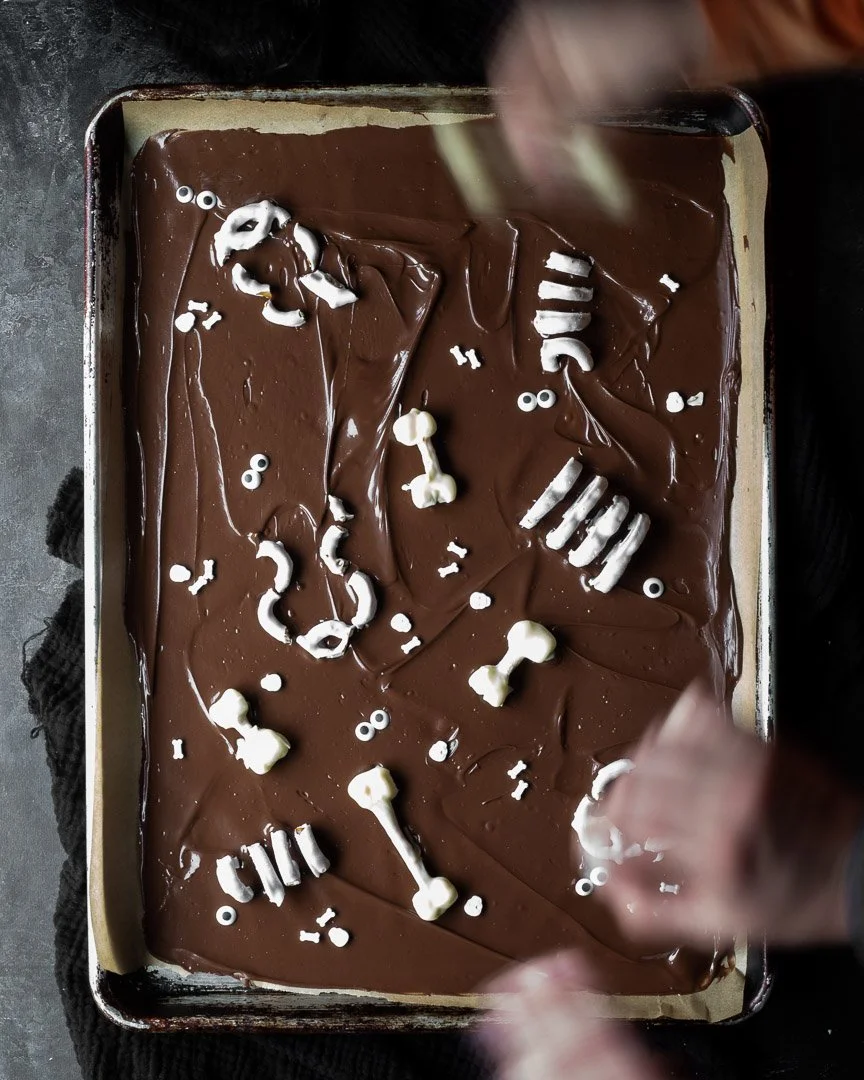
Boneyard bark | Me & the Moose. This boneyard bark is easy and cute for classroom parties, playdates, or just a Halloween treat. #meandthemoose #halloween #bark #boneyardbark #chocolate #marshmallows #pretzels
For the pretzel bones:
1/2 cup white chocolate chips
1/4 tsp coconut oil
Thin pretzel sticks
Mini marshmallows
Melt the white chocolate and coconut oil in the microwave. Heat for 30 seconds and then 10 seconds at a time, stopping and mixing after each 10-second burst, until melted.
Line a cookie sheet with a piece of parchment paper and clean out space in your fridge to chill the bones.
Cut the pretzel sticks and mini marshmallows in half.
Dip one end of the 1/2 pretzel stick into the melted chocolate and carefully stick two of the 1/2 marshmallows onto the chocolate and hold for a few seconds to set. Repeat on the other side of the pretzel stick.
Chill in the fridge for 10 minutes.
Reheat your chocolate slightly (for about 5 seconds) and stir.
Dip the whole pretzel and marshmallow bone into the white chocolate with a fork and gently tap on the side of your bowl to let the extra chocolate drip off. Place back on the parchment sheet and return to the fridge and chill for 10-15 minutes.

Boneyard bark | Me & the Moose. This boneyard bark is easy and cute for classroom parties, playdates, or just a Halloween treat. #meandthemoose #halloween #bark #boneyardbark #chocolate #marshmallows #pretzels

Boneyard bark | Me & the Moose. This boneyard bark is easy and cute for classroom parties, playdates, or just a Halloween treat. #meandthemoose #halloween #bark #boneyardbark #chocolate #marshmallows #pretzels
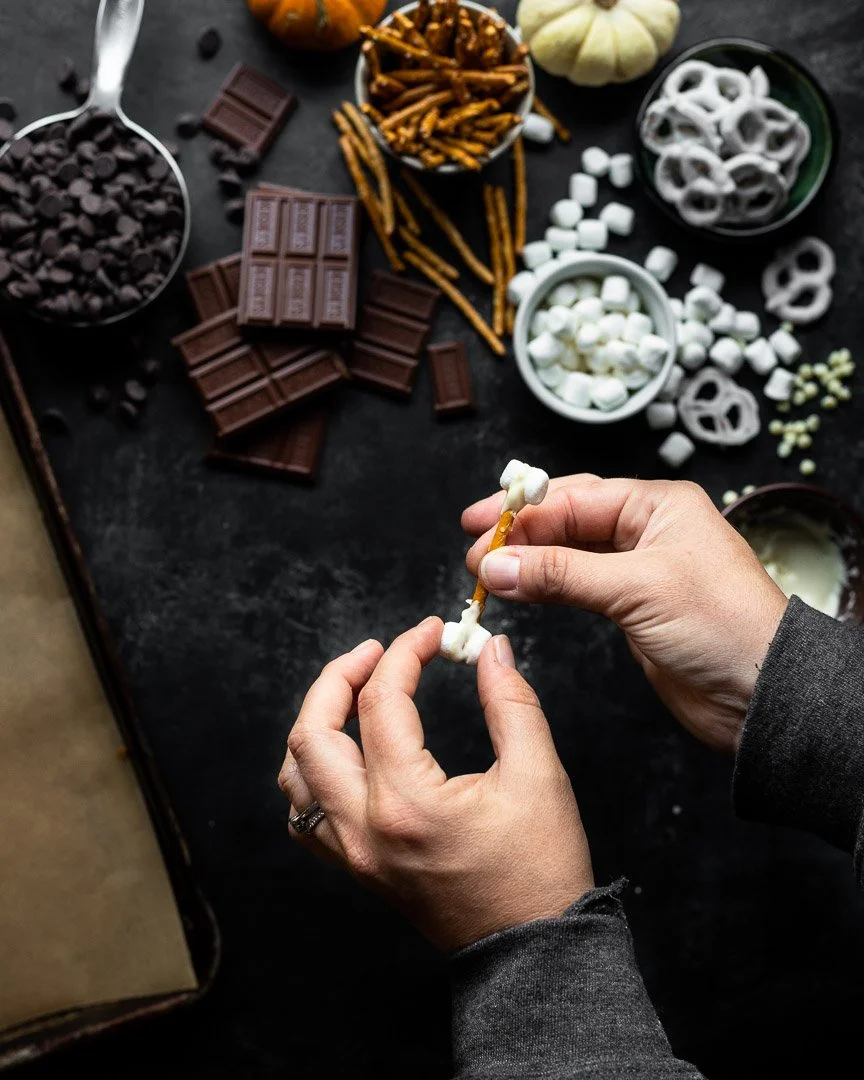
Boneyard bark | Me & the Moose. This boneyard bark is easy and cute for classroom parties, playdates, or just a Halloween treat. #meandthemoose #halloween #bark #boneyardbark #chocolate #marshmallows #pretzels
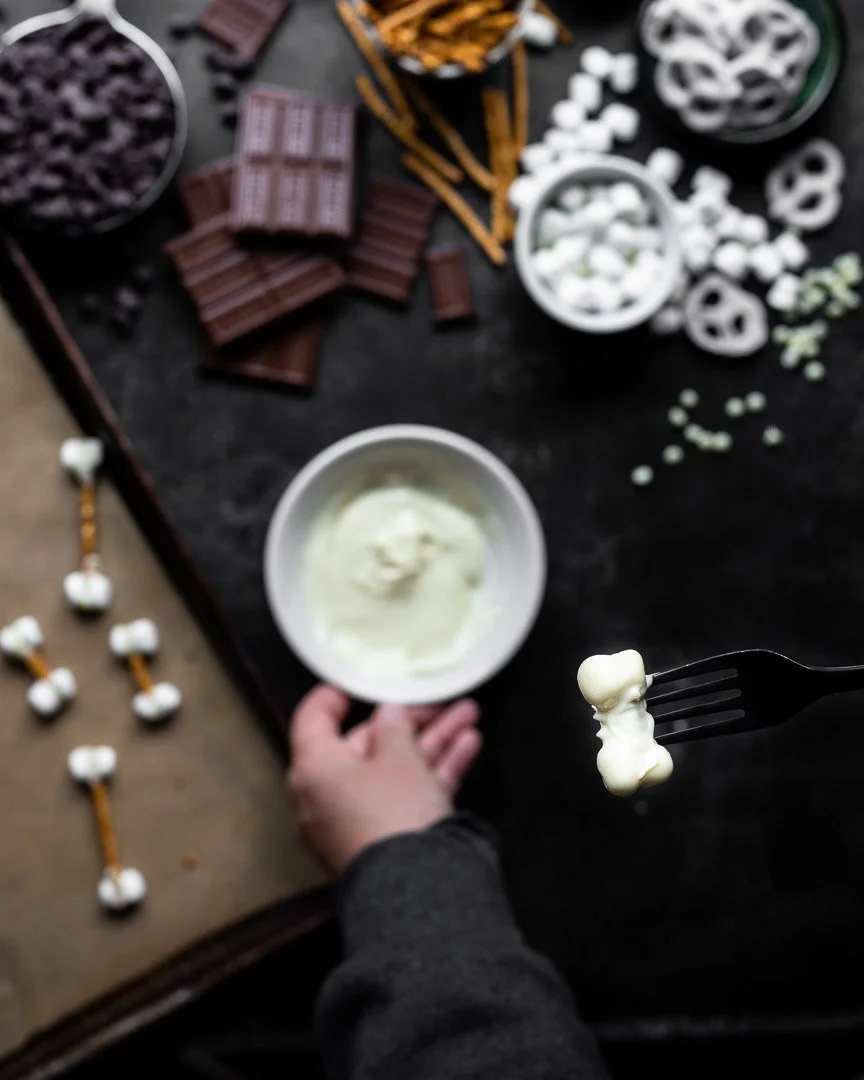
Boneyard bark | Me & the Moose. This boneyard bark is easy and cute for classroom parties, playdates, or just a Halloween treat. #meandthemoose #halloween #bark #boneyardbark #chocolate #marshmallows #pretzels
For the ribs and skeleton bones:
Yogurt covered pretzels (whatever you think you'll need and then extras because they break in the cutting)
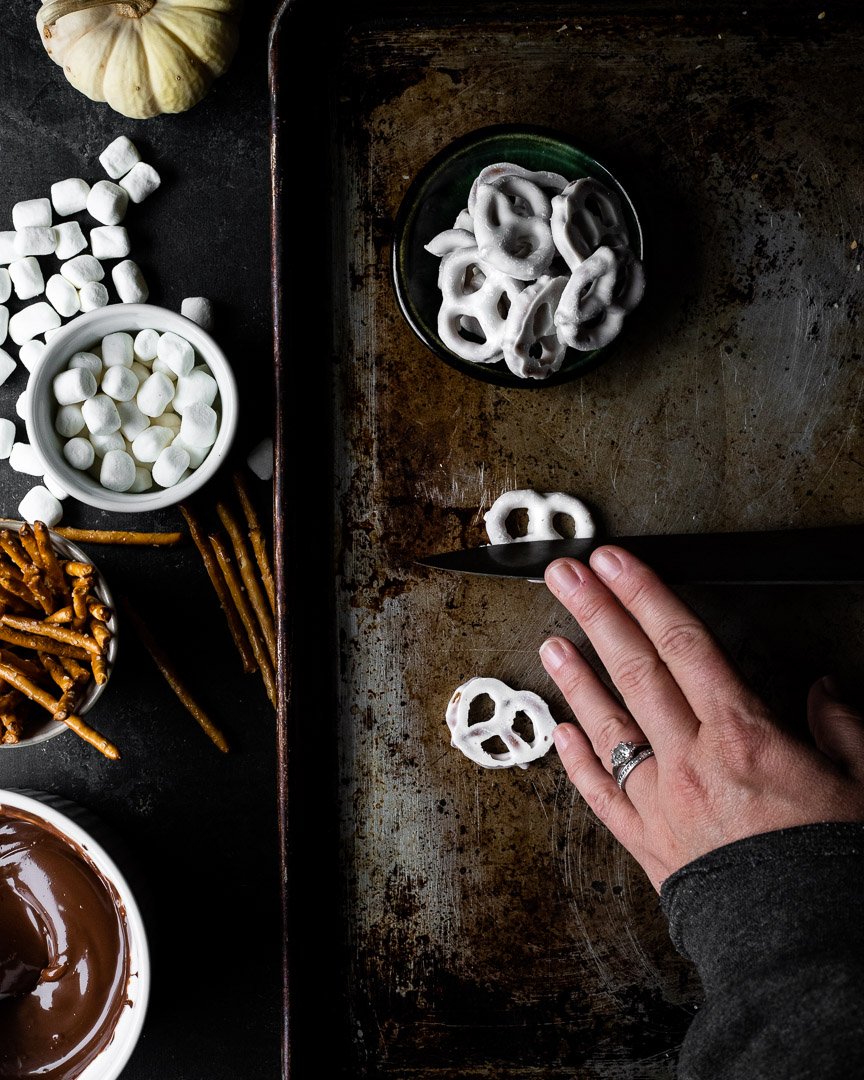
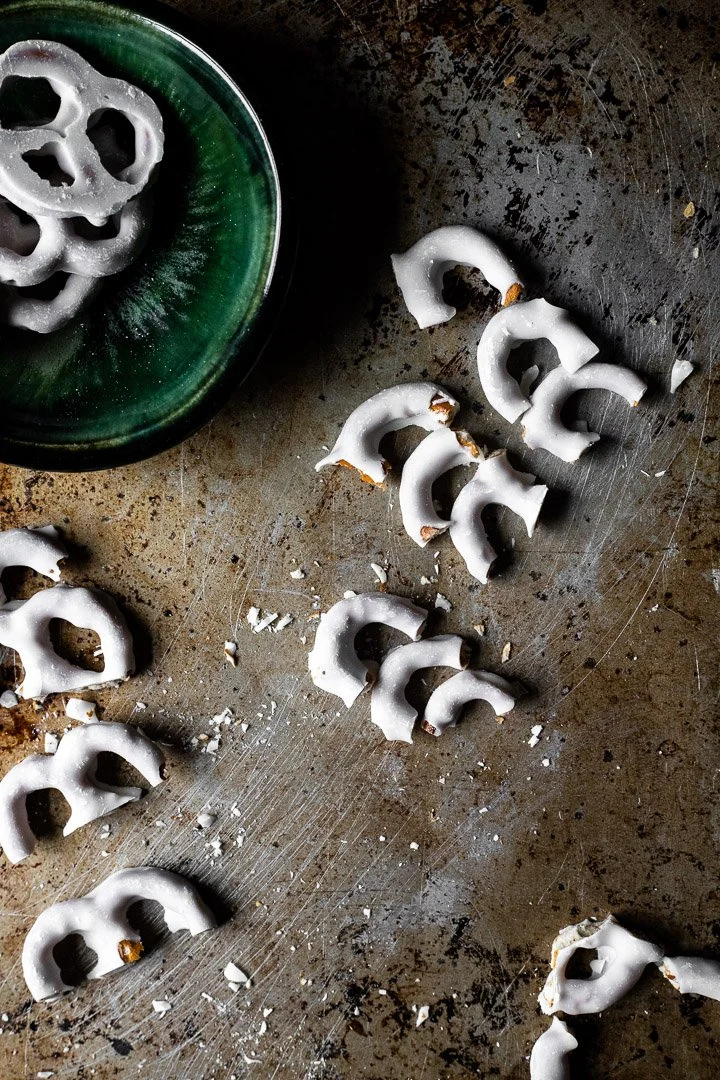
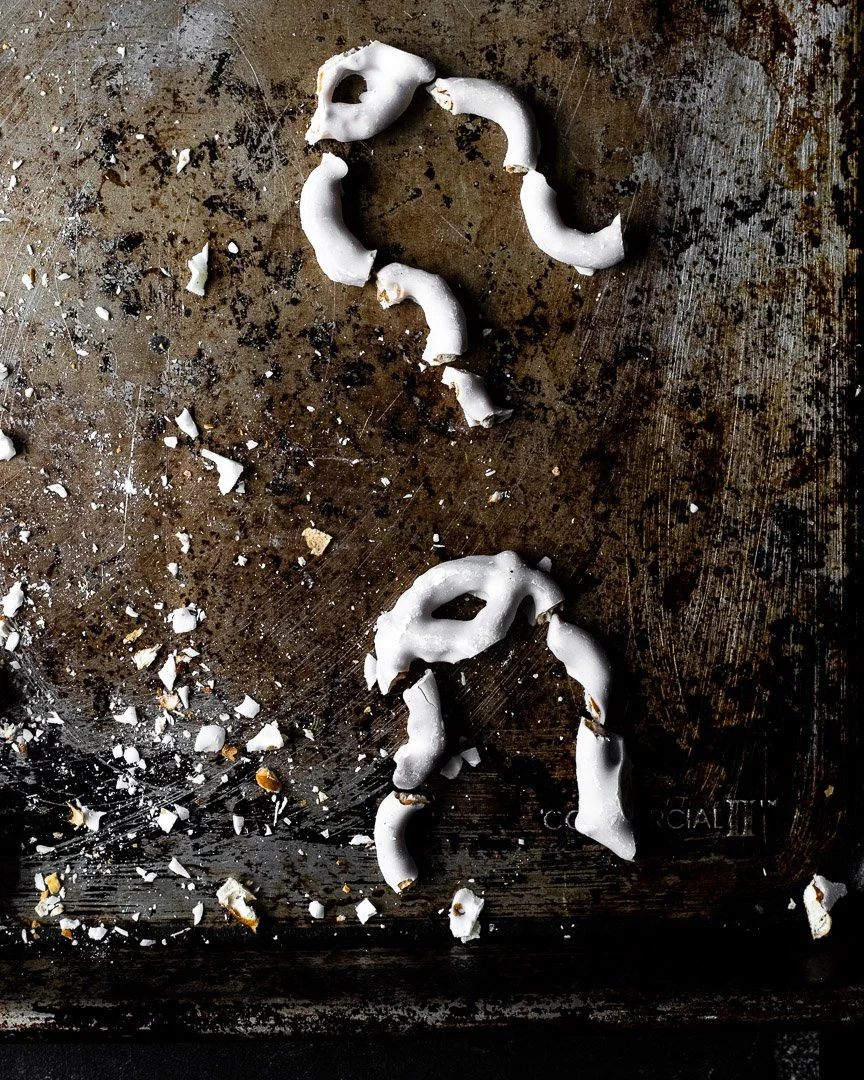
Saw the yogurt pretzels in half with a sharp knife and take off a little bit of the middle nubbin that's left between the pretzel's two arches. These arches will be the ribs. The bottom half of the pretzel can be the pelvis and any pieces that break off (and lots will, don't worry about it) can be used to make the arms or legs.
Set aside the cut pretzels.
For the bark:
2 cups chocolate chips (any combination of semi-sweet, milk, and dark chocolate)
1 tsp coconut oil
Candy eyes (optional)
Candy bones (optional)
Melt the chocolate and coconut oil in the microwave, stirring after each 10-second burst until everything is melted.
Gather your toppings.
Pour the melted chocolate onto a fresh piece of parchment paper on a cookie sheet and spread into a thin layer (but not too thin). Place your pretzel bones, pretzel ribs, candy eyes, and candy bones onto the warm chocolate. Once you’re satisfied with your arrangement, chill for at least an hour in the fridge.
Malted chocolate pavlova

Pavlova failures abounded this week. Ugh. Half of these photos are from when I gave up trying to make a meringue that didn't fall and just accepted that I'd wasted, like, 20 eggs making these stupid desserts.
But I'll back up: Pavlova! I love meringues and a pavlova is akin to a large meringue that has a softer, more marshmallow-y center. It's a decadent finish to a holiday dinner, but strangely light, which seems appropriate after ham or whatever other heavy things make up your Easter meal. It's also going to be almost 80 degrees here in NYC on Easter Sunday, so a light dessert might be nice. Good planning on my part.

Pavlovas should be easy: They require very few ingredients and very little active cooking time. But, I've learned the hard way (read: after 4 fallen pavlovas), that the technique can be tricky. I've put some lengthy notes below to explain what I did to achieve pavlova success on my 5th try. Victory in our time.


I've done A LOT of research on pavlova techniques in the past 14 days. Unfortunately, some of the advice is contradictory (why does that always happen?). In 20 years, when I've made 400 pavlovas, I'll update this post with a foolproof method for cooking them. Until then, here's what worked:
1) Cold egg whites are fine. Using cold eggs are not the secret because I also used cold egg whites in one of my fallen meringues. But I used them in my successful one, so don't worry about bringing them to room temperature before you get started.
2) Whip egg whites at a slower speed for a longer amount of time. I whipped the egg whites on a 4 with my stand mixer and had the best results when aerating the eggs a little more slowly. Using a lower speed also makes it easier to ensure that you whip enough, but not too much.
3) Whip the eggs almost to stiff peaks before adding the sugar. I read this advice on a random Australian listserv (I did a DEEP dive into pavlova-land) and it really helped. All of the other recipes I read told me to add the sugar when the eggs were at soft peaks, but that inevitably led to fallen pavlova. I tried to get some good photos of the soft peak stage, but was scared to stop the mixer, lest my 5th attempt fall too. Basically, you'll know you're at soft peaks when the bubbles that started earlier as froth become really really tiny, the eggs' volume increases, and you can see the tracks from the whisk going through the mixture. Once you get here, keep mixing for a few more minutes before adding the sugar.
4) Don't overbeat the eggs. Once you've added the sugar, stop whipping as soon as the egg whites start looking glossy and shiny and check to see if you've achieved stiff peaks.
5) Sift the malt powder, chocolate, and cornstarch over the whipped meringue. I worked pretty hard to ensure that nothing deflated those eggs and the only time it worked was when I actually sifted the dry add-ins at the end. I also folded the ingredients together excruciatingly gently and JUST until things are mixed together enough. I left the batter a little streaky because I really didn't want them to deflate.

But fear not. If you're still reading, then you're already committed to making this and good on you. Regardless of what happens with the texture of your pavlova, it'll taste great. This recipe uses a lot less sugar than most because I find most pavlovas awfully sweet. I also love the flavor of malt. While the pavlova itself isn't overwhelmingly malt-y, it has a mild sweetness and chocolate-y flavor that melds perfectly with some lightly sweetened cream and the malted and chocolate candies on top. If I was doing this again, I would also dust the top with malt powder. But if I make another pavlova, my husband might divorce me.

Malted pavlova
Adapted from Nigella and Martha
6 egg whites
large pinch of salt
1 cup sugar
1 tsp vinegar
1 Tbsp cornstarch
3 Tbsp malt powder
1 Tbsp cocoa powder
Preheat oven to 350 degrees and line a large baking sheet with parchment paper.
Separate the egg whites and yolks and set the yolks aside. (Be careful! Seriously, no yolks allowed in pavlova.) In a stand mixer fitted with the whisk attachment, whip the egg whites on medium-low speed ("4" on my stand mixer) until they start to get frothy. Add the salt and continue whipping. Look for soft peaks: (in case you didn't read this above) The bubbles that started forming when the eggs got frothy become really tiny, the eggs’ volume increases, and you can see clear tracks where the whisk cuts through the mixture. Continue whisking past this stage (still on speed 4) for about 3-4 more minutes.
Add the sugar in 2-3 Tbsp increments while continuing to whip. After each sugar addition, let your mixer go for about 1 minute to incorporate the sugar. Once your sugar is mixed in, continue whisking until the eggs look glossy and shiny. Stop the mixer and check that you’re at “stiff peaks.” To check: turn the whisk right side up and see if the egg whites stay in a peak or lop over—they should stay in a peak. Add the vinegar and then sift the cornstarch, malt powder, and cocoa over the eggs. Very gently, fold the ingredients together until JUST mixed.
Mound this mixture onto your parchment and smooth down the top a bit, leaving a slight divot in the center. Put in the oven and immediately reduce heat to 300. Cook for 60-70 minutes and then turn off the heat and let cool completely in the oven with the door closed.
The pavlova can be kept, well covered, for 2-3 days before being decorated with the cream and candy.
Whipped cream
2 cups heavy whipping cream
4 Tbsp sugar
½ Tbsp vanilla extract
Combination of Cadbury chocolate mini eggs and Whoppers malted mini eggs
To assemble: Remove the parchment paper and place the pavlova on your serving dish. Some people like to invert the pavlova and put cream on the underside. I have no preference about this step. Mound the whipped cream on whatever side you like and top with the candy. Serve immediately.
Yield: 8-10 servings

Cardamom and pistachio meltaways

Cardamom and pistachio meltaways | Me & The Moose. This unusual spin on the classic Christmas cookie is both unique and familiar at the same time. #meandthemoose #cardamomandpistachiomeltaways #christmasbaking #christmascookies #cookierecipes #meltaways #Russianteacakes #Mexicanweddingcookies
A few ingredients and a quick whizz in the food processor leads to quick, easy, and delicious cookies for your holiday cookie tray.

Cardamom and pistachio meltaways | Me & The Moose. This unusual spin on the classic Christmas cookie is both unique and familiar at the same time. #meandthemoose #cardamomandpistachiomeltaways #christmasbaking #christmascookies #cookierecipes #meltaways #Russianteacakes #Mexicanweddingcookies
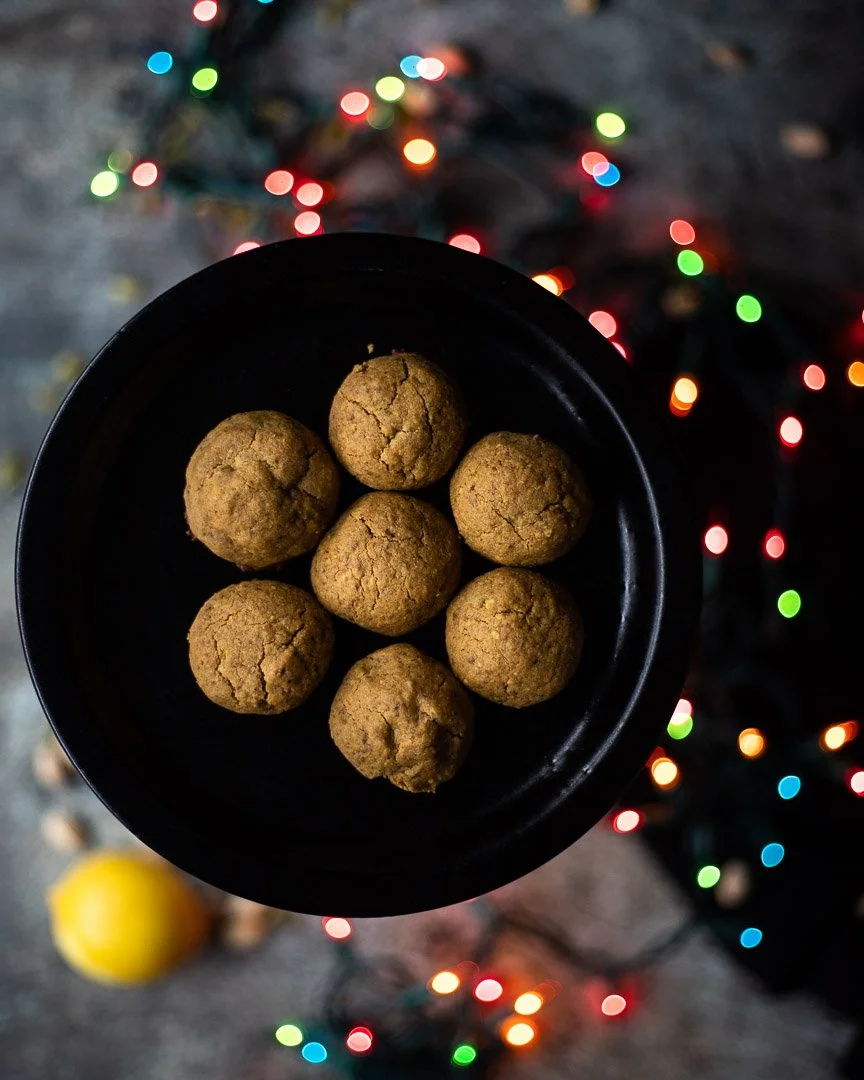
These cookies are GOOD, y'all. Sorry, I've been watching a marathon of Fixer Upper while writing, which is really the only logical reason for this Yankee to use the word "y'all." Anyway, I've called these cookies "meltaways," but they're the treat of 1000 names: Snowballs, Butterballs, Russian tea cakes, Mexican wedding cookies, meltaways, you name it. At their core, these are egg-free, simple cookies that are a little crumbly, very buttery, and subtly sweet. Adding in cardamom and pistachio just makes them a tiny bit more interesting.
Cardamom and pistachio meltaways | Me & The Moose. This unusual spin on the classic Christmas cookie is both unique and familiar at the same time. #meandthemoose #cardamomandpistachiomeltaways #christmasbaking #christmascookies #cookierecipes #meltaways #Russianteacakes #Mexicanweddingcookies
I tested this recipe more than was technically necessary (not sorry). But it felt like there were many possible variations that would radically change the final product, so here are a few lessons:
1) Buy already roasted and shelled pistachios, if you can. Trader Joe's calls them "nutmeats" which is just awful. But your fingertips will thank you.
2) Use unsalted nuts even though you're adding salt to the batter.
3) The amount of cardamom in the recipe is for a new or newish bottle. If you can smell the cardamom when you open the bottle, use less. If you have to really stick your nose close to the spice to smell it, increase the amount. I used the dregs of a VERY old bottle of cardamom in my initial recipe and I had to more than double the amount used to get the taste I wanted. Then I tried with a brand new bottle and 1/2 tsp was more than enough. So, get friendly with your spices to judge for yourself.

Cardamom and pistachio meltaways | Me & The Moose. This unusual spin on the classic Christmas cookie is both unique and familiar at the same time. #meandthemoose #cardamomandpistachiomeltaways #christmasbaking #christmascookies #cookierecipes #meltaways #Russianteacakes #Mexicanweddingcookies
Cardamom and pistachio meltaways
Time: about 30 minutes, mostly active
Yield: 14 cookies
Adapted from Bon Appetit
1 cup roasted, shelled pistachios
½ cup (1 stick) unsalted butter
2 Tbsp powdered sugar, plus 1/2 cup more for rolling
½ teaspoon vanilla extract
¾ cup all-purpose flour
½-1 tsp cardamom
½ teaspoon kosher salt
¼ tsp lemon zest
Preheat the oven to 350. If they aren’t already roasted, place the pistachios on a sheet pan and roast them until the nuts become fragrant, about 4 minutes.
In the bowl of the food processor, whizz the butter and 2 Tbsp of sugar until the butter has broken down, formed a ball, and then spread itself out again, about 2 minutes. Scrape down the sides of the bowl and add the vanilla, flour, cardamom, salt, lemon zest, and pistachios. Whizz again until the nuts are broken down and the ingredients are combined.
Scoop a scant 1 Tbsp of dough at a time, roll into a ball, and place on a parchment-lined baking sheet. Repeat with all of the batter. Bake for 7 minutes, rotate the pan, and bake for 4-7 more minutes, until the cookies start browning on the bottom and form tiny cracks on top (but too much cracking means dry cookies, so be careful not to overbake).
Let cool completely. Place about 1/2 cup of powdered sugar in a bowl and roll the cooled cookies in the sugar, one at a time. Leave out for a few hours before storing: This helped keep the sugar from dissolving into the cookies, I found.