Lemon and rosemary turkey and couscous en cocotte

Don’t be intimidated by the “en cocotte” portion of the title. It’s just French for “cooked in a covered pot that you can also use for serving.” An alternative translation is: How to cook a really good turkey breast the lazy way; no overnight brine, no basting, nothing.

Take me to the recipe!

Lemon and rosemary turkey and couscous en cocotte | Me & The Moose. This one-pot (ish) meal has a low and slow cooking time, but is mostly hands-off and a much faster way to make delicious turkey breast without brining or drying out the meat. #t…

A quick note before we talk about the ins and out of this recipe: Anyone who knows me, understands how very much I hate the word “moist.” (I refer to is as “the ‘M’ word.”) Even saying it in my head feels wrong. I’m not alone here, I know, but I do feel that I have a particularly strong reaction, which made my search for the easiest turkey cooking method particularly grueling. Because it’s damn near impossible to read a blog post, watch a video, or see a cooking show about poultry without people shouting it from the rooftops.

But figuring out this recipe made it all worth it! And I promise you, this is the easiest route to not-dry turkey.

Lemon and rosemary turkey and couscous en cocotte | Me & The Moose. This one-pot (ish) meal has a low and slow cooking time, but is mostly hands-off and a much faster way to make delicious turkey breast without brining or drying out the meat. #t…

I first learned about cooking “en cocotte” from an episode of Cook’s Country. They made “French Chicken in a Pot” and I wanted to try it with turkey. I’ve also wanted to make a version of the famous Greek Avgolemono Soup, which is broth thickened with a cooked grains and egg yolks, but soup isn’t always psychologically satisfying as a meal, you know?

Instead, I used the broth and egg yolks to thicken the grains instead of the other way around.

Lemon and rosemary turkey and couscous en cocotte | Me & The Moose. This one-pot (ish) meal has a low and slow cooking time, but is mostly hands-off and a much faster way to make delicious turkey breast without brining or drying out the meat. #t…

A couple of cooking notes:

  • After roasting the turkey, there should be about 1/4 of an inch of liquid at the bottom of the Dutch oven. If there isn’t, add another 1/4 cup of stock before cooking the couscous.

  • The only extra step in this recipe is to blend together some broth, egg yolks, and lemon juice to add to the cooked couscous. I really recommend using a blender EVEN THOUGH it’ll dirty another appliance. If you don’t get a really good emulsion of the liquids, you can end up with scrambled eggs rather than a rich, thick sauce over your couscous.

  • The oven temperature (275!) will seem very low and it is. But the Dutch Oven with a lid and an extra layer of foil really seals in the heat and moisture and cooks the turkey despite the low oven temperature. Our oven runs very hot, so I actually set it 10 degree lower.

  • The only downside to this cooking method is that the steam softens the turkey skin. If you like crispy skin, just strip it off and seer it on a really hot skillet to crisp it back up.

  • I love serving this with a quick tzatziki sauce.

Lemon and rosemary turkey and couscous en cocotte | Me & The Moose. This one-pot (ish) meal has a low and slow cooking time, but is mostly hands-off and a much faster way to make delicious turkey breast without brining or drying out the meat. #t…

Lemon and rosemary turkey and couscous en cocotte

1 bone-in turkey breast, about 2 ½ lbs
2 Tbsp olive oil, divided
1 small onion (or ½ of a large onion), chopped
4-5 extra large garlic cloves, smashed and roughly chopped 
1 Tbsp fresh rosemary, minced (or 1 tsp dried)
1½ tsp smoked paprika
1 tsp kosher salt
4 cups low sodium chicken stock or water, divided
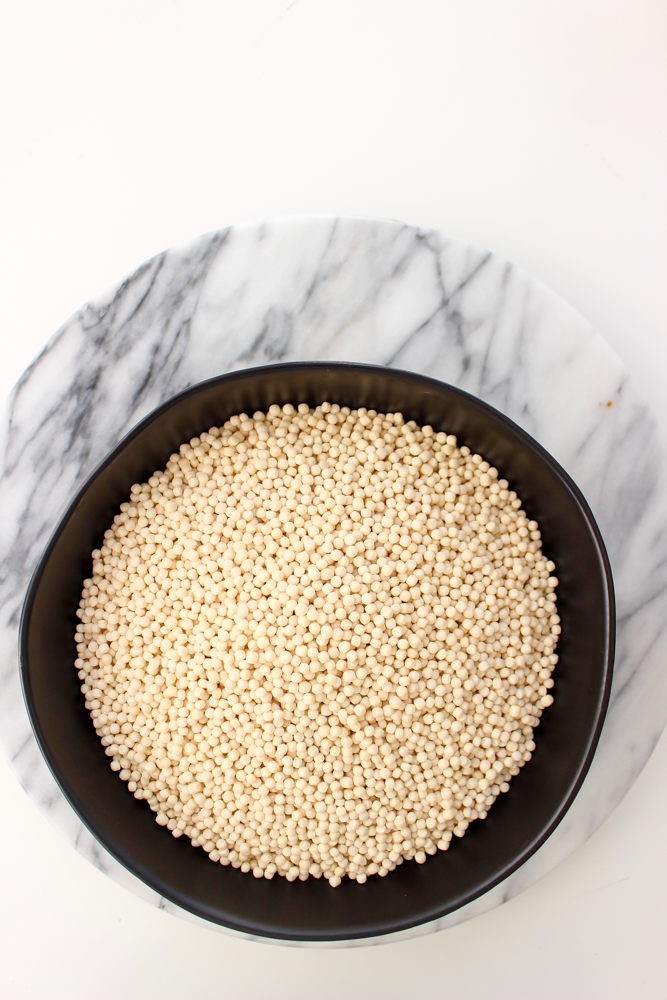
3 cups Israeli couscous  
2 egg yolks
1/3 cup lemon juice (juice of 2 large lemons)

Preheat the oven to 275.

In a large Dutch oven or oven safe pot with a lid, heat 1 Tbsp olive oil over medium high heat. Seer the turkey breast on the top, bottom, and both sides, adjusting the heat if the turkey browns too quickly or if the oil starts to spit uncomfortably. When browned all over (this should take about 10 minutes), remove to a plate.

Add 1 Tbsp of olive oil to the same Dutch oven and heat over a medium low flame for a few seconds. Saute the onion until translucent, about 3 minutes. Add the garlic and cook for 1 minute more. Add the rosemary, smoked paprika, and salt. Cook for 1 minute more until fragrant.

Turn off the heat.

Add the turkey back to the pan. Cover the top of the Dutch oven tightly with a large piece of tin foil and then top with the lid.

Bake for 1 hour. Check the internal temperature of the turkey with a thermometer in the thickest part. When the thermometer reads 165, the turkey is done. If the turkey isn’t up to temperature yet, return it to the oven and check it every 5-10 minutes to avoid overcooking.

While the turkey is cooking, blend together 1 cup of chicken stock, 2 egg yolks, and 1/3 cup of lemon juice. Set aside.

When the turkey is done, remove the Dutch oven and carefully take off the tin foil from its top (watch the steam!). Remove the turkey to a plate or cutting board and cover tightly with the tin foil. Let rest.

Add 3 cups of stock to the turkey cooking juices in the Dutch oven and bring to a boil. Add the couscous, reduce the heat to low, and simmer for 8-10 minutes, until the couscous has absorbed all of the stock. (Check after 4 minutes to make sure the couscous isn’t cooking too fast or sticking too much. If it is, turn down the heat.)

When the liquid is absorbed, add the broth/ egg yolk/ lemon juice combination. Stir it into the couscous and bring the mixture back to a boil. Once it boils, turn off the heat and stir a few more times.

Slice the turkey and serve with the couscous.

Yield: 5-6 large servings

Lemon and rosemary turkey and couscous en cocotte | Me & The Moose. This one-pot (ish) meal has a low and slow cooking time, but is mostly hands-off and a much faster way to make delicious turkey breast without brining or drying out the meat. #t…

Sheet pan dinner: Sausage and purple cabbage

Is there anything better than October? Everyone has settled into new routines, the weather is (generally) cooler, the leaf peeping and apple picking are in full swing, and it’s finally acceptable to buy enormous bags of candy and maintain the fiction that they’ll last until October 30th.

KIDDING! I would never pretend that that candy is making it to the end of the month.

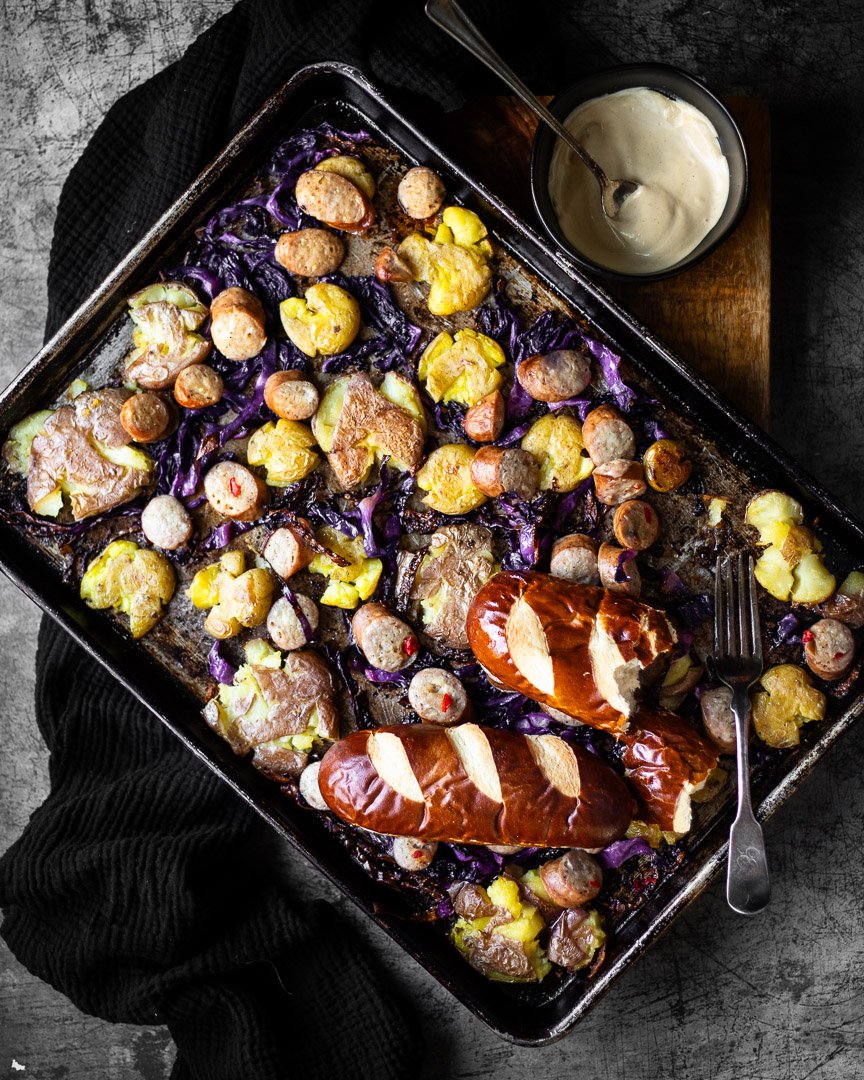
Thick cuts of cabbage lead to crispy edges and softer interiors. #meandthemoose #sheetpandinner #purplecabbage #potatoes #sausage #Oktoberfest
Purple cabbage is magical. Look at that purple! #meandthemoose #sheetpandinner #purplecabbage #potatoes #sausage #Oktoberfest

But really, we are trying to maintain a modicum of healthy eating now that we’re super busy again with school and activities and the faster pace of non-summer months. That’s where sheet pan dinners like this one come in handy.

Dijonnaise is a simple combo of dijon mustard, mayonnaise, and magic. #meandthemoose #sheetpandinner #purplecabbage #potatoes #sausage #Oktoberfest
Sheet pan dinners are the best and easiest way to get dinner on the table and cleanup done quickly. #meandthemoose #sheetpandinner #purplecabbage #sausage #potatoes #Oktoberfest

The combination of sausage, cabbage, and potatoes with a mustard-y sauce feels very Oktoberfest, which is obviously on-brand for this month.

Also, I haven’t yet found a vegetable that wasn’t made more delicious by roasting and purple cabbage and potatoes may be among my favorites. Find the smallest potatoes you can, or halve anything larger then a golf ball.

Roasting at high heat with plenty of olive oil and salt leads to a delicious, quick dinner. #meandthemoose #sheetpandinner #purplecabbage #potatoes #sausage #Oktoberfest

If you leave off any bread on the side and check your labels for the sausage, this dish is also gluten-free, dairy-free, and Whole 30 compliant.

A quick note about the sausage here: We always pre-cooked sausage. The timing gets tricky when starting with raw sausage and the chicken/turkey varieties are usually pre-cooked anyway.

SPD: German red cabbage, potatoes, and sausage

1/2 small head red cabbage, ¾ inch thick slices
1 lb small potatoes
1-2 Tbsp olive oil
salt to taste
1 lb pre-cooked turkey or chicken sausage (we use Wellshire Farms turkey kielbasa)

Dijonnaise

2 Tbsp mayonnaise
1 Tbsp Dijon mustard


Heat oven to 425.

Thickly slice the cabbage into ¾ inch thick steaks. Spread out on your baking sheet along with the small potatoes. Brush or spray with olive oil. Sprinkle with salt. Cook for 20 minutes or until the cabbage starts to singe in the sides.

Remove the sheet pan from the oven and tuck the sausage in with the potatoes and cabbage. I have cooked the sausage from frozen and when already defrosted, and it takes about the same amount of time.

If desired, smash the potatoes slightly with the bottom of a mug or measuring cup and spray or brush on more olive oil for a crispier, crunchier potato.

Return to the oven and cook for 10 more minutes or until the centers of the cabbage steaks are fork tender.

Yield: dinner for 3 adults or 2 adults and 2 children (with possibly some leftovers depending on how much your kids actually eat.)

Sheet pan dinners are the fastest, easiest way to get dinner on the table and clean up done quickly. #meandthemoose #sheetpandinner #purplecabbage #sausage #potatoes #Oktoberfest

Almond butter quinoa muffins

IMG_8346.jpg

What these muffins have: Good fats, protein, Omega-3s, deliciousness.

What these muffins don't have: Gluten, dairy, refined sugar, wheat, eggs, soy.

Bonus feature: The muffins only require one bowl!

IMG_8312.jpg

The new school year already started for lots of the country, but here in CT, M's preschool starts again on Monday. I've been thinking about quick ways to begin our day with protein that don't require cooking in the morning. These muffins are the answer!

Half of the flour is ground quinoa, which has lots of protein. The other half is oatmeal. I originally made these muffins with almond flour instead of oats for even more protein, but the almond flour was so dense that the muffins stuck to the roof of your mouth. You could just feed your kid a spoonful of almond butter and save yourself the trouble.

IMG_8323.jpg

With the oatmeal, the muffins are still substantial, but they're no longer dense. They're actually a smidge crumbly because I omitted eggs and any other binding agent. I wanted them to stay vegan and I don't always have the patience to make a flax egg. Letting them cool completely before eating them made them sturdier too. 

IMG_8325.jpg

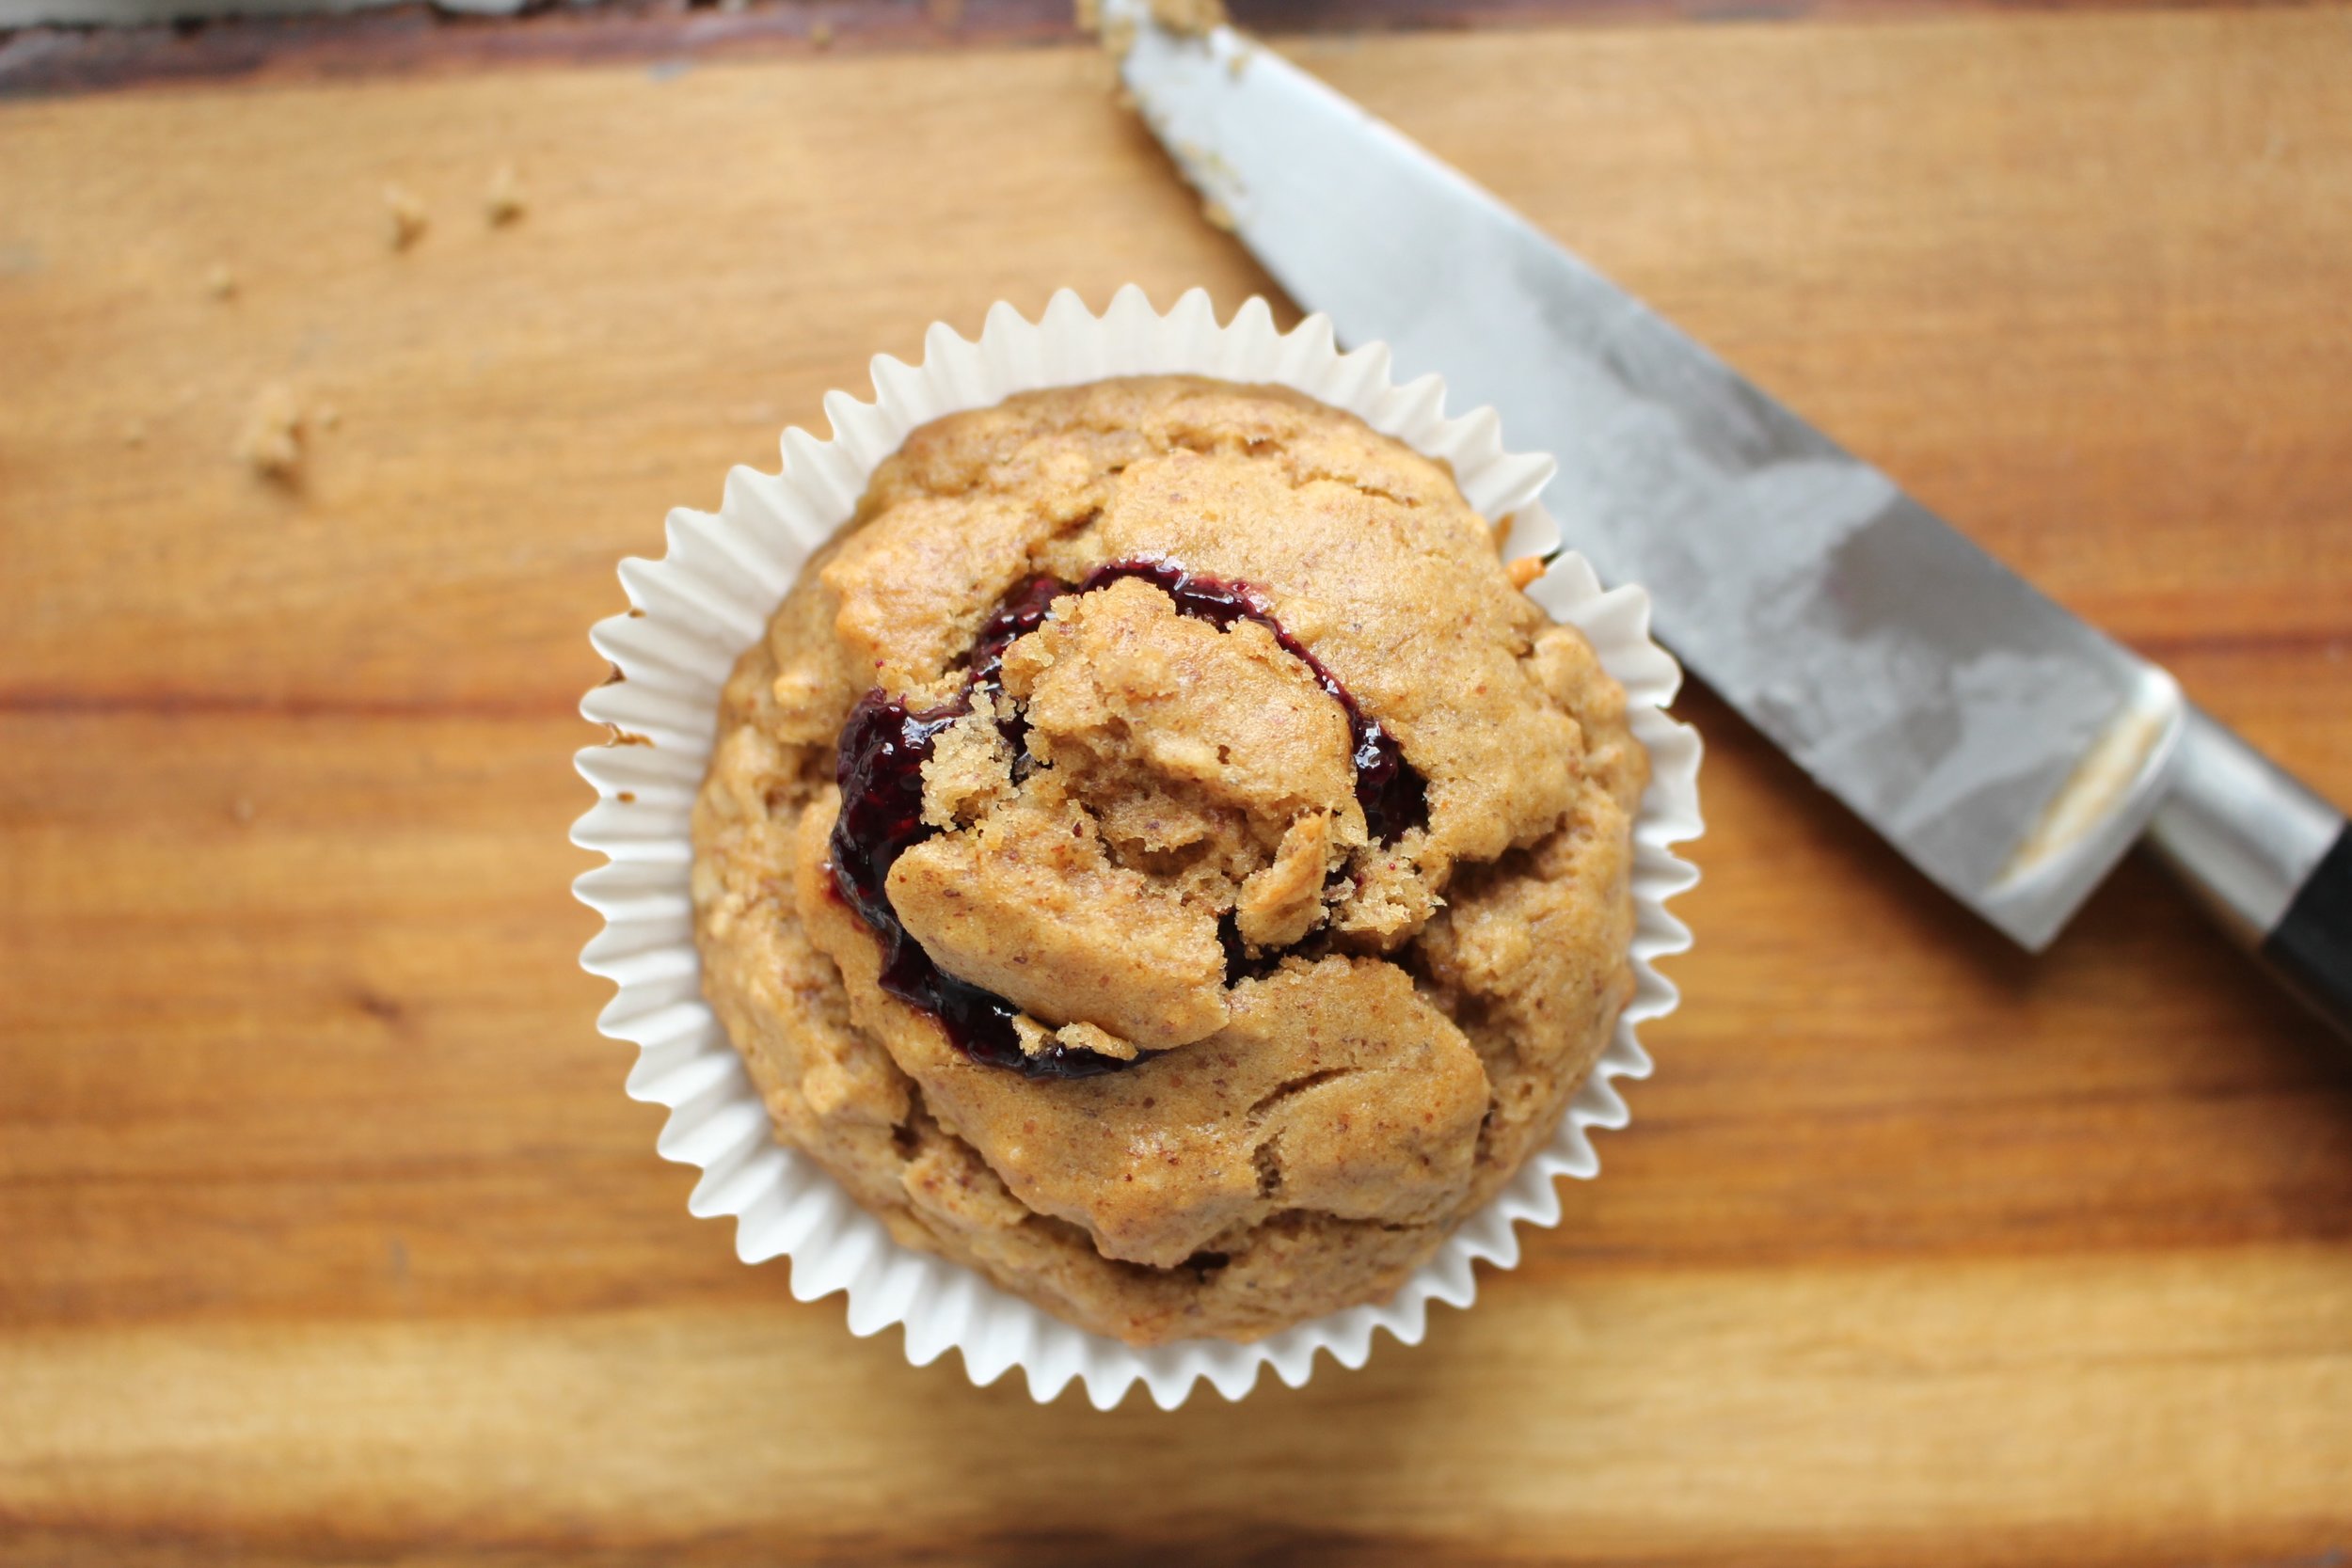
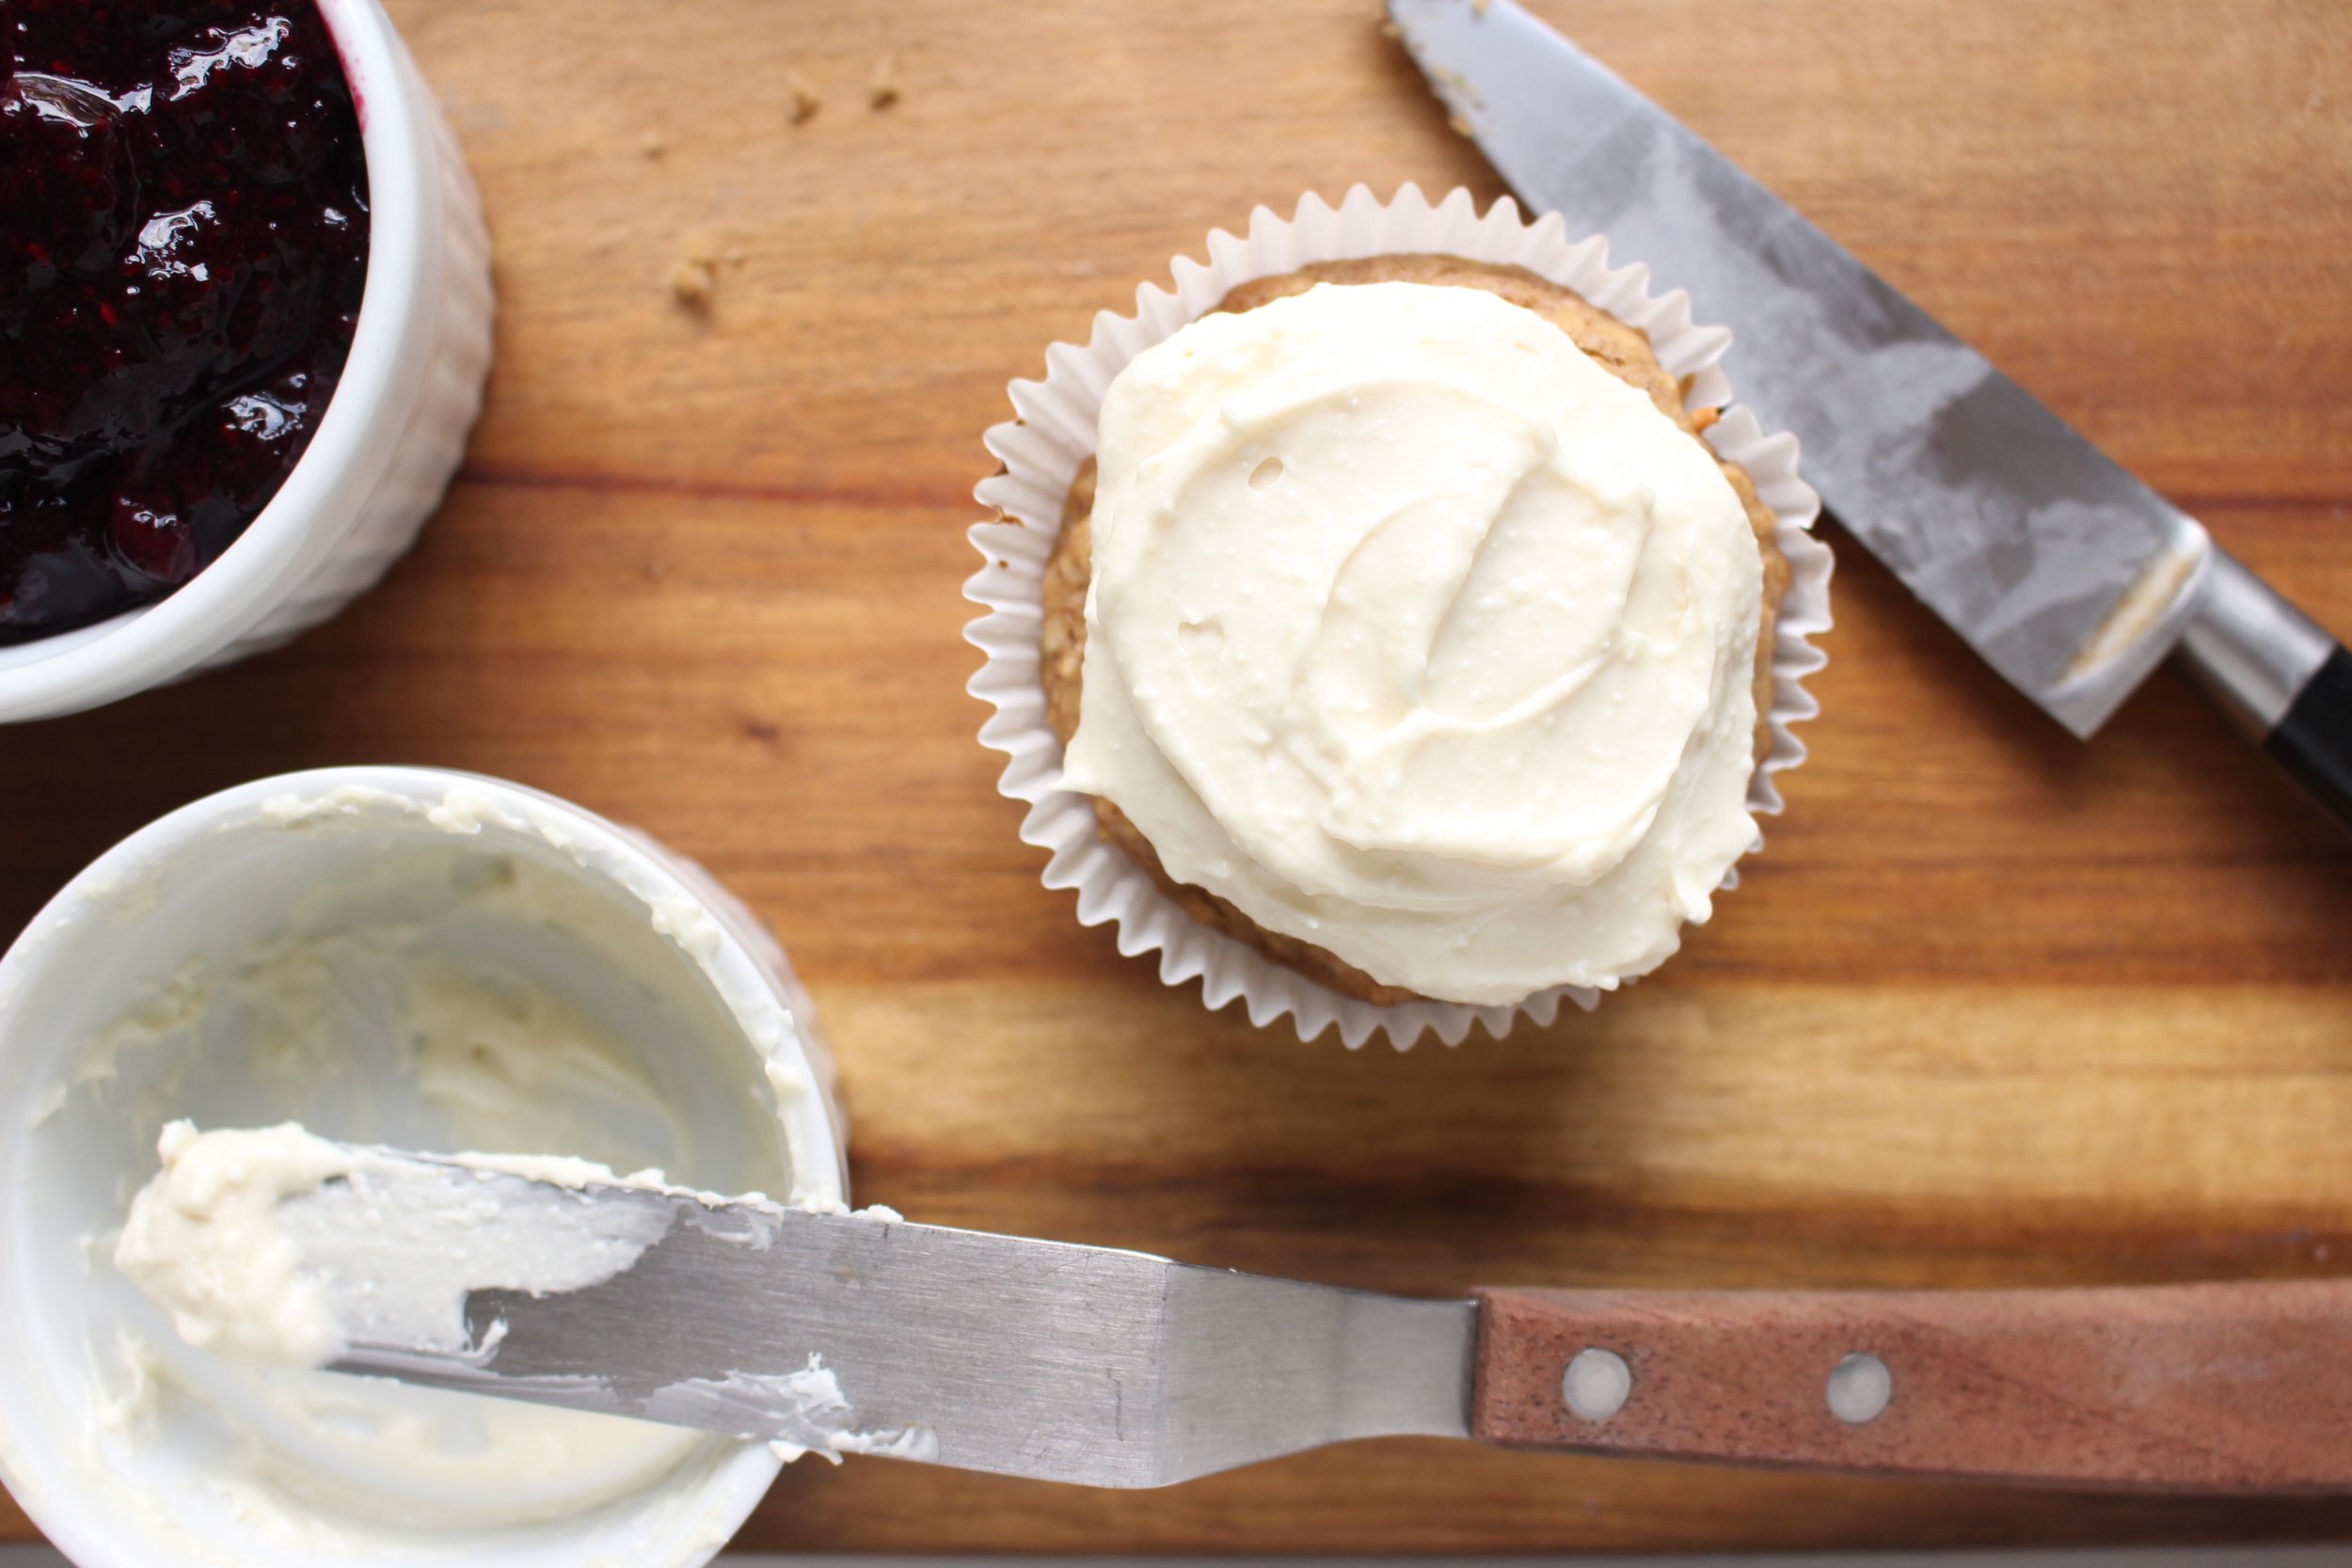
For the first day of school, I thought it might be nice to add some blueberry chia jam and a quick icing to make the muffins more special. (I also called them breakfast cupcakes, which went over VERY WELL.) The jam is simple and free of any added sugar. I used cream cheese and maple syrup for my frosting, but you could also use coconut cream or a pre-made dairy-free topping.

You could also mix the chia jam with some yogurt for a delicious breakfast for the younger set (or the parental set, if I'm honest).

If you're avoiding nuts, substitute coconut or rice milk for the almond milk and use sunflower seed butter in place of the almond butter. Still delicious!

Important note: These muffins are best when fresh, so I recommend freezing 3/4 of the batch and then either defrosting a serving at night for breakfast the next morning, or toasting a frozen one right before eating it.


Almond butter quinoa muffins

2 large mashed banana
1 cup creamy natural almond butter, well mixed (or nut butter or seed butter of your choice)
½ cup maple syrup
¼ cup unsweetened vanilla almond milk (or rice, coconut, or other non-dairy milk of choice)
1 Tbsp vanilla extract
1 cup quinoa flour
1 cup quick oats
½ tsp salt
1½ tsp baking powder
1 tsp baking soda
1 tsp pie spice (or cinnamon)
2 tsp apple cider vinegar

Preheat oven to 350.

In a large bowl, mash the bananas. Add the almond butter, maple syrup, almond milk, and vanilla extract and mix well.

Add the flours, salt, baking powder, baking soda, and spices. Mix well. Add the apple cider vinegar and mix again. Let the mixture sit while you prep the muffin tin and prepare the jam and icing (if using).

When ready, spoon the mixture into your muffin tin until each opening is half full.

Bake for 12-14 mins or until the tops turn golden brown and the muffins are firm to the touch.

Let cool completely in the muffin tin before serving.

Yield: 18 muffins


For the Blueberry chia jam:
1 pint blueberries
1 ½ Tbsp chia seeds

Put the blueberries into a small sauce pan and cook over a medium low flame until the berries have broken down and become syrupy, about 15 minutes.

Let cool for 5 minutes and add the chia seeds. Mix well.

Place the mixture in the refrigerator for 10-15 minutes or until ready to use.

Yield: 1 Tbsp per muffin


For the frosting (optional):
2 ¼ cups whipped cream cheese
6 Tbsp maple syrup

Mix the cream cheese and maple syrup well with a spatula. The mixture will look curdled at first. Continue mixing until the two ingredients have come together. Refrigerate until ready to use.

Yield: 2 Tbsp per muffin

IMG_8335.jpg
IMG_8348.jpg

Zucchini and summer squash frittata

Use up that zucchini and summer squash in a family-favorite frittata that comes together in minutes. #meandthemoose #frittata #easydinnerrecipes #quickdinnerrecipes #eggs #zucchini

Whelp, I'm laid up in bed due to my lower back's semiannual revolt against the rest of my body. Luckily, I've made a bunch of these easy and quick frittatas and the leftovers are great for breakfast, lunch, dinner, or snacks. Or eaten with your hands while watching The Great British Baking Show from the floor.

Use up that zucchini and summer squash in a family-favorite frittata that comes together in minutes. #meandthemoose #frittata #easydinnerrecipes #quickdinnerrecipes #eggs #zucchini

I started making these because it's summer squash season, which means that markets and backyard gardens are flooded with zucchini and yellow squash. There are recipes for galettes and gratins galore and I'm sure they're all delicious. But I wanted something easier and lighter. 

Use up that zucchini and summer squash in a family-favorite frittata that comes together in minutes. #meandthemoose #frittata #easydinnerrecipes #quickdinnerrecipes #eggs #zucchini

And what's easier than a frittata? They require one pan and come together so fast. I love adding a salty, garlicky, crunchy kick on top with the combination of panko, minced garlic, Parmesan, and sea salt.

I also like to leave the squash in fairly large chunks because otherwise the vegetables disappear into mush. If your kiddos will more likely eat something with less visible squash, feel free to use thinner slices or even to spiralize the veggies.

I find that the crunch on top often distracts from the fact that this frittata is vegetable laden. To that end, you really have to use panko or gluten-free panko to achieve that crunch. Regular breadcrumbs won't do the trick.

Serve this with ANY pesto from the archives!

Use up that zucchini and summer squash in a family-favorite frittata that comes together in minutes. #meandthemoose #frittata #easydinnerrecipes #quickdinnerrecipes #eggs #zucchini

Zucchini and summer squash frittata

Time: 30-35 minutes, mostly active
Yield: 6-8 servings, depending on what meal you're eating this for and what you're having with it.

1 tbsp olive oil
1 medium white onion, thinly sliced
1 ½ -2 lbs zucchini and summer squash, cut into ¼ inch thick slices
8 large eggs
2 cups shredded Gruyere, Gouda
½ cup panko breadcrumbs
¼ cup grated Parmesan
2 large garlic cloves, minced
1/2 tsp kosher salt, divided
A few cracks of black pepper

Preheat the oven to 350.

Heat the oil in an oven-proof skillet over a medium flame and add the onion. Cook for 5 minutes or until the onions are translucent and fragrant.

Meanwhile, crack the eggs in the bowl and mix until the whites and yolks are well combined. Add the squash, the shredded Gruyere or Gouda, and 1/4 tsp of salt and stir to combine. Pour into the pan with the hot onions and stir again to combine.

Cook the eggs and squash, undisturbed (no more stirring!), on the stove top for 8-10 minutes, until the edges of the eggs begin to set.

Meanwhile, combine the panko, garlic, Parmesan, remaining salt, and pepper in a small bowl and set aside. When you're ready to put the frittata in the oven, pour the panko mixture evenly over the top of the frittata. 

Put in the oven and bake, uncovered, until the eggs are set in the middle, about 12-15 minutes. If the panko topping starts to brown, cover it loosely with tin foil until the eggs are cooked.

Carrot, ginger, and tahini dressing

IMG_7906.jpg

Salad! Do your kids eat it? M will inexplicably stuff his face with raw kale sometimes and then turn around and gag on anything leafy or green. The dressing is a factor. Also, if he gets to mix the salad, he is much more likely to eat it. I recommend putting your salad bowl on a rimmed baking sheet to catch any greens that escape (read: all of the greens) and letting the little ones have a go.

IMG_7893.jpg
IMG_7903.jpg

Since M is currently SO PASSIONATE about sushi, we've eaten at A LOT of Japanese restaurants lately. Sometimes that ubiquitous carrot and ginger dressing is a revelation, but more often, it's watery or too acidic. This version is neither of those things. There's a fair amount of liquid and acid in this recipe, but the load of carrots and the little bit of tahini mellows the vinegar just enough and adds a touch of creaminess.

I won't lie: It's a little chunkier than your average salad dressing, but it coats the lettuce beautifully and instead of just being oil, you're sneaking in some extra goodness in what is essentially a condiment. So if your toddler deigns to eat a mouthful, they're eating EVEN MORE VEGETABLES.

Also, this dressing is sweet and tangy, but happens to be free of gluten, dairy, and sugar. And it lasts FOREVER. Pretty sure I'm still eating a batch that I made three weeks ago. But, you know, use your judgment.

IMG_7872.jpg

Creamy carrot and ginger tahini dressing

¼ apple cider vinegar
1 Tbsp white vinegar
2 Tbsp tahini
2 extra large carrots or 4 medium/small carrots
1 inch piece of fresh ginger, peeled and roughly chopped
¼ white onion
1 large clove garlic
2 Tbsp lemon juice
½ cup olive or avocado oil
salt
pepper

Place all ingredients (except the oil) in a blender or food processor. Start blending and slowly pour in the olive oil while the machine is running. Blend until you've reached your desired consistency. If the mixture feels too watery, add another tablespoon of tahini. If it feels too thick, add one tablespoon of water and blend.

IMG_7877.jpg
IMG_7886.jpg