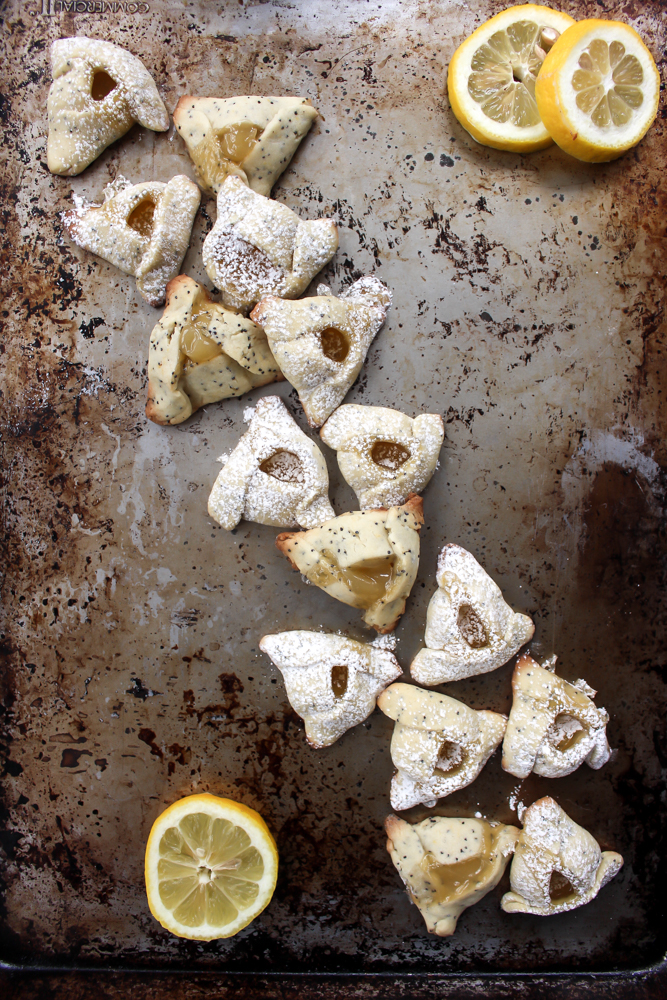
Lemon poppyseed hamantaschen
/
Don’t hate me, but my favorite cookie holiday is Purim. Not Christmas. Not Valentine’s Day. Purim. I love a hamantaschen almost more than any other cookie. Is that weird? I don’t care.
Why do I love these cookies so much? I think it’s because Purim means that spring is FINALLY here. I reached the nadir of my winter depression last week but we’re making our way back. I can see grass again! We have an extra hour of light! We have green buds popping up despite still-freezing temperatures!

I rejiggered my hamantaschen dough recipe from last year because I wanted the cookie to be slightly more crumbly. I also left out the baking powder because my (and probably everyone who’s ever made hamantaschen) biggest pet peeve about this cookie is that it can open up during baking and lose it’s shape. Whelp, if you leave out the baking powder, there’s a lot less leavening happening. Problem solved.
Also, I stand corrected about one hamantaschen-related statement: Last year I didn’t think that freezing the dough after forming the cookies made a difference, but this year, it did. Go figure.
A couple of notes:
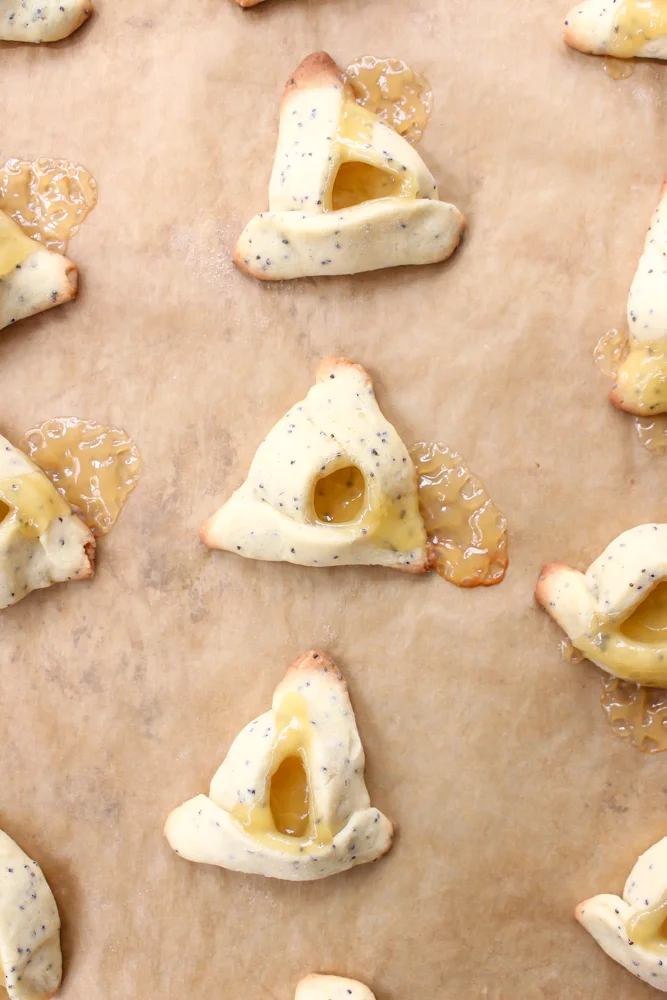
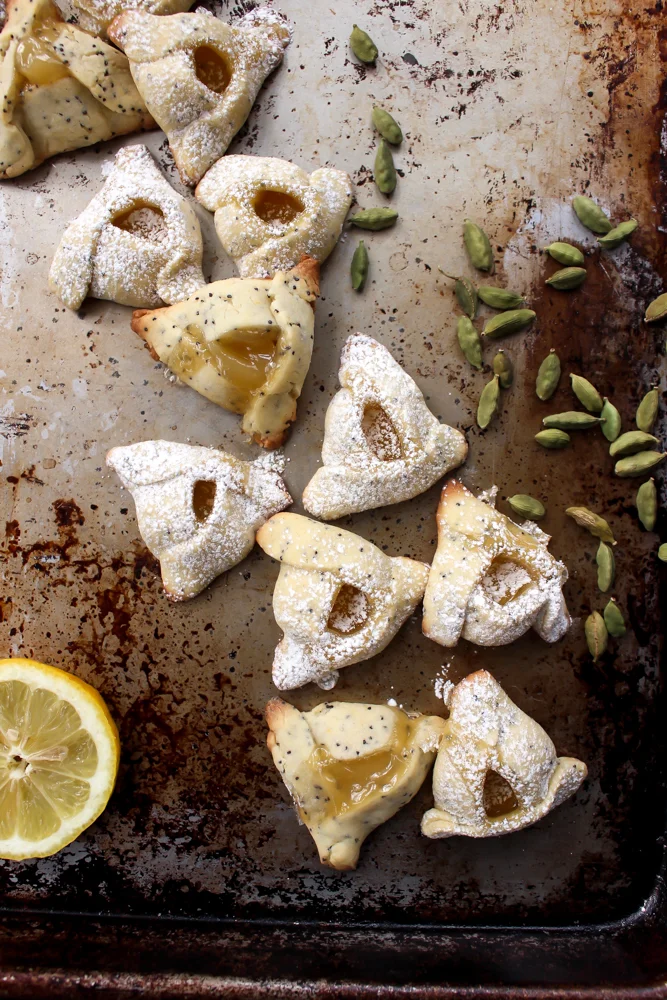
I used a store-bought lemon curd, but feel free to make your own. It will bubble out while the cookies bake, but you can always fill in any holes that develop with a bit more curd once the cookies cool.
There is a teeny amount of cardamom in this recipe because I didn’t want the cookies to taste too strongly of cardamom. The little hint of it actually makes the lemon taste more lemony.
Lemon poppyseed hamantaschen
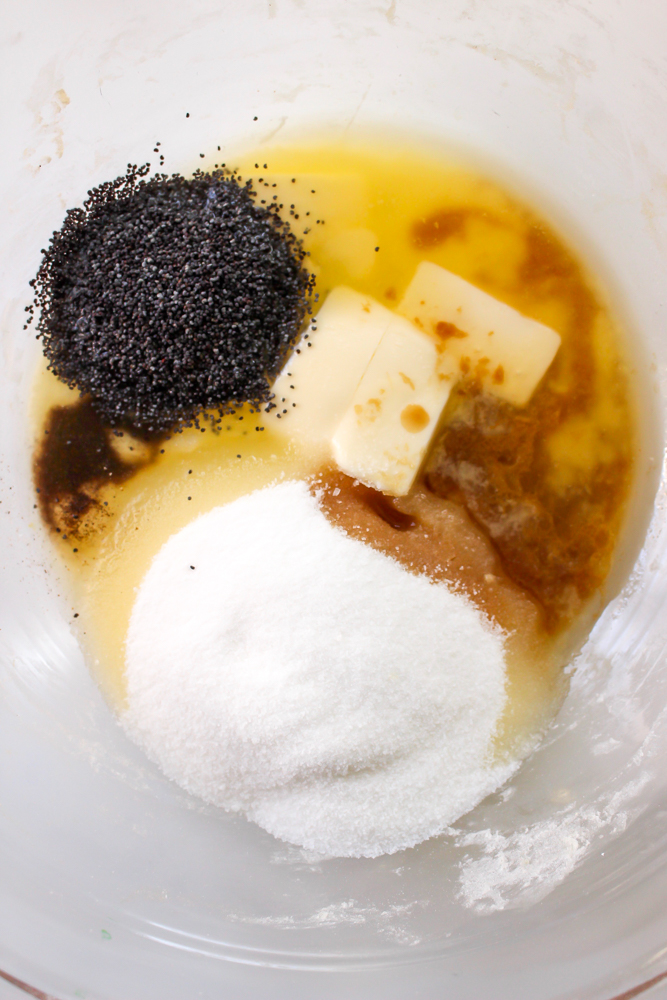
6 Tbsp butter, melted and slightly cooled
2/3 cup granulated sugar
1 heaping tsp vanilla extract
2 large eggs
Heaping ¼ tsp salt
2 Tbsp poppyseeds
1/8- 1/4 tsp cardamom
2 cups AP flour
1/2 tsp lemon curd per cookie
Melt the butter in a large mixing bowl in the microwave until half melted (heat on high for 30 seconds and then in 10 second bursts until your butter is only half formed). Stir the butter to let the residual heat of the melted half take care of the half that is still solid. Let cool slightly.
Add the sugar, vanilla, and eggs and whisk to combine thoroughly.
Add the salt, poppyseeds, and cardamom, and stir again.
Add ½ of the flour and stir with a spatula until just combined. Add the rest of the flour and mix until the dough comes together. Use your hands to get the last bits of flour to come together in the dough. If it feels too flaky or dry, mix in some water, 1 Tbsp at a time, until the dough feels slightly wet, all of the flour is easily incorporated, and there are minimal cracks along the edges of the dough when squished down.
Divide the dough into two discs, wrap tightly with plastic wrap, and chill for 20 minutes in the freezer.
Preheat the oven to 350.
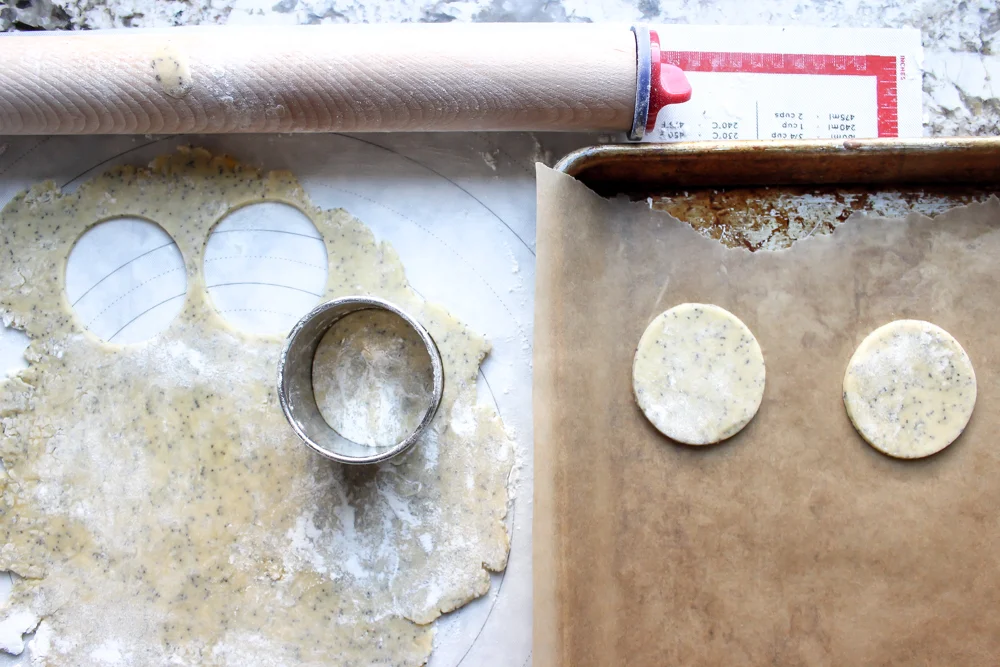
After 20 minutes, roll out the dough to 1/8th of an inch on a floured surfaced with a floured rolling pin. (Be liberal with the flour as this is a sticky dough. If it feels too sticky to work with, put back in the freezer for 5 minutes and try again.)
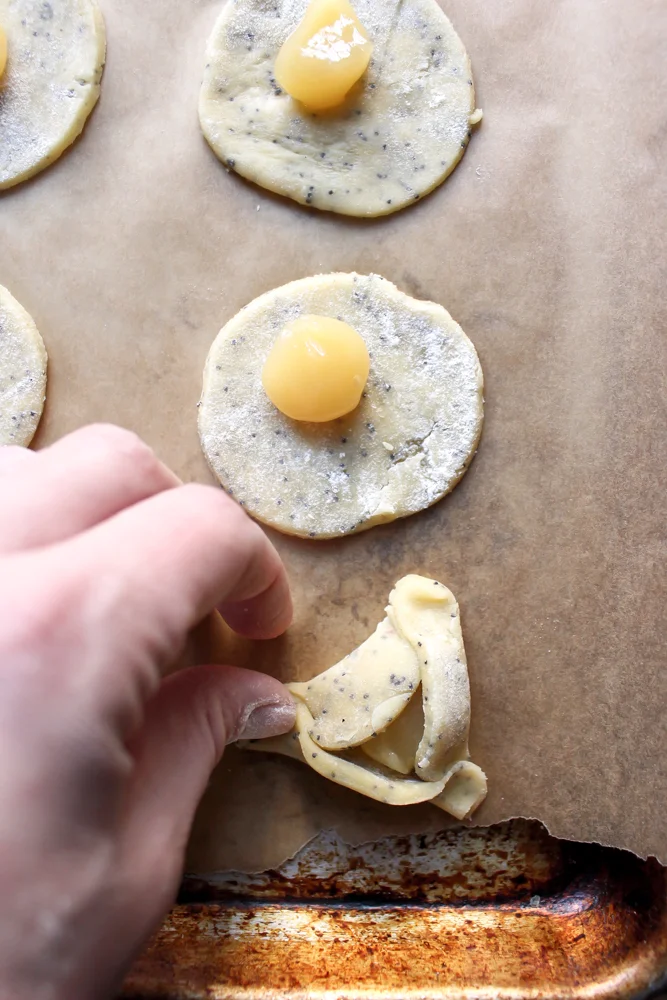
Cut out 2.5-inch circles and transfer them to a parchment-covered baking sheet.
Fill the center of each circle with ½ tsp lemon curd.
Fold the cookie dough into a triangle by folding and pinching three sides of the circle together.
Bake the cookies for 5 minutes and rotate in the oven. Bake until the bottoms of the cookies are browned but the tops are still light, about 4-5 minutes more.
If lots of the filling has bubbled out, let the cookies cool and add another ½ tsp of the lemon curd.
Yield: 36 cookies


![[NEW RECIPE!] Thanksgiving leftovers hot pocket!
Thursday is going to be a great meal and a weird sad day for me. It’s the first Thanksgiving without my mom and this was HER holiday. Growing up, we were Jewish, but my mom’s family was Ch](https://images.squarespace-cdn.com/content/v1/546a33ffe4b0bff63b7b9405/1669075898662-2KJQA7P9W8KSRUJF47M4/image-asset.jpeg)


